<目次>
(1) Azure Machine LearningからAzure StorageのFile Shares(ファイル共有)のデータにアクセスする方法
やりたいこと
(1-1) STEP1:前提条件(例)
(1-2) STEP2:「Manage Indentity」を持つCompute Clusterの設定
(1-3) STEP3:File Sharesへのデータアクセス処理の記述&実行
(1-4) STEP4:実行と結果確認
(1) Azure Machine LearningからAzure StorageのFile Shares(ファイル共有)のデータにアクセスする方法
やりたいこと
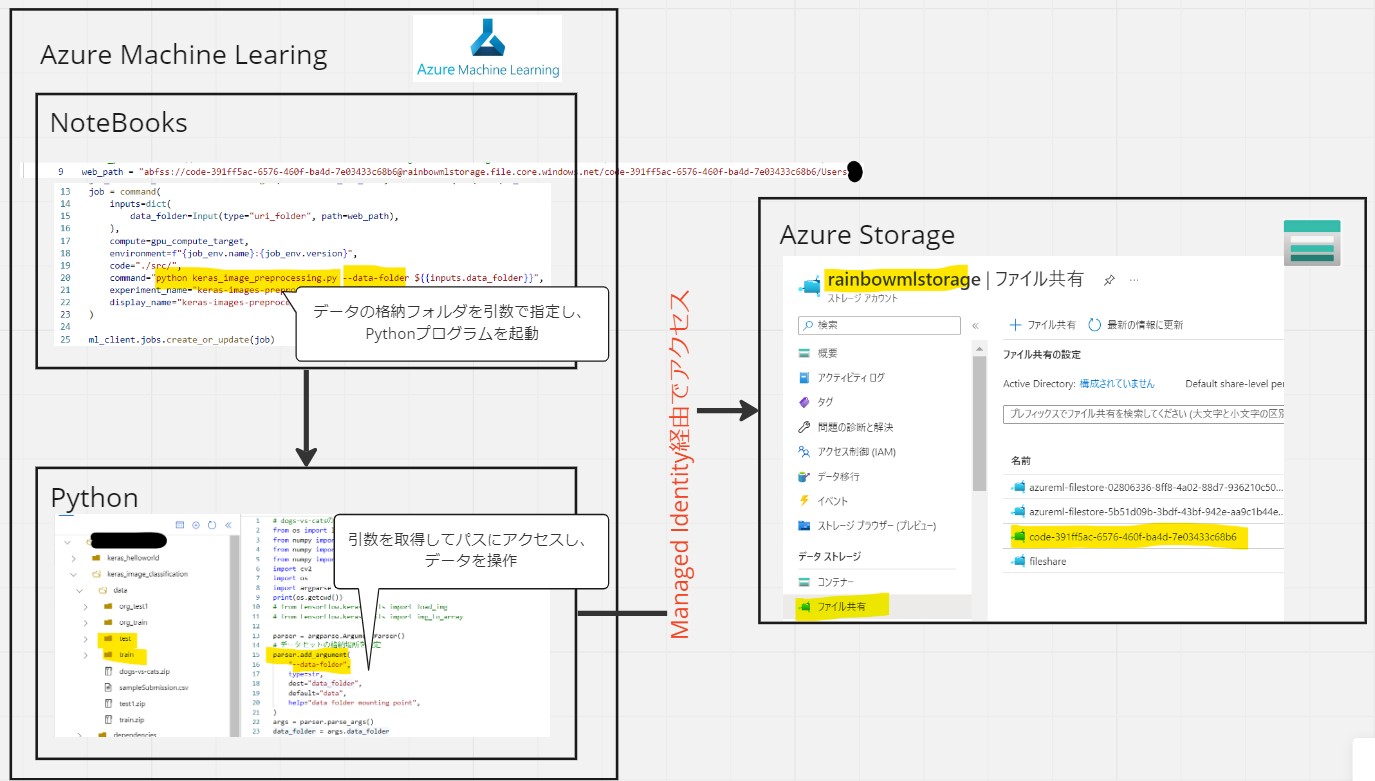
(1-1) STEP1:前提条件(例)
●STEP1-1:Azure Machine Learning
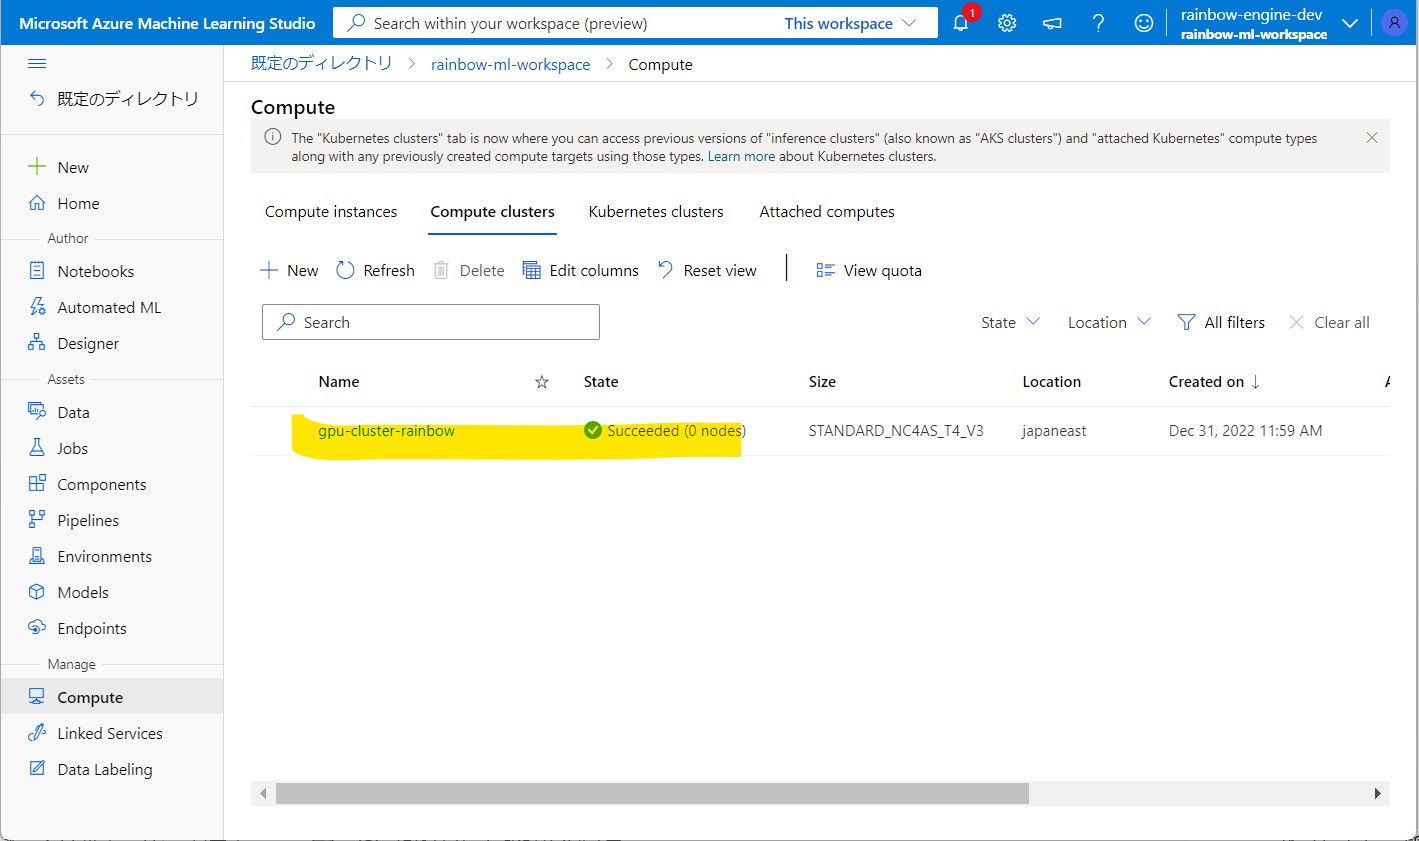
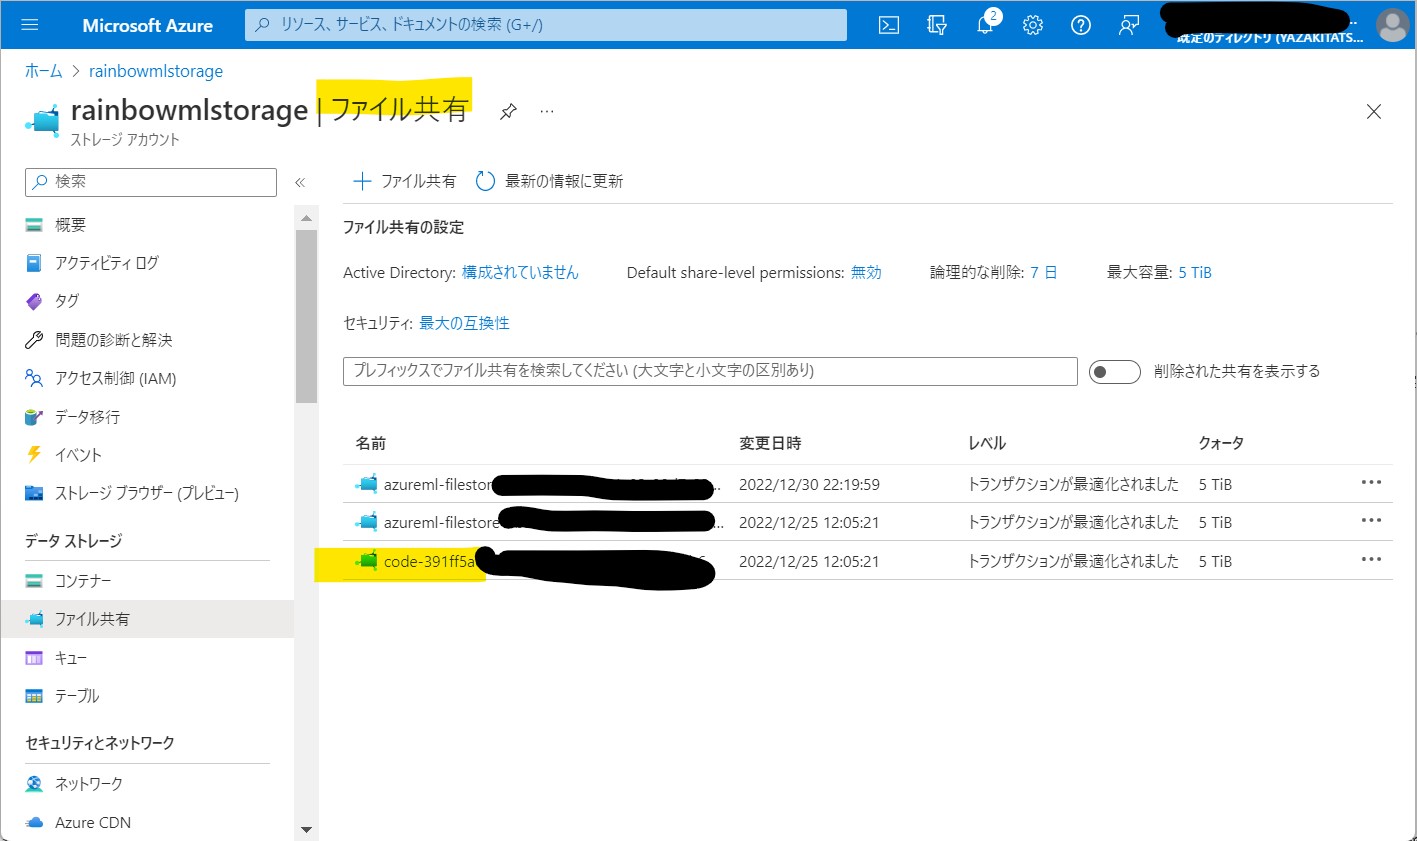
●STEP1-2:Azure Storage
(1-2) STEP2:「Manage Indentity」を持つCompute Clusterの設定
| ラベル | 説明 |
| 設定操作 | Azure Machine LearningのCompute clusterに対して「Manage Identity」の設定を行います。 |
| サポートするアイデンティティの種類 | 「one system-assigned identity」または「multiple user-assigned identities」をサポートします。 |
| デフォルト設定 | デフォルトは「one system-assigned identity」を使用します。 |
| 用途説明 | Azure MLにおけるストレージのマウント、データストア、コンテナレジストリ等で使用されます。 |
●STEP2-1:Managed Identityの作成
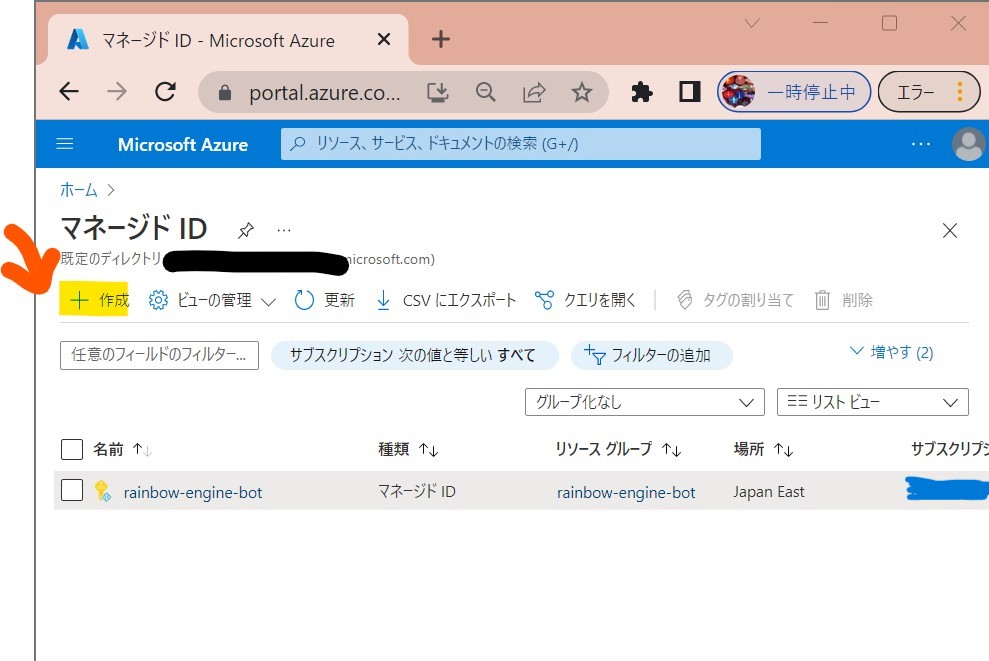
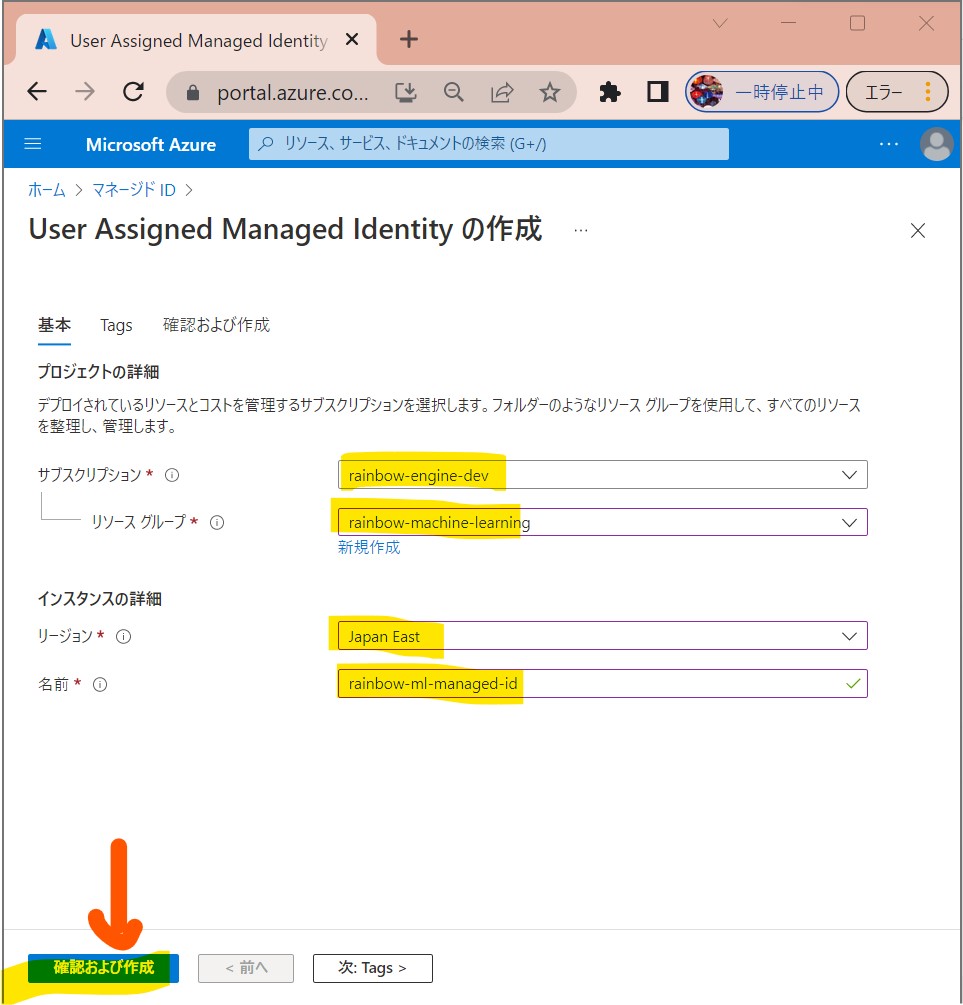
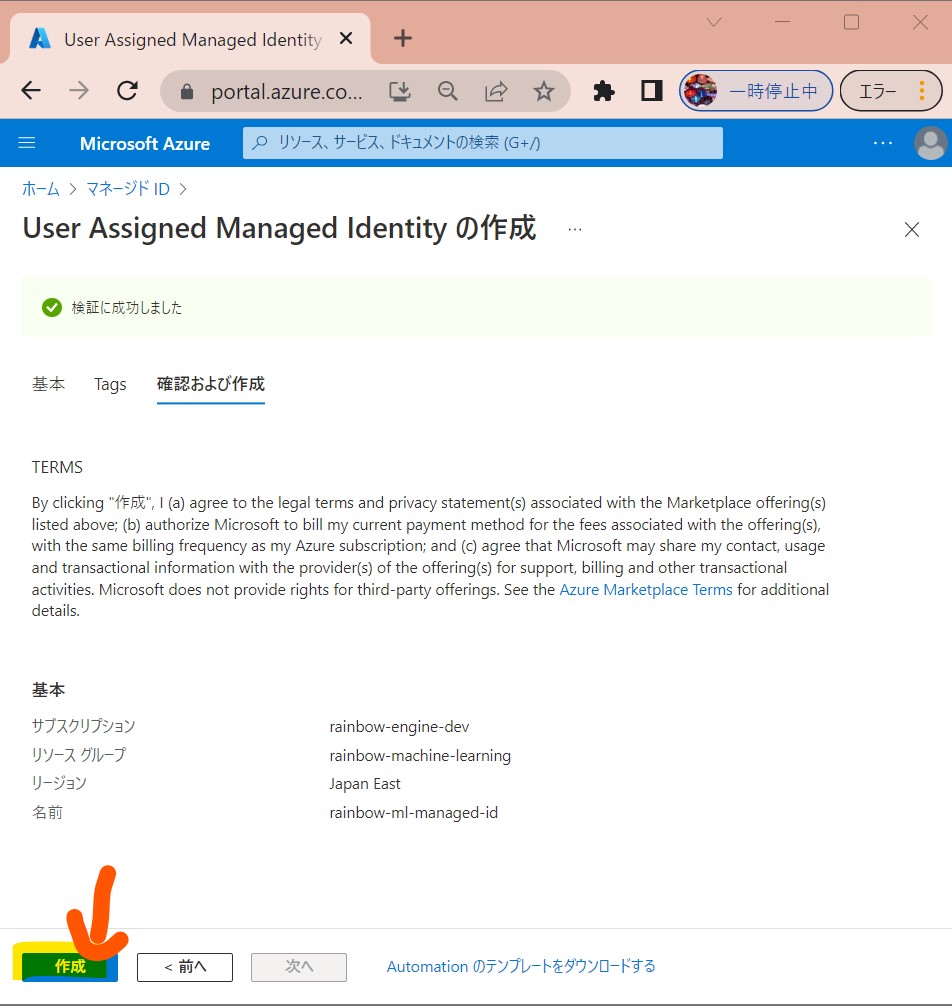
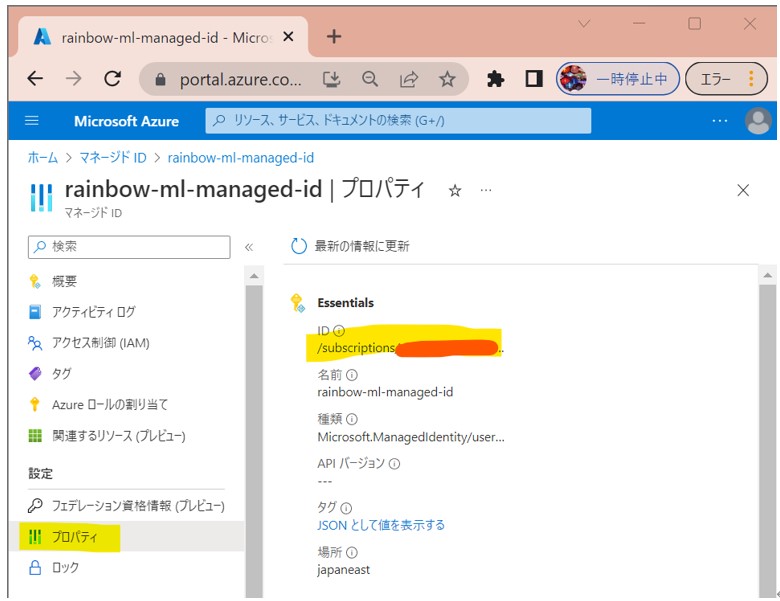
●STEP2-2:Managed Identityを持つCompute Clusterの作成
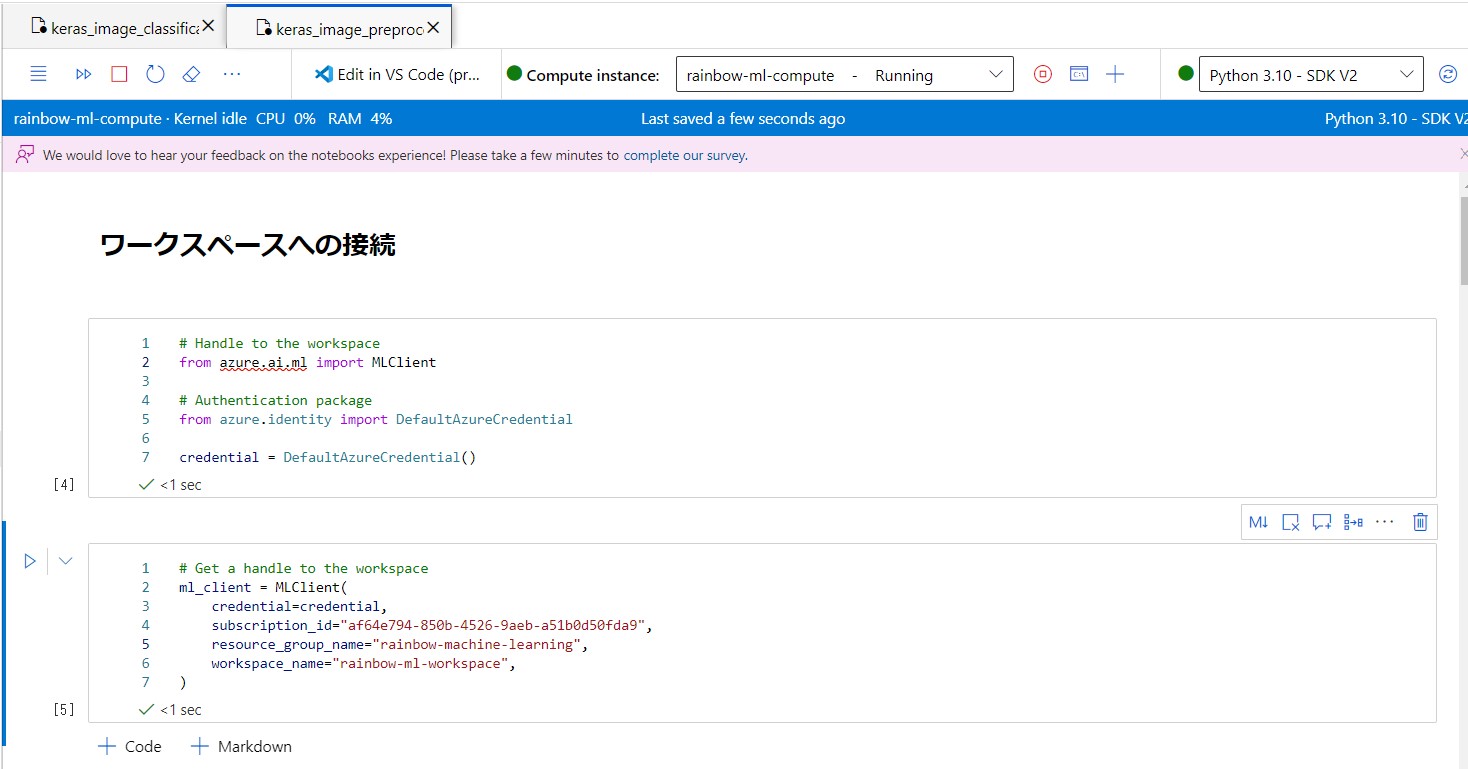
# Handle to the workspace
from azure.ai.ml import MLClient
# Authentication package
from azure.identity import DefaultAzureCredential
credential = DefaultAzureCredential()
# Get a handle to the workspace
ml_client = MLClient(
    credential=credential,
    subscription_id="[ご自身のSubscription ID]",
    resource_group_name="rainbow-machine-learning",
    workspace_name="rainbow-ml-workspace",
)
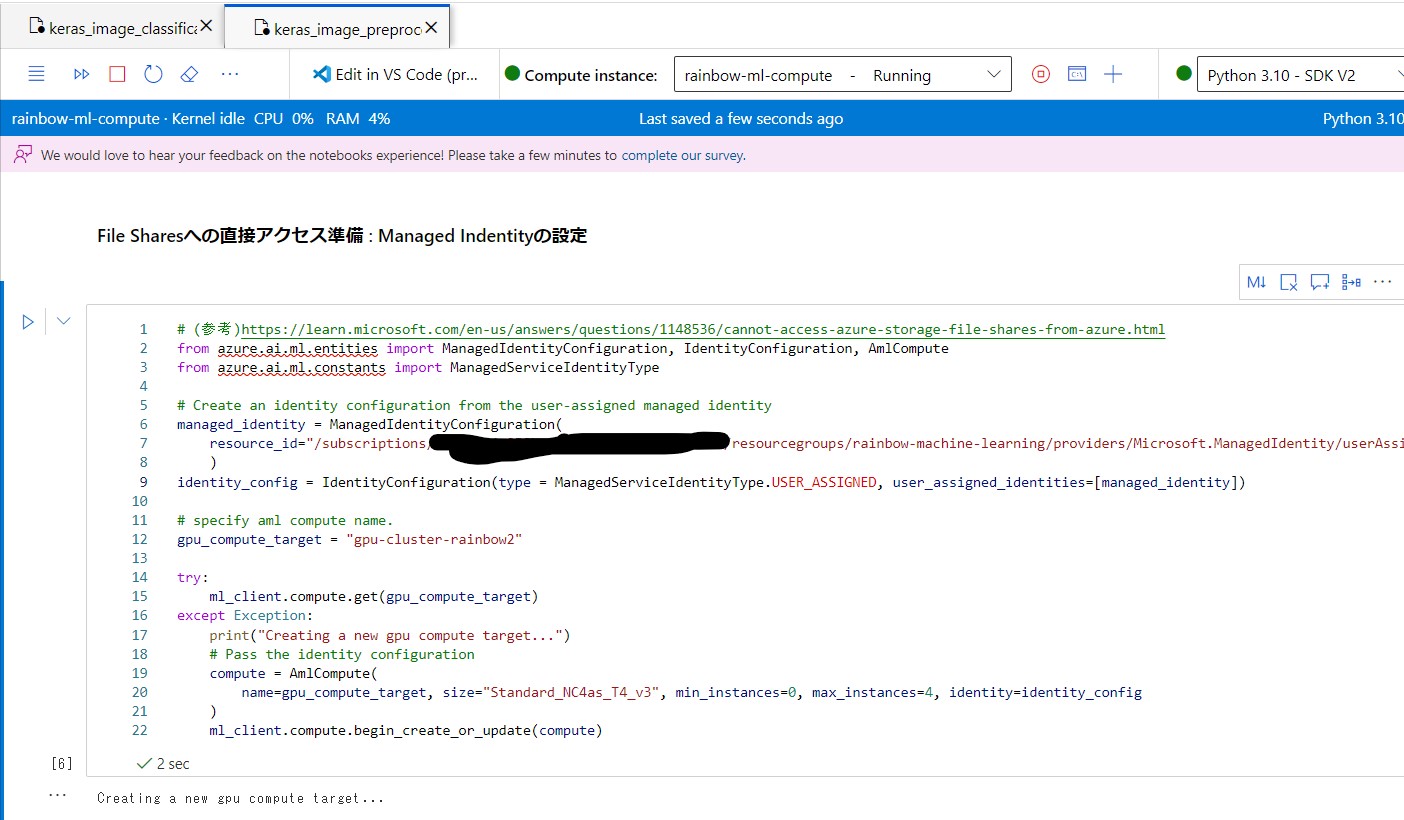
# (参考)https://learn.microsoft.com/en-us/answers/questions/1148536/cannot-access-azure-storage-file-shares-from-azure.html
from azure.ai.ml.entities import ManagedIdentityConfiguration, IdentityConfiguration, AmlCompute
from azure.ai.ml.constants import ManagedServiceIdentityType

# Create an identity configuration from the user-assigned managed identity
managed_identity = ManagedIdentityConfiguration(
    resource_id="/subscriptions/[ご自身のSubscription ID]/resourcegroups/rainbow-machine-learning/providers/Microsoft.ManagedIdentity/userAssignedIdentities/[ご自身のManaged IDのリソース名]"
    )
identity_config = IdentityConfiguration(type = ManagedServiceIdentityType.USER_ASSIGNED, user_assigned_identities=[managed_identity])

# specify aml compute name.
gpu_compute_target = "gpu-cluster-rainbow2"

try:
    ml_client.compute.get(gpu_compute_target)
except Exception:
    print("Creating a new gpu compute target...")
    # Pass the identity configuration
    compute = AmlCompute(
        name=gpu_compute_target, size="Standard_NC4as_T4_v3", min_instances=0, max_instances=4, identity=identity_config
    )
    ml_client.compute.begin_create_or_update(compute)
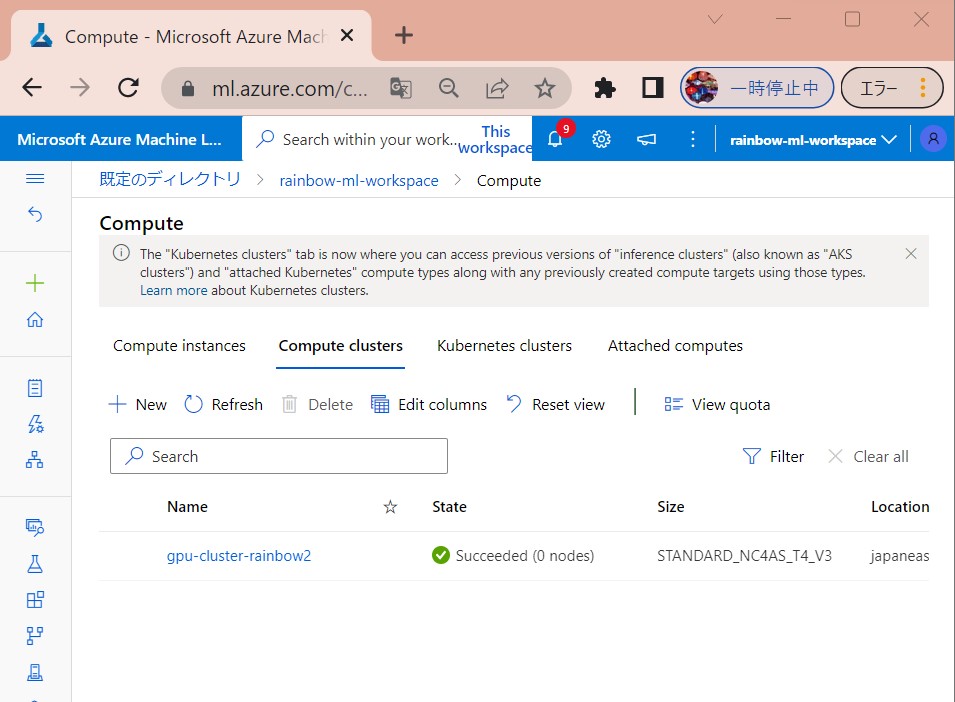
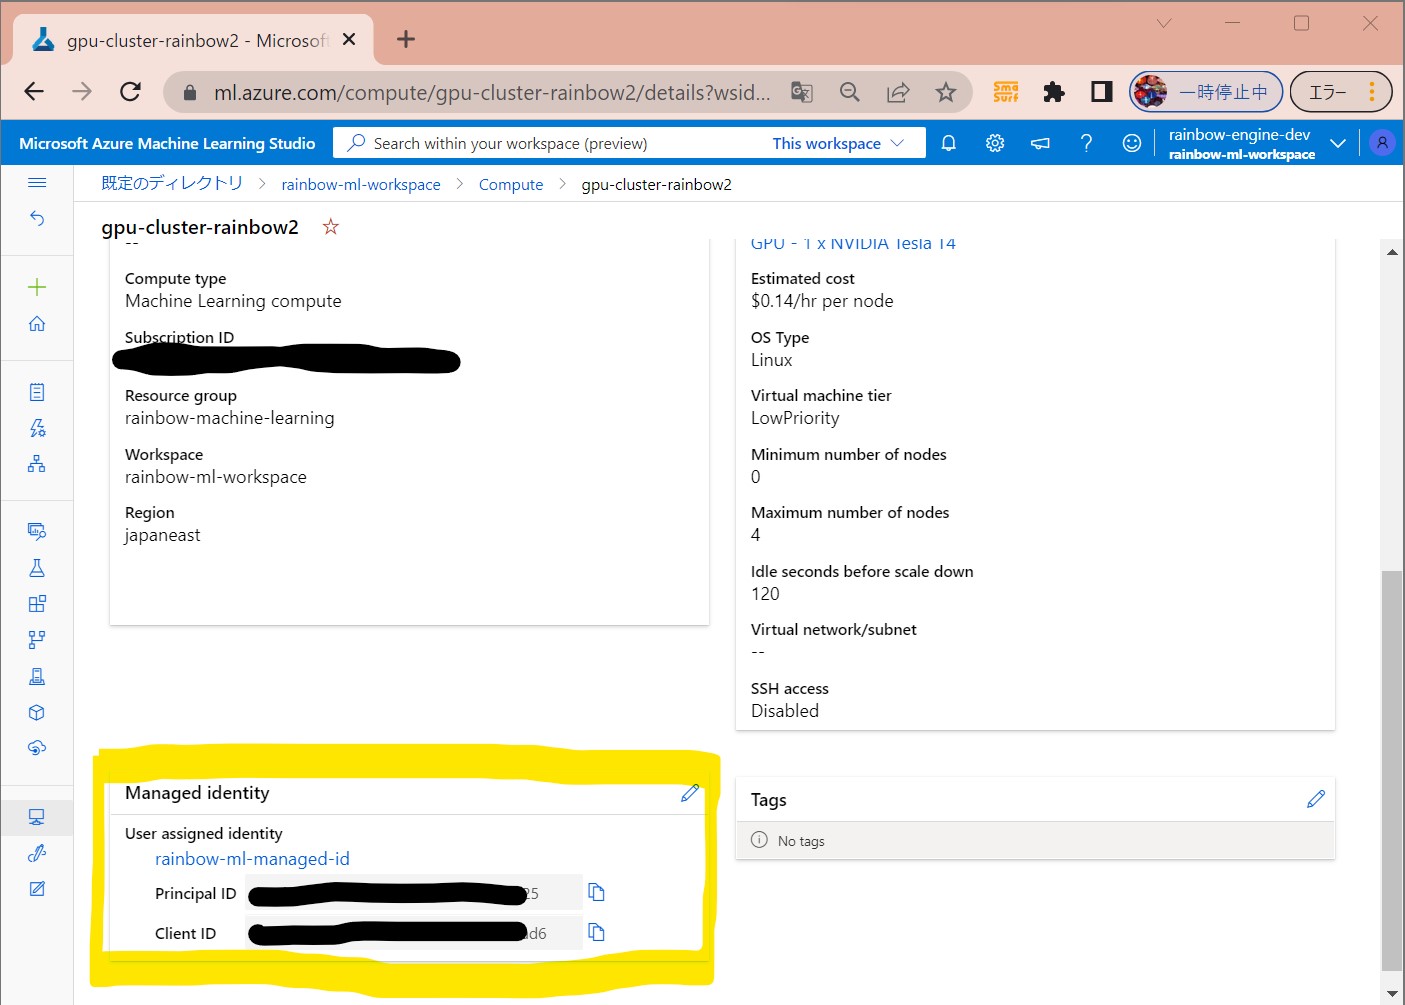
●STEP2-3:Compute Clusterの作成結果確認
(1-3) STEP3:File Sharesへのデータアクセス処理の記述&実行
●STEP3-1:Azure Machine LearningのNotebooksの実装
from azure.ai.ml import command
from azure.ai.ml import UserIdentityConfiguration
from azure.ai.ml import Input

gpu_compute_target = "gpu-cluster-rainbow2"
custom_env_name = "keras-env"
# ↓正常終了
web_path = "./data"

# ジョブの最新環境を取得
job_env = ml_client.environments.get(name=custom_env_name, version=str(len(list(ml_client.environments.list(name=custom_env_name)))))
# ジョブの定義
job = command(
    # 入力パラメータの設定
    inputs=dict(
        data_folder=Input(type="uri_folder", path=web_path),
    ),
    # CPU/GPUリソース
    compute=gpu_compute_target,
    # 実行環境
    environment=f"{job_env.name}:{job_env.version}",
    # 実行対象モジュールの格納先
    code="./src/",
    # 実行対象モジュールと引数
    command="python fileshare_test_get_image.py --data-folder ${{inputs.data_folder}}",
    experiment_name="fileshare_test_get_image",
    display_name="fileshare_test_get_image",
)
# ジョブの実行
ml_client.jobs.create_or_update(job)
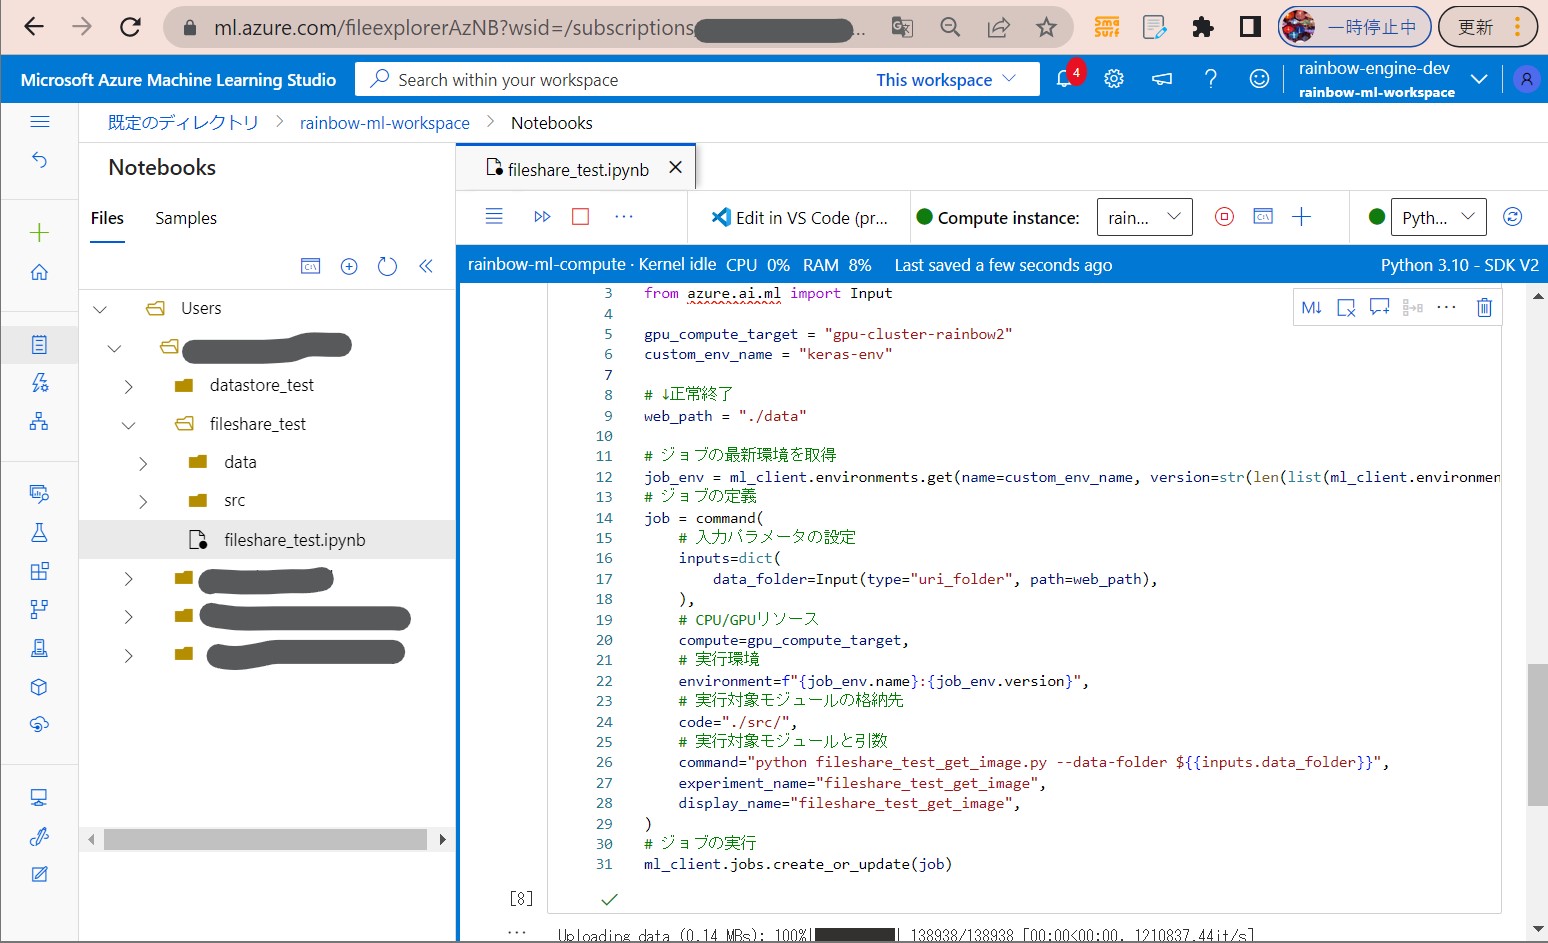
web_path = "https://rainbowmlstorage.file.core.windows.net/code-391ff5ac-6576-460f-ba4d-7e03433c68b6/Users/xxxx/datastore_test/data"
●STEP3-2:NoteBooks経由で呼び出すPythonプログラムの実装
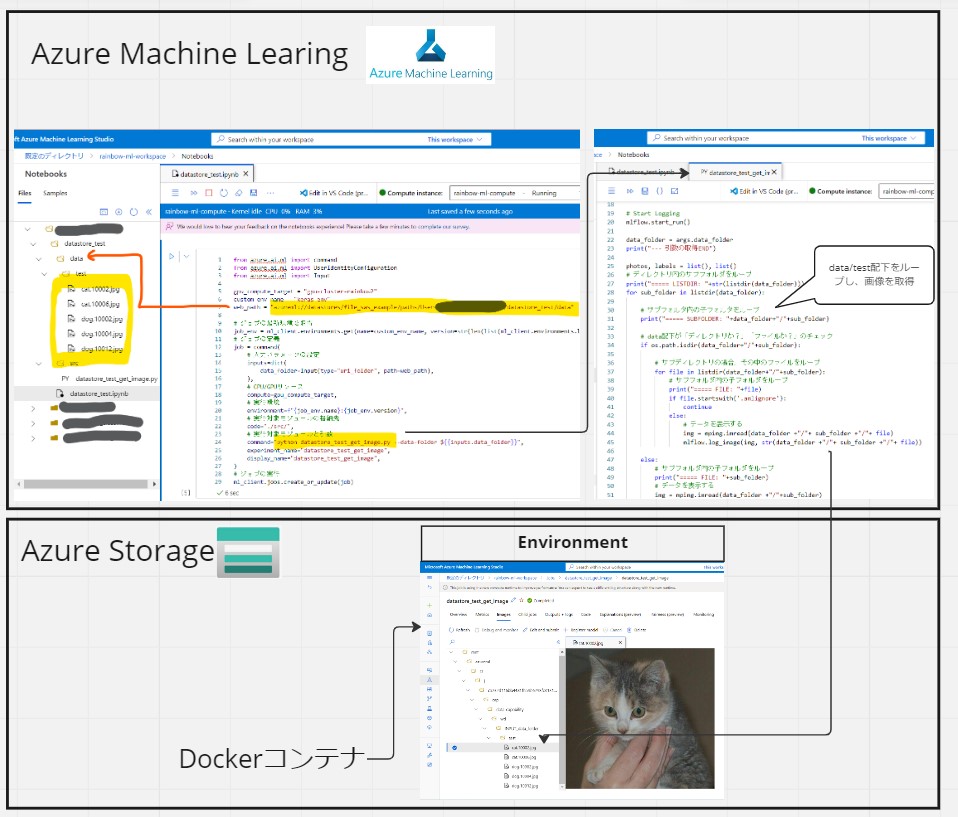
from os import listdir
import os
import argparse
import matplotlib.image as mpimg
import mlflow

print("--- 引数の取得START")
parser = argparse.ArgumentParser()
# データセットの格納場所を設定
parser.add_argument(
    "--data-folder",
    type=str,
    dest="data_folder",
    default="data",
    help="data folder mounting point",
)
args = parser.parse_args()

# Start Logging
mlflow.start_run()

data_folder = args.data_folder
print("--- 引数の取得END")

photos, labels = list(), list()
# ディレクトリ内のサブフォルダをループ
print("===== LISTDIR: "+str(listdir(data_folder)))
for sub_folder in listdir(data_folder):

    # サブフォルダ内の子フォルダをループ
    print("===== SUBFOLDER: "+data_folder+"/"+sub_folder)

    # data配下が「ディレクトリか?」「ファイルか?」のチェック
    if os.path.isdir(data_folder+"/"+sub_folder):

        # サブディレクトリの場合、その中のファイルをループ
        for file in listdir(data_folder+"/"+sub_folder):
            # サブフォルダ内の子フォルダをループ
            print("===== FILE: "+file)
            if file.startswith('.amlignore'):
                continue
            else:
                # データを表示する
                img = mpimg.imread(data_folder +"/"+ sub_folder +"/"+ file)
                mlflow.log_image(img, str(data_folder +"/"+ sub_folder +"/"+ file))

    else:
        # サブフォルダ内の子フォルダをループ
        print("===== FILE: "+sub_folder)
        # データを表示する
        img = mpimg.imread(data_folder +"/"+sub_folder)
        mlflow.log_image(img, str(data_folder +"/"+sub_folder))

mlflow.end_run()
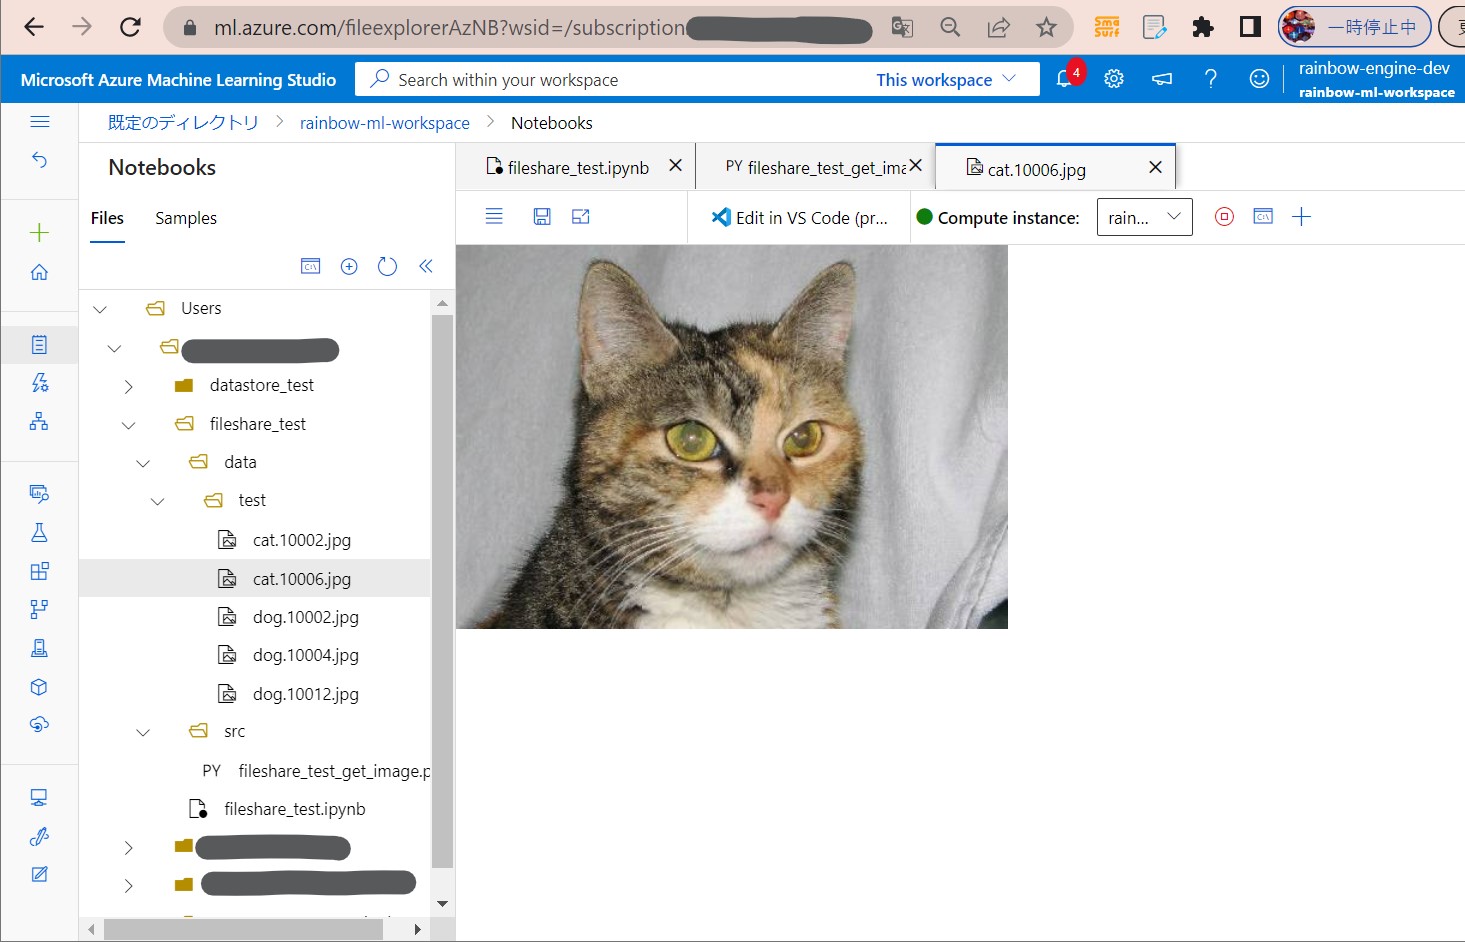
(1-4) STEP4:実行と結果確認
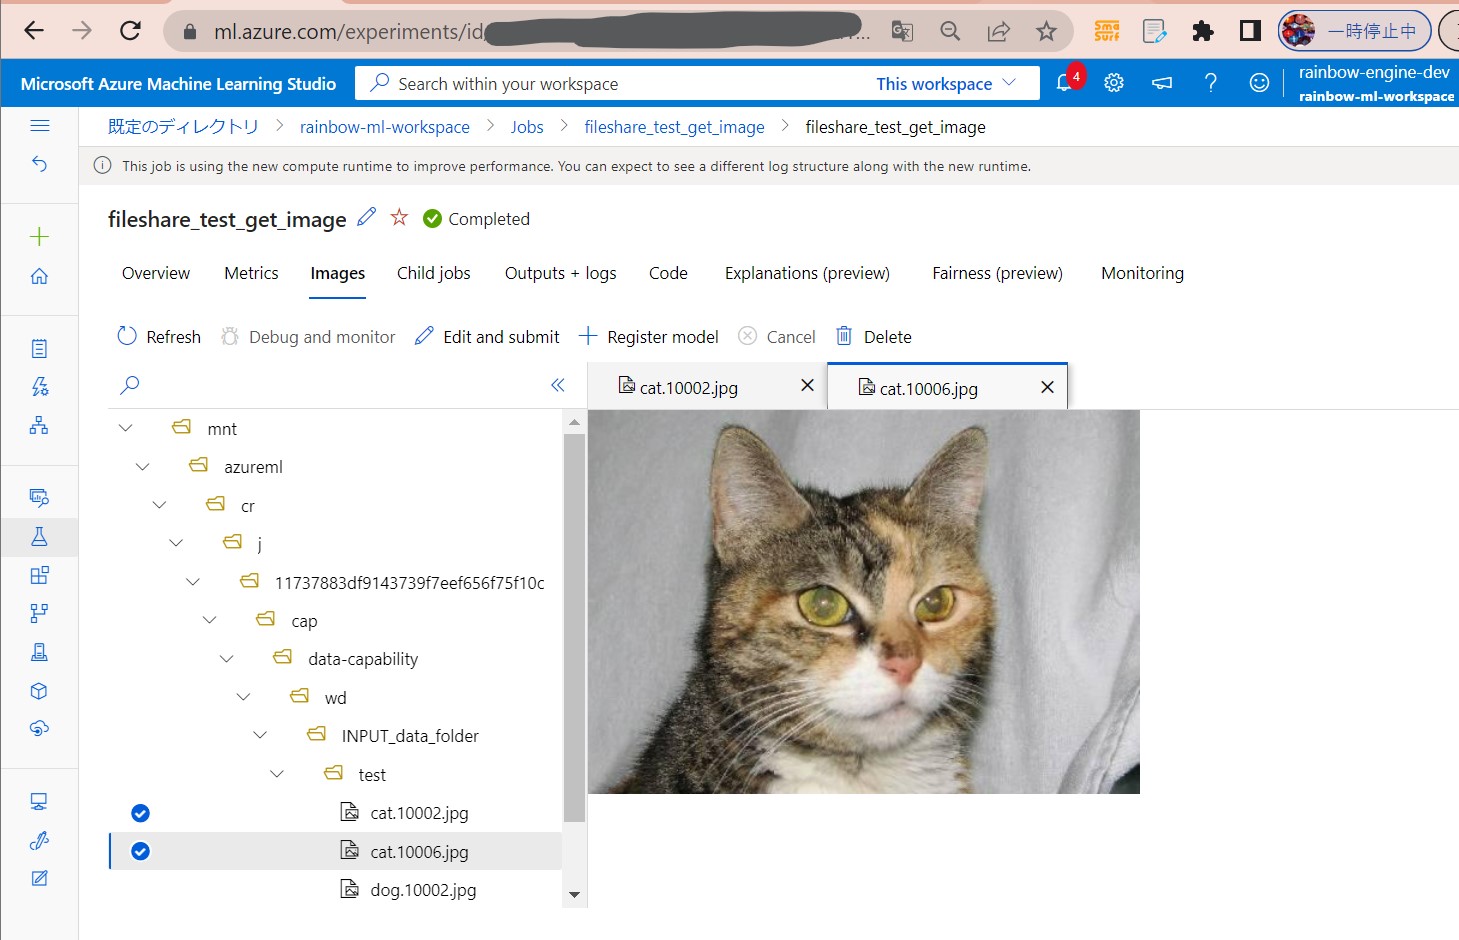
●STEP4-1:セルを順番に実行
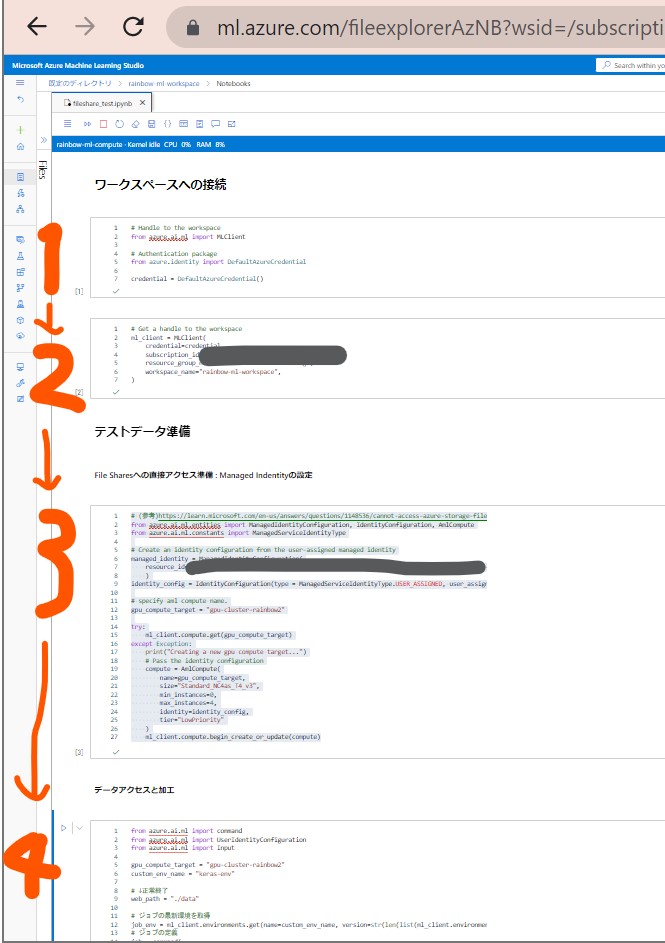
●STEP4-2:結果確認
