<目次>
(1) Azure DevOpsの使い方についてご紹介
やりたいこと
概要
(1-1) STEP1:リポジトリを作る
(1-2) STEP2:クローン~ブランチ作成~修正~コミット&プッシュ
(1-3) STEP3:プルリクエスト~マージ
エラー対処①:fatal: cannot lock ref ‘HEAD’: is at xxx but expected yy
(1) Azure DevOpsの使い方についてご紹介
やりたいこと
・Azure DevOpsのリポジトリ上に資産を登録したり、他の人がブランチを切ってプルリクエストを出す手順を素早く押さえる。
概要
・「Azure DevOps」(開発と運用を密に連携して進める為のツール)の基本的な使い方を知る(Repository作成、資産のプッシュ・ブランチ作成・プルリクエストなど)
(前提条件)
・Azure DevOpsの環境が使えること
・Visual Studio Codeが使用可能であること
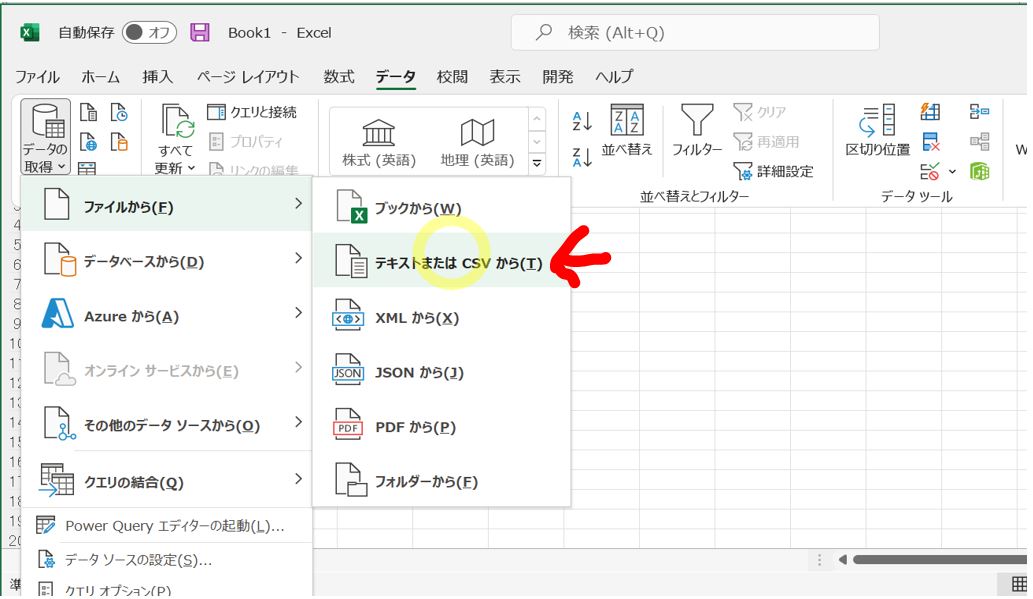
(1-1) STEP1:リポジトリを作る
・①「New Repository」押下
(図111)
↓
・②リポジトリ名などを入力
(図112)
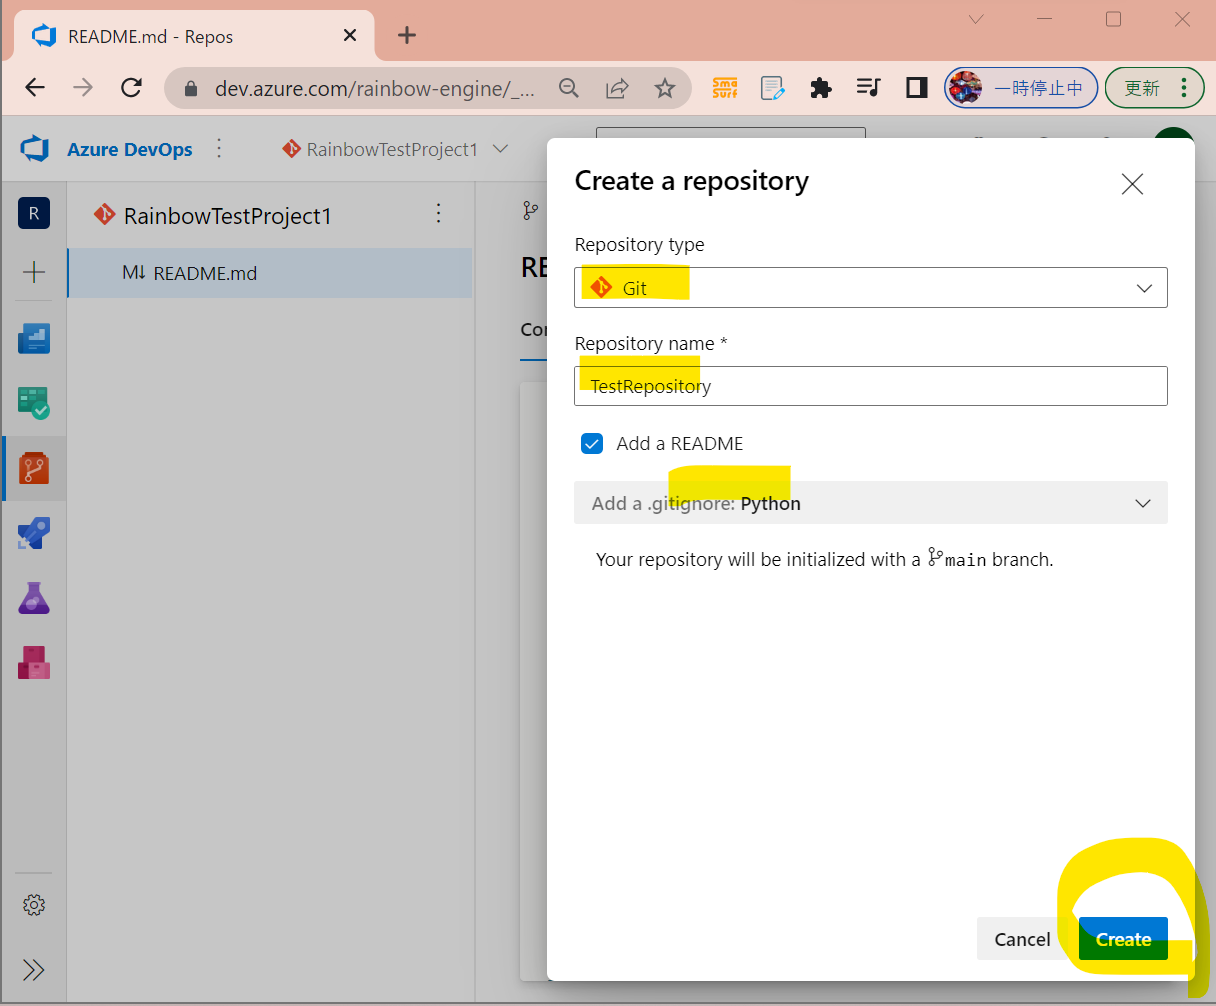
(備考)
.gitignoreファイルは、Gitによって追跡されるべきでないファイルやディレクトリを指定するためのファイルであり、開発者が手動で作成する必要があります。しかし、Azure DevOpsはリポジトリ作成時に一般的なプログラミング言語やフレームワークに基づいたデフォルトの.gitignoreファイルを作成できます。
(1-2) STEP2:クローン~ブランチ作成~修正~コミット&プッシュ
※Gitの使い方の流れについて知りたい方は下記記事を参照
●STEP2-1:Gitクローン
・①「Clone」を押下
(図121①)
↓
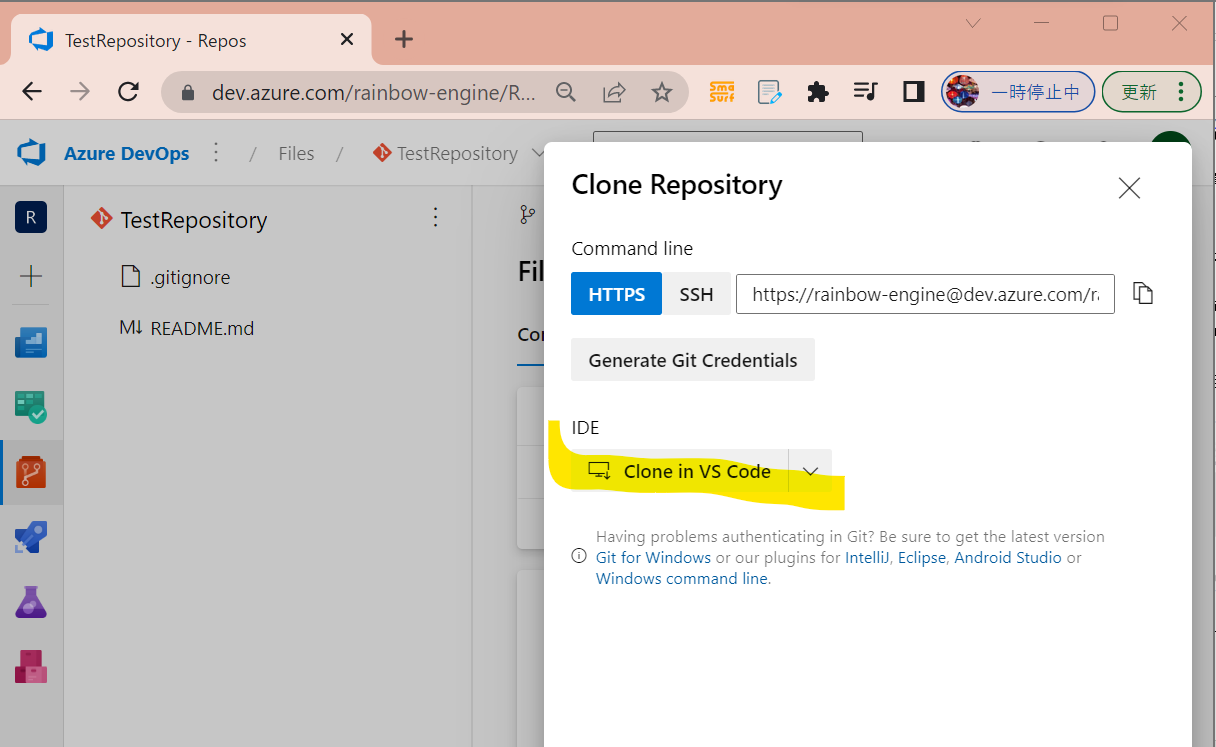
・②Cloneの方法を選択
⇒今回は「Clone in VS Code」を選択
(図121②)
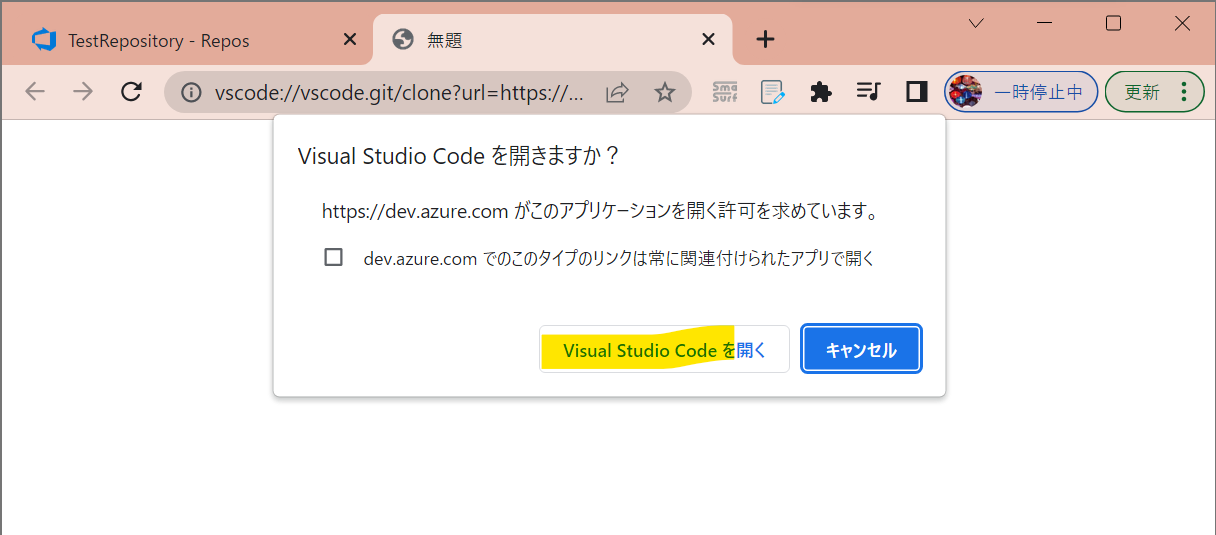
↓
・③「Visual Studio Codeを開く」を押下
(図121③)
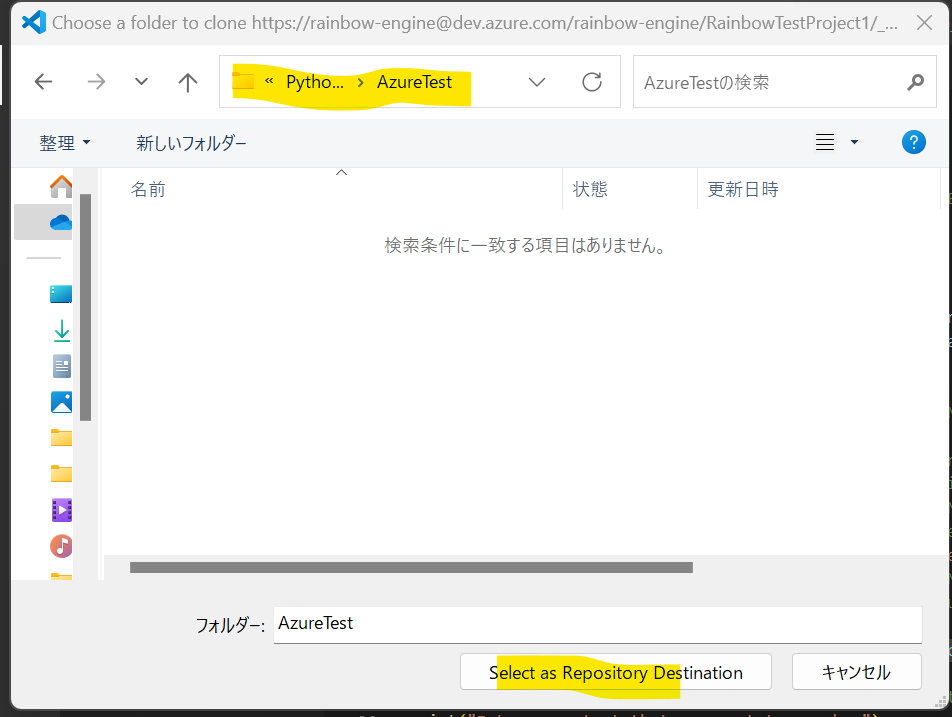
↓
・④リポジトリをクローンするフォルダを選択
(図121④)
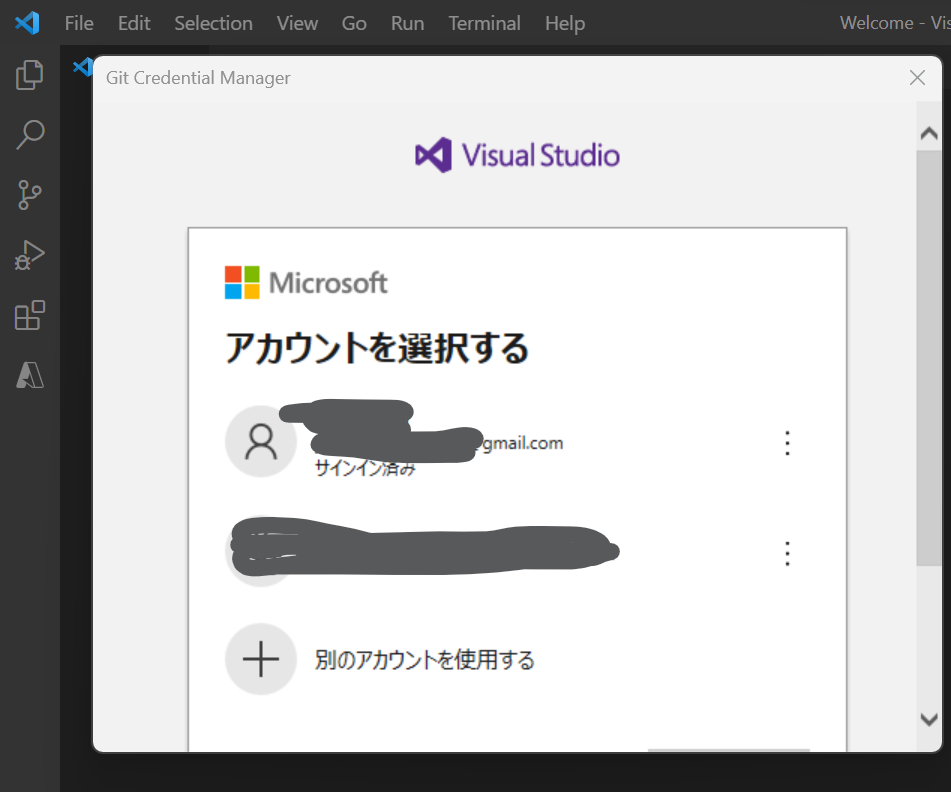
↓
・⑤DevOpsのアカウントを選択する
(図121⑤)
↓
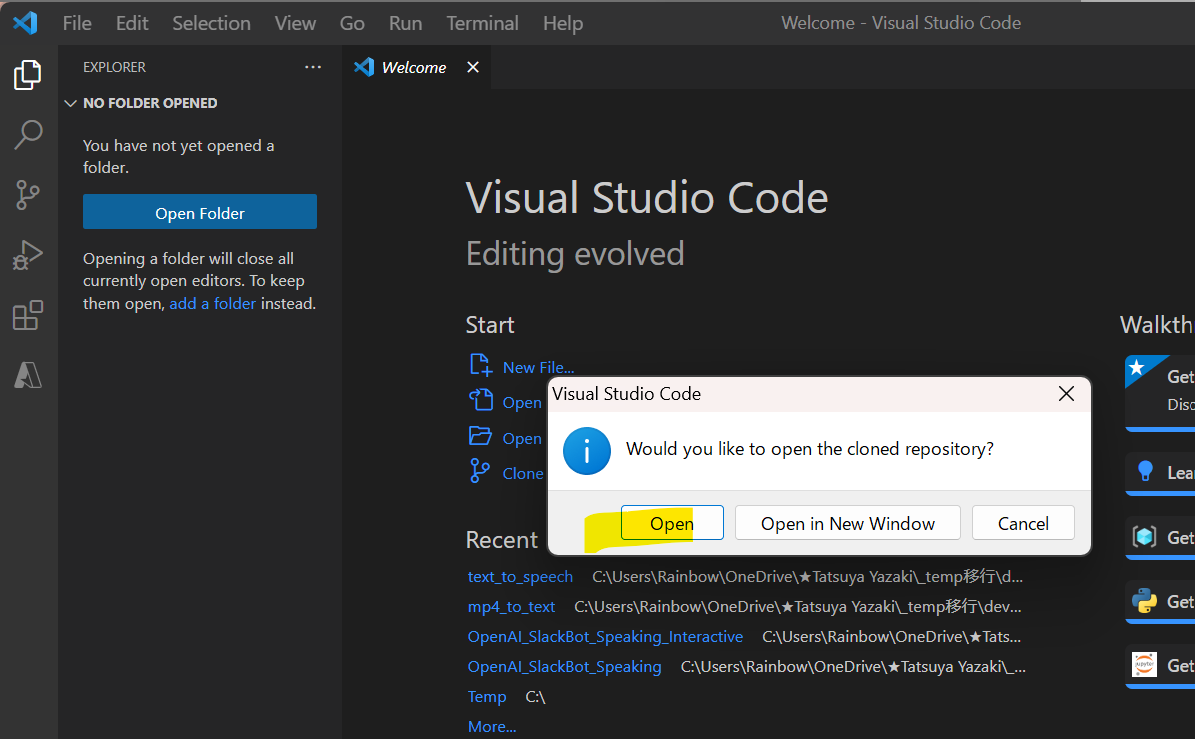
・⑥クローンしたリポジトリを開くか聞かれたら「Open」
(図121⑥)
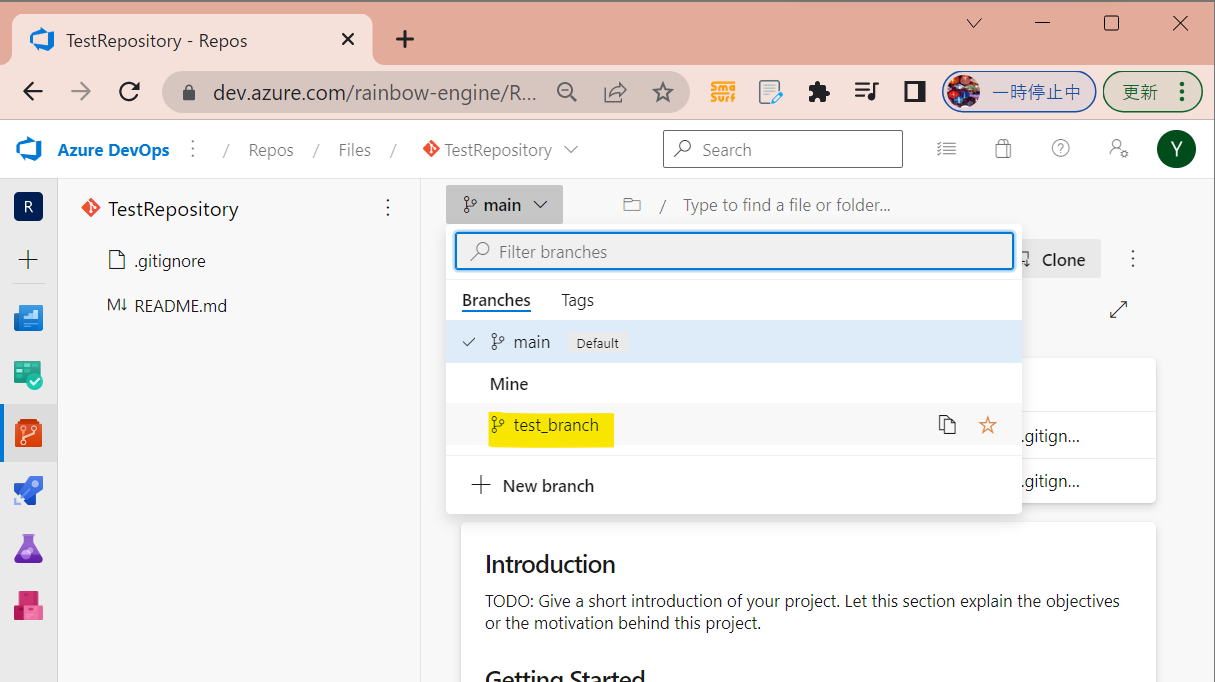
●STEP2-2:ブランチを切る
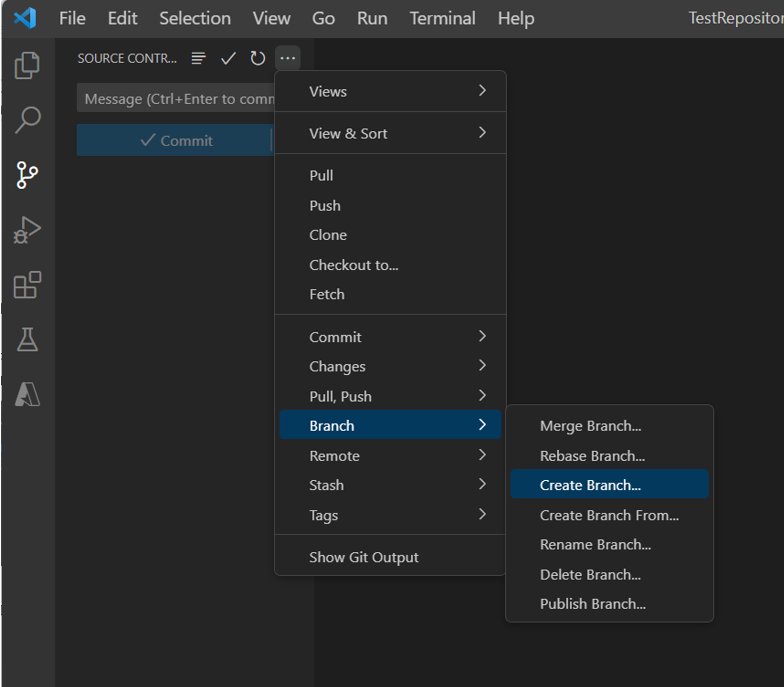
・①「・・・」ボタン→「Branch」→「Create Branch」
(図131)
↓
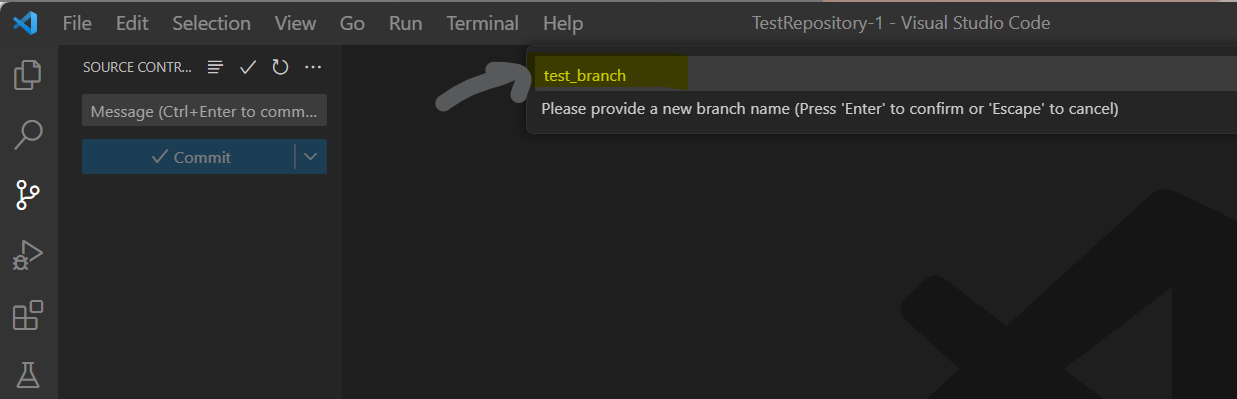
・②ブランチ名を入力して「Enter」押下
(図132)
↓
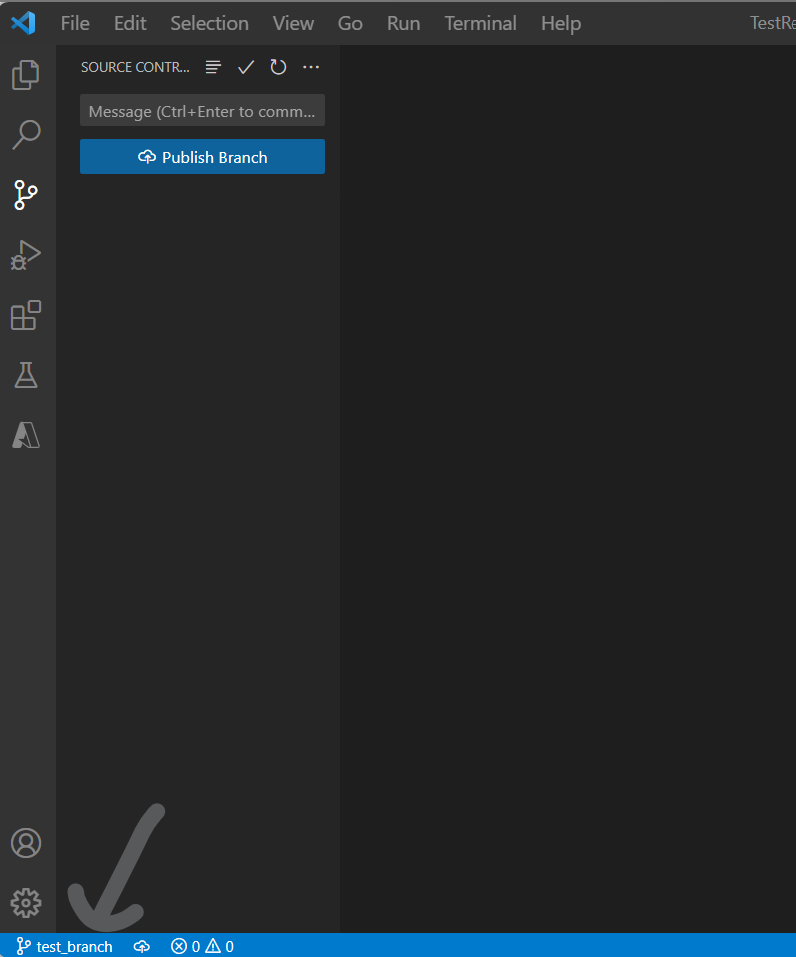
・③ブランチが切り替わる
(図133)
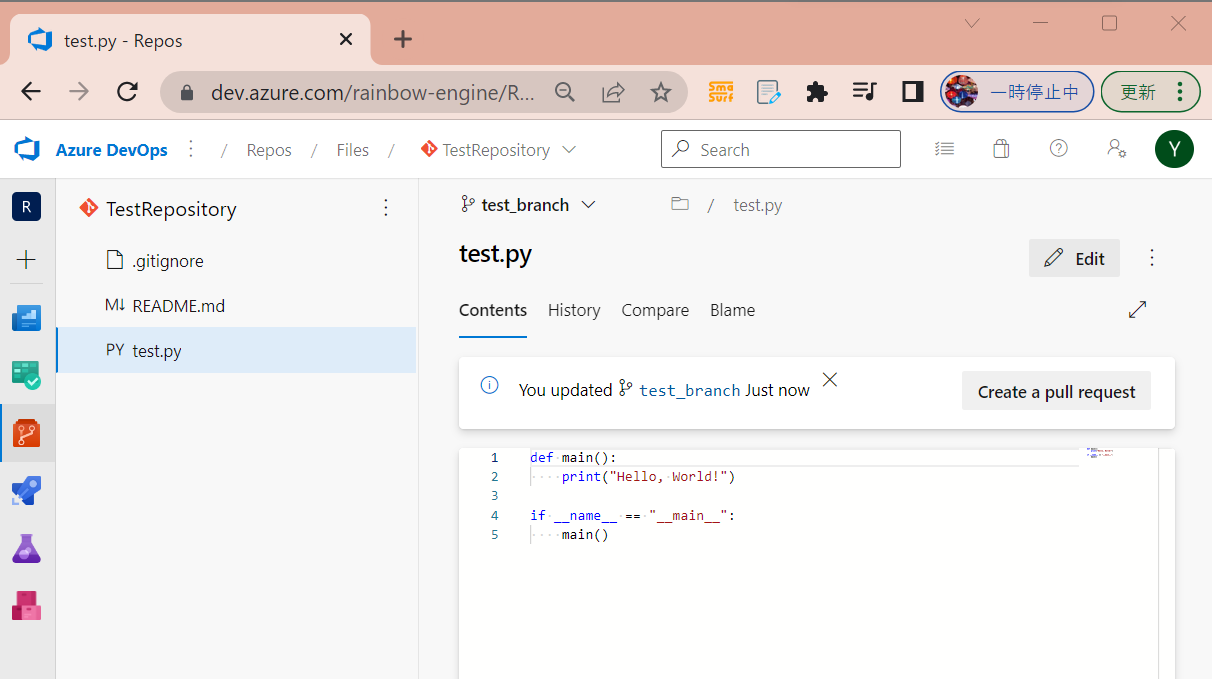
●STEP2-3:ローカルでソース修正
・①例でPythonのサンプルコードを追加
(図134)
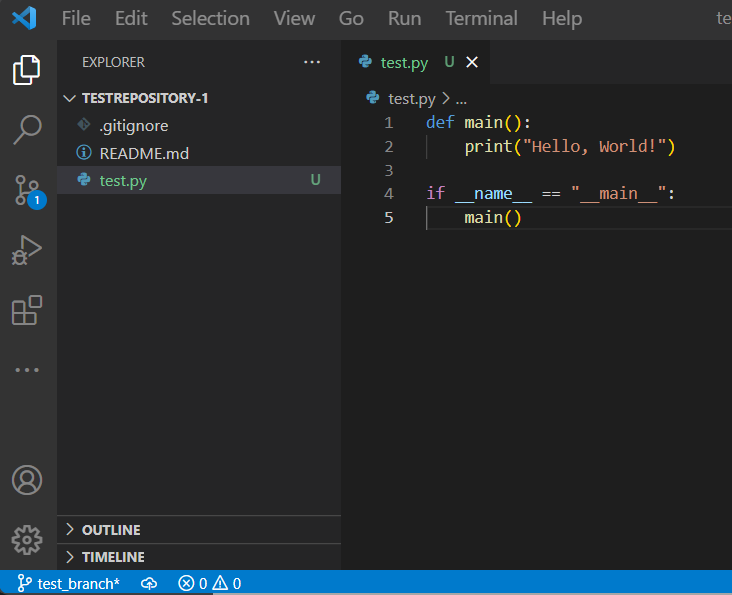
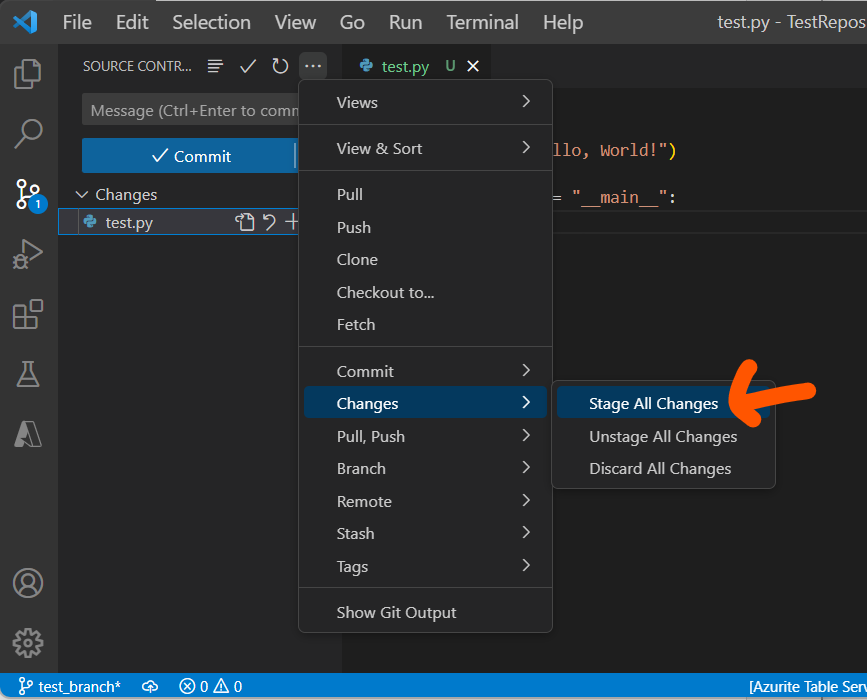
●STEP2-4:ローカルブランチに追加&コミット
・①「・・・」ボタン→「Changes」→「Stage All Changes」(Gitの「Add」)
(図135)
↓
・②コミットメッセージを入力して「Commit」を押下
(図136)

↓
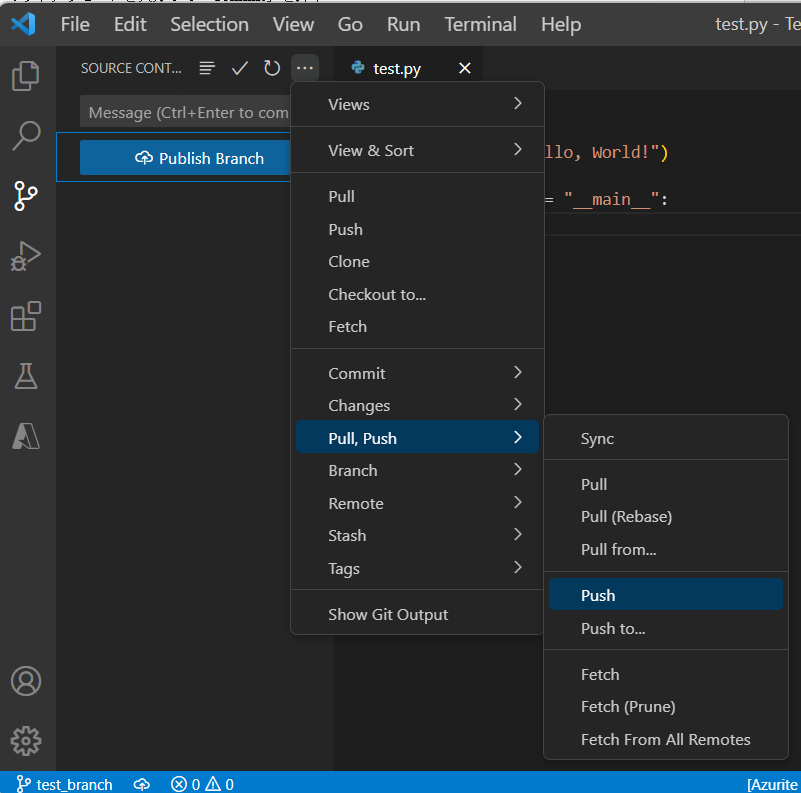
●STEP2-5:リモートリポジトリのブランチにプッシュ
・①「・・・」ボタン→「Pull, Push」→「Push」
(図137)
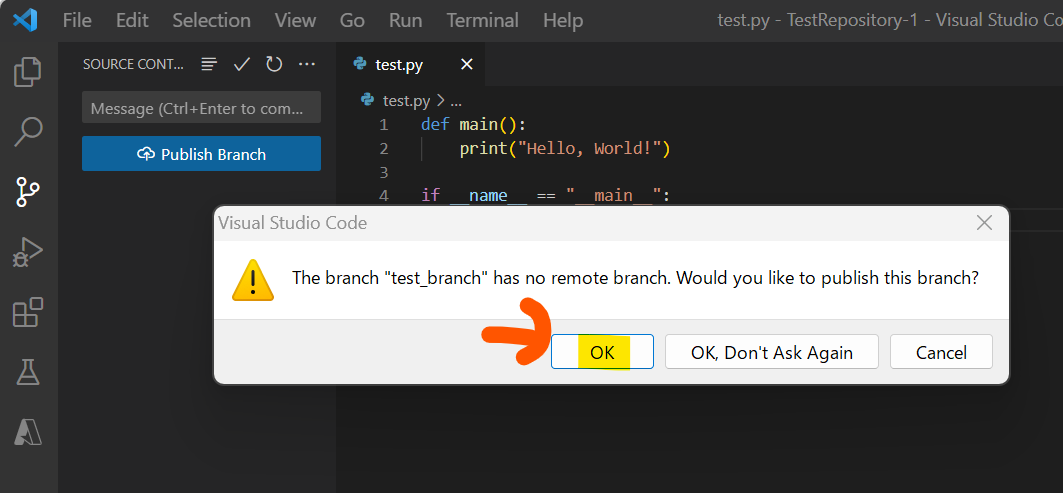
↓
・②「OK」
(図138)
↓
・③ブランチが作成された
(図139①)
(図139②)
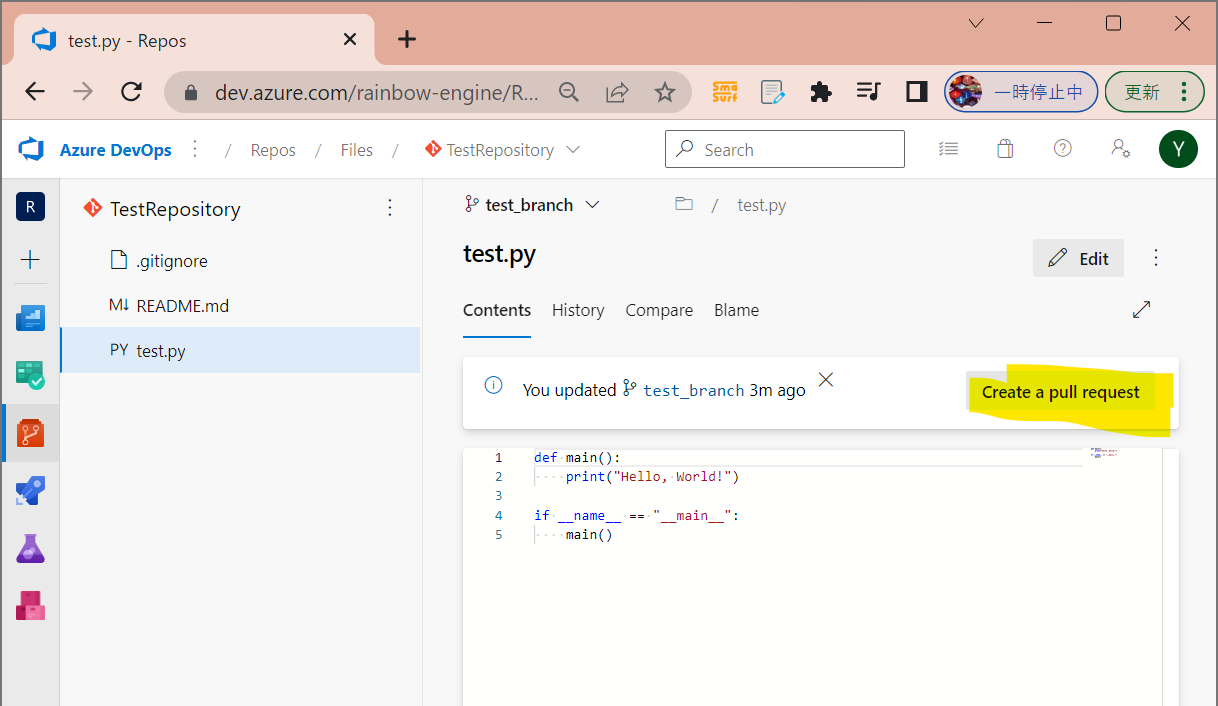
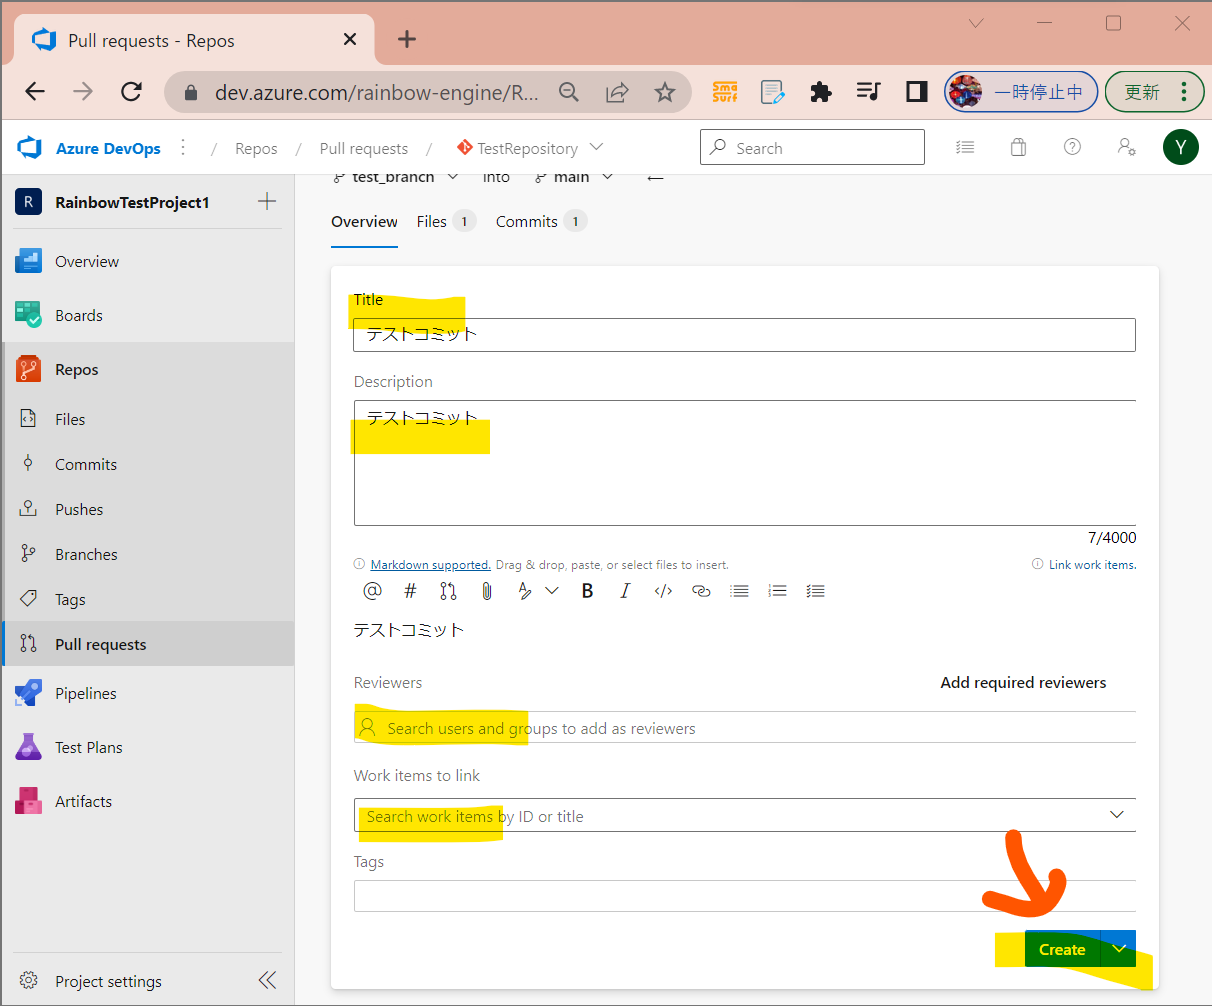
(1-3) STEP3:プルリクエスト~マージ
●STEP3-1:開発者がプルリクエストする
(図211)
↓
(図212)
●STEP3-2:レビュー&マージ
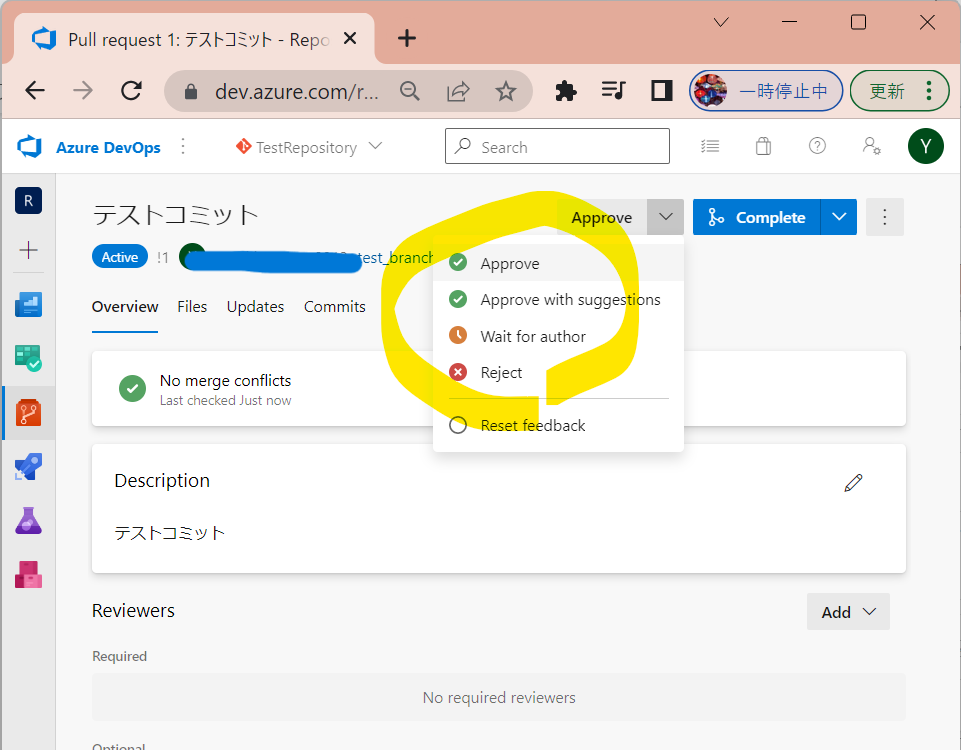
・①レビューして「Approve」を選択
(図213)
↓
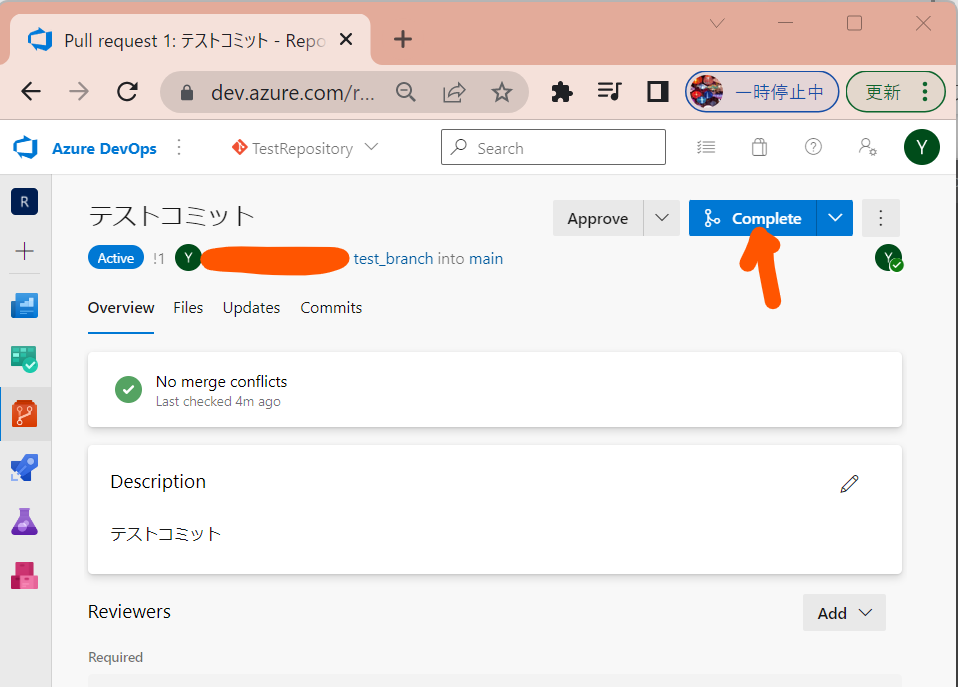
・②OKなら「Complete」押下
(図214)
↓
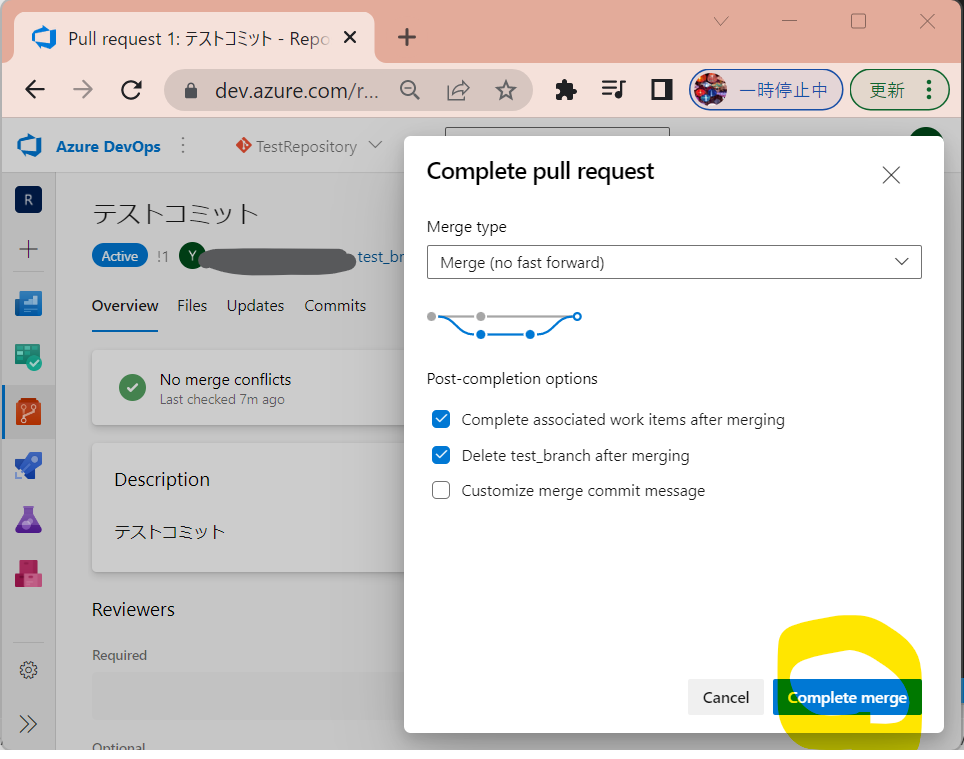
・③「Complete Merge」を押下
(図215)
↓
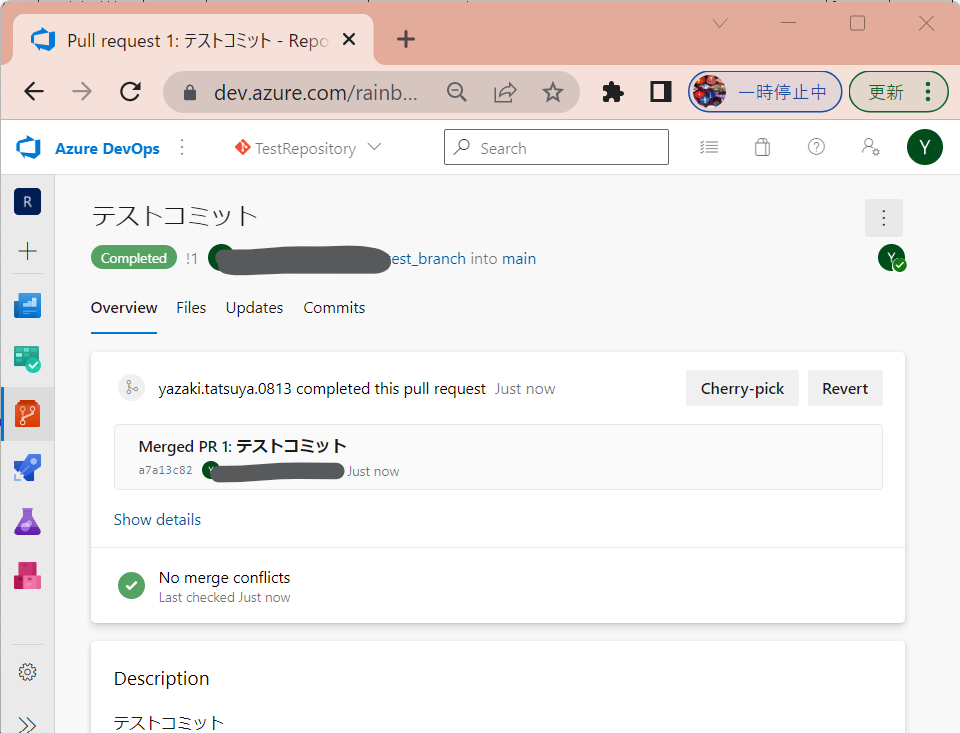
(図216)
(補足)マージの種類
(表)
| Complete: | プルリクエストの全ての変更をリポジトリのデフォルトブランチにマージ。 (利用シーン) 開発者がブランチを完全に統合し、リポジトリに取り込む必要がある場合。 |
| Squash: | プルリクエストの全ての変更を1つの新しいコミットにまとめて、リポジトリのデフォルトブランチにマージ (利用シーン) プルリクエストが多数の小さなコミットで構成されている場合に、履歴をきれいに保つために使用 |
| Rebase: | プルリクエストで行われた変更を、リポジトリのデフォルトブランチに取り込むために、現在のブランチのコミットを取り出して、デフォルトブランチに置き換える。 (利用シーン) 歴史をきれいに保ち、履歴の重複を削除するとき |
| Semi-linear merge: | リポジトリのデフォルトブランチにマージする前に、プルリクエストがターゲットブランチで更新された場合に、マージコミットを生成することによって変更を取り込みます。 (利用シーン) このタイプのマージは、プルリクエストが他のブランチと競合している場合に有効。 |
(図221)

エラー対処①:fatal: cannot lock ref ‘HEAD’: is at xxx but expected yy
●エラーメッセージ
> git -c user.useConfigOnly=true commit –quiet
fatal: cannot lock ref ‘HEAD’: is at xxx but expected yyy
(図311)
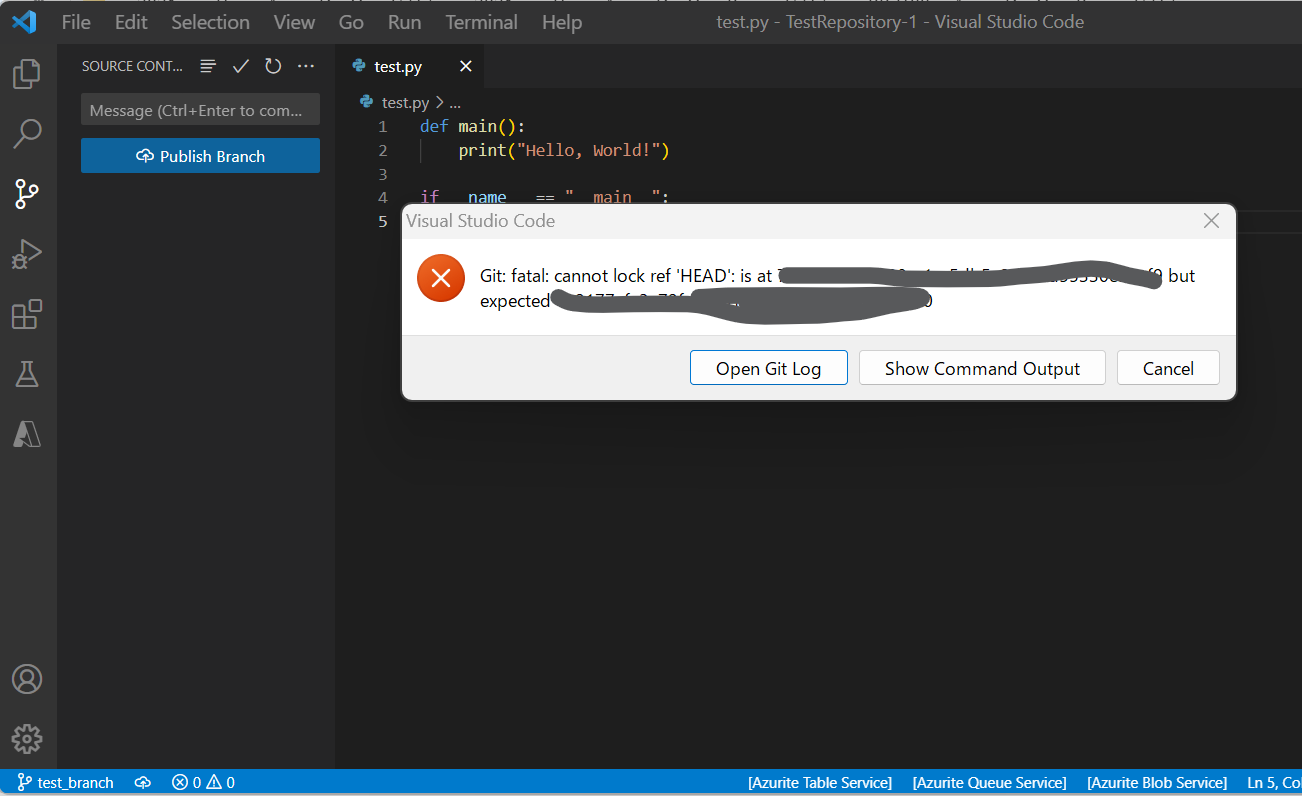
●原因/対処
コミットメッセージが入っていないため、(図136)のようにコミットメッセージを入力してから再実行。