<目次>
(1) LinkedIn APIの使い方について(PythonでAPIコール疎通させるまで)
(1-1) STEP1:【任意】企業・団体ページの作成
(1-2) STEP2:Appの作成
(1-3) STEP3:AppのVerify
(1-4) STEP4:Appの「Auth」タブの確認/設定
(1-5) STEP5:Appの「Products」タブの確認/設定
(1-6) STEP6:認証コードの取得(Python)
(1-7) STEP7:API疎通チェック(Python)
(1) LinkedIn APIの使い方について(PythonでAPIコール疎通させるまで)
LinkedIn APIの使い方という事で、Python言語でAPIコールを疎通させるまでに必要なステップをご紹介します。
(1-1) STEP1:【任意】企業・団体ページの作成
(概要)
STEP2の「Appの作成」をするためには、Linked Inに登録済みの企業/団体のページを紐付ける必要があります。会社員の方で会社の公式なAppとして登録する場合は、所属企業のLinkedInページを紐づけても良いですが、今回は検証のため私の個人組織を登録します(このブログを運営する組織として登録)。
(手順)
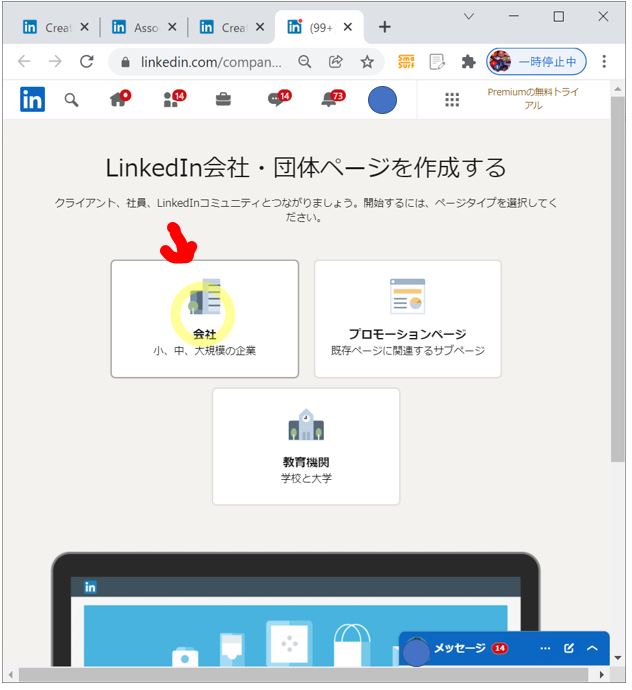
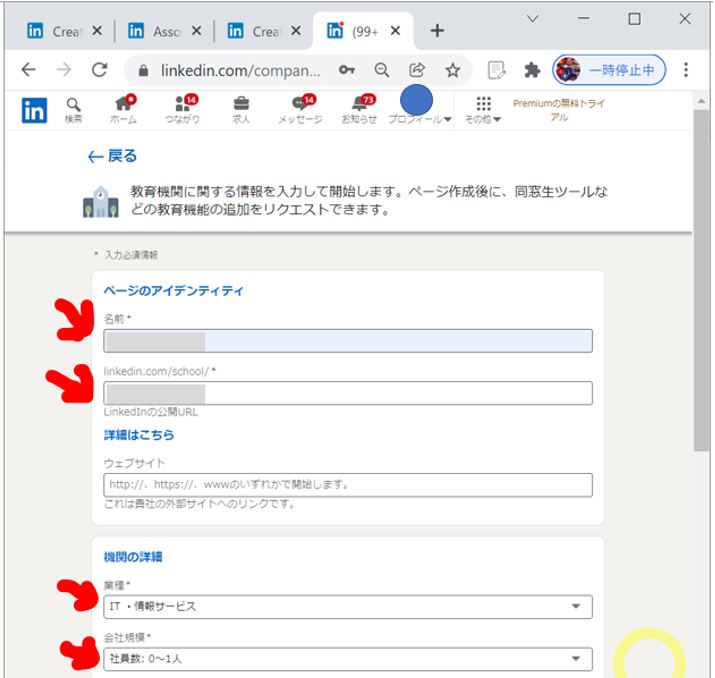
・①下記URLで「会社・団体ページを作成する」を押下
https://www.linkedin.com/help/linkedin/answer/710

(図111①)
↓
・②組織の種類を選択
(図111②)会社の例
↓
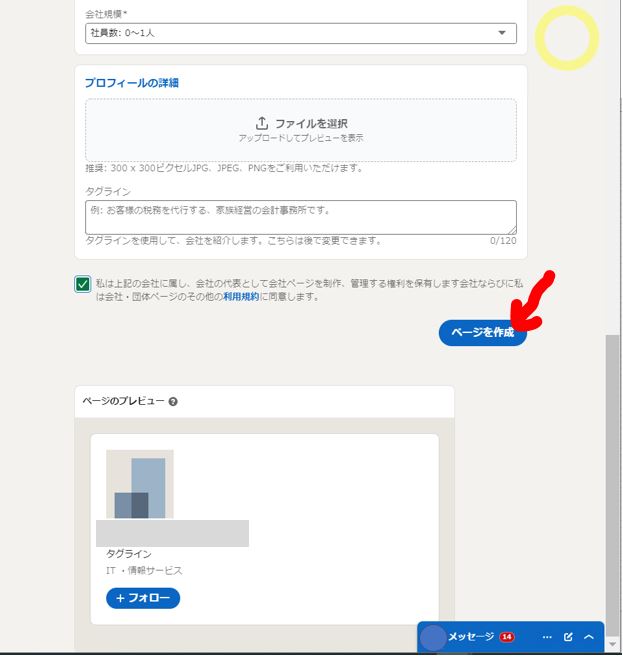
・③組織の情報を入力して「ページを作成」押下
(図111③~④)
(1-2) STEP2:Appの作成
(概要)
APIコールの元となるクライアントアプリ(Client App)を登録します。
(手順)
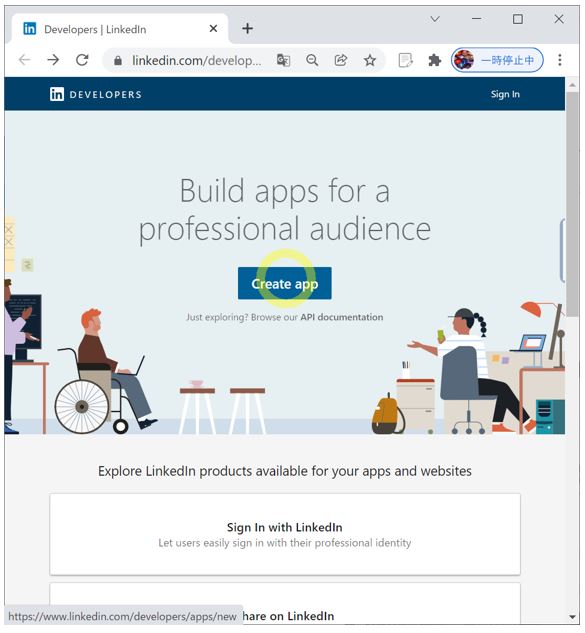
・①下記URLにアクセスし「Create App」押下
(図121①)
↓
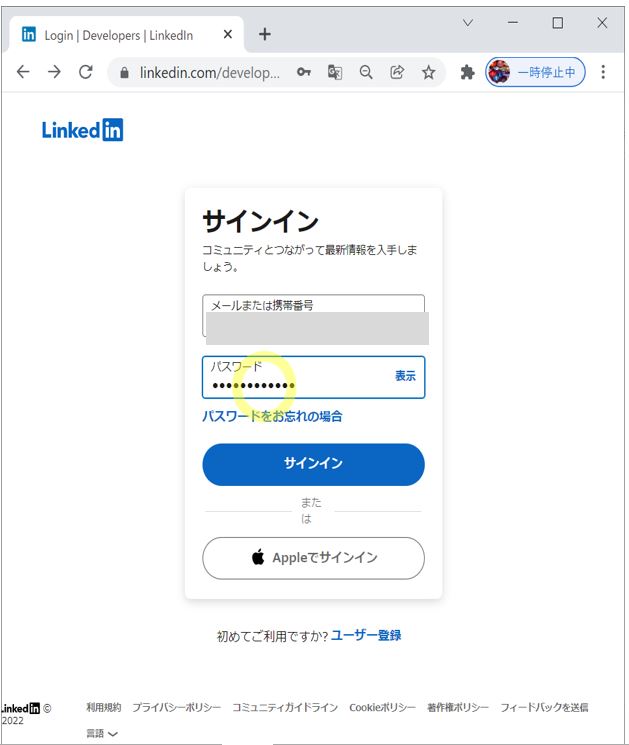
・②サインイン
(図121②)
↓
(図121③)
↓
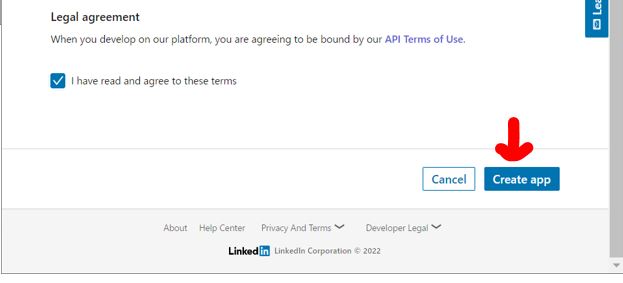
(図121④⑤)

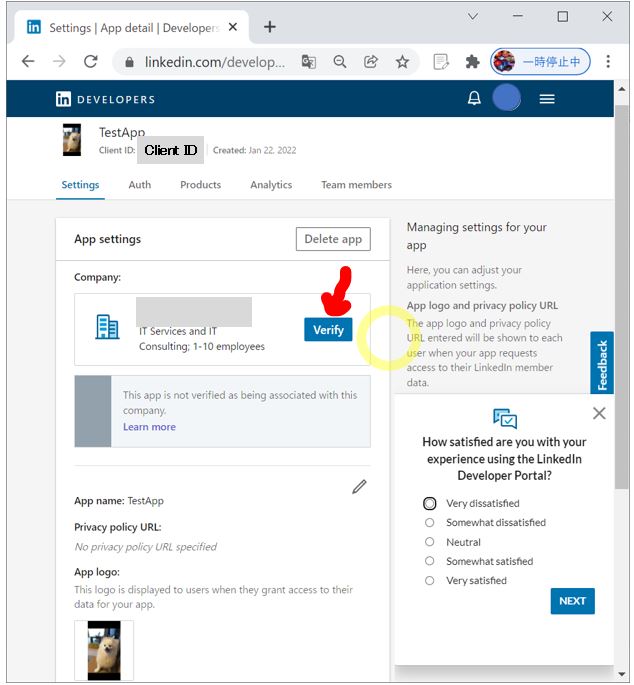
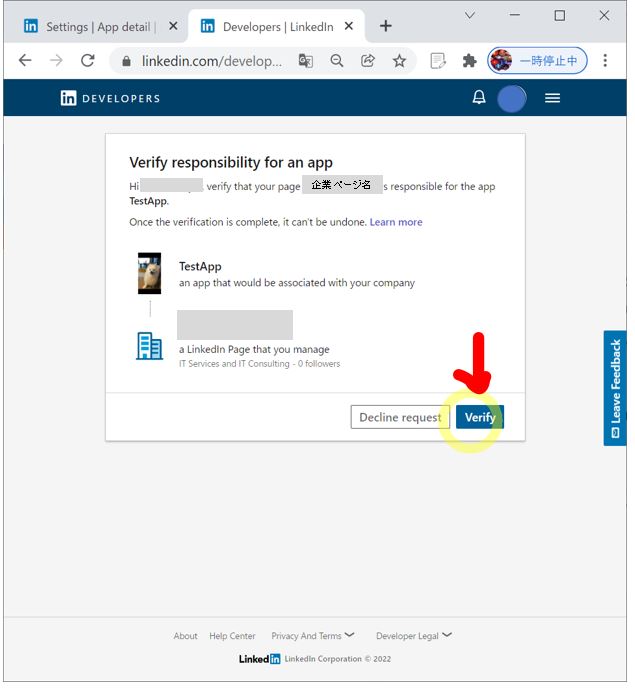
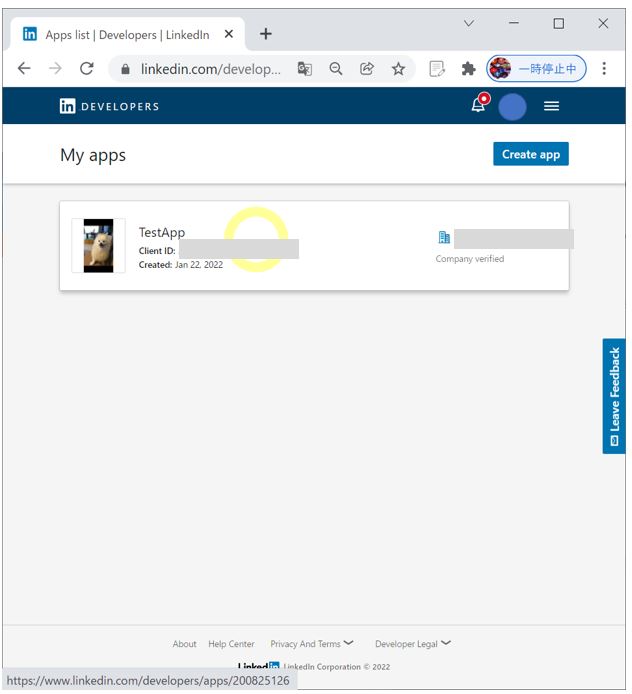
(1-3) STEP3:AppのVerify
作成したAppと企業・団体ページの紐づけを承認します。
・①「Verify」押下
(図131①)
↓
・②「Generate URL」押下して、発行されたURLをコピー
(図131②)

↓
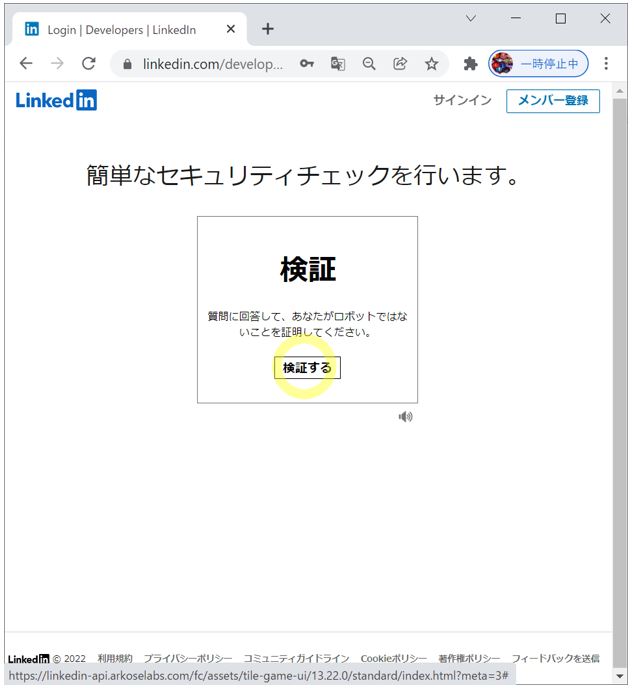
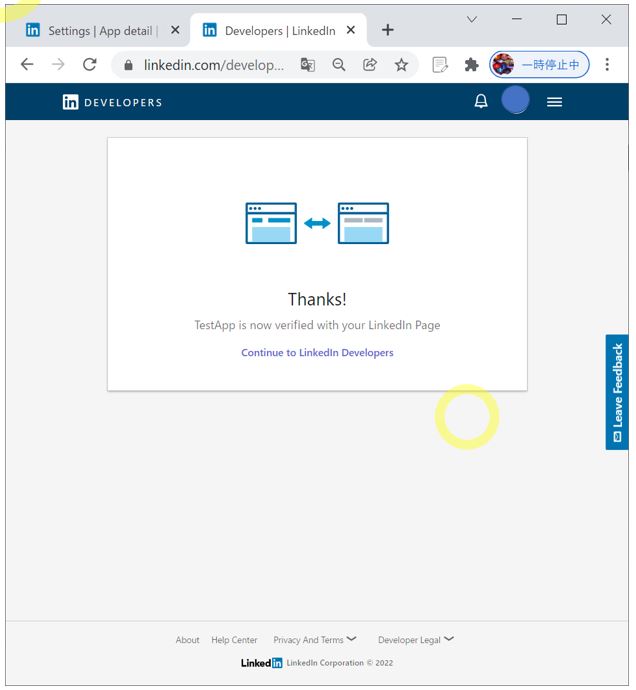
・③コピーしたURLをブラウザで開き「Verify」押下
(図131③)
↓
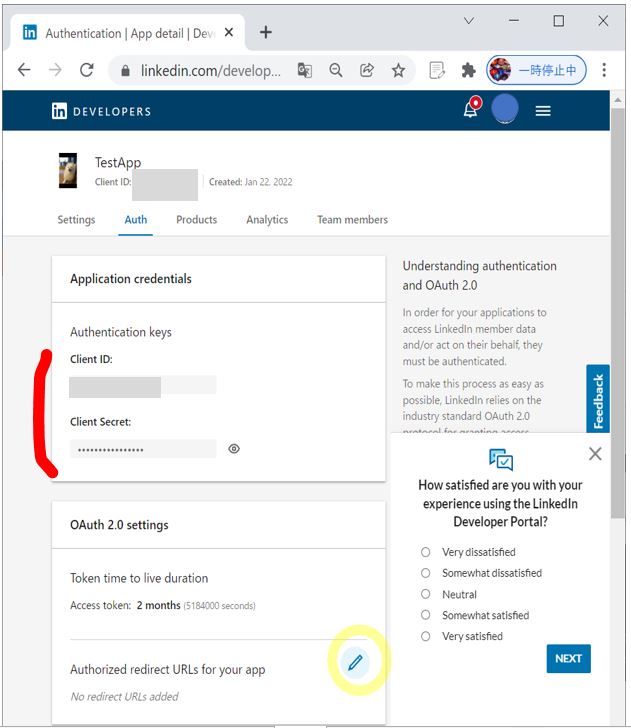
・②「Client ID」と「Client Secret」を控える
「Client ID」はご自身のAppを一意に特定するためのIDです。後で使用するので控えます。
(図141②)
↓
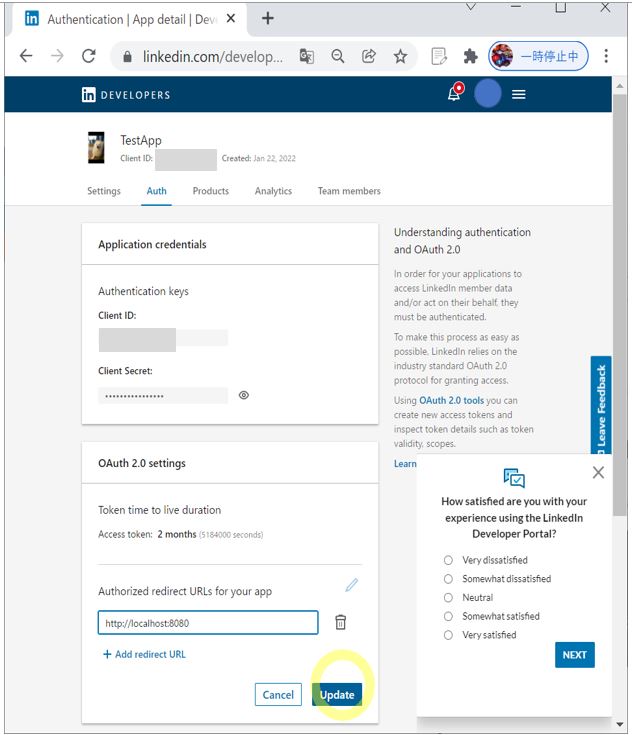
・③「Authorized redirect URLs for your app」の編集ボタン押下
(図141③)
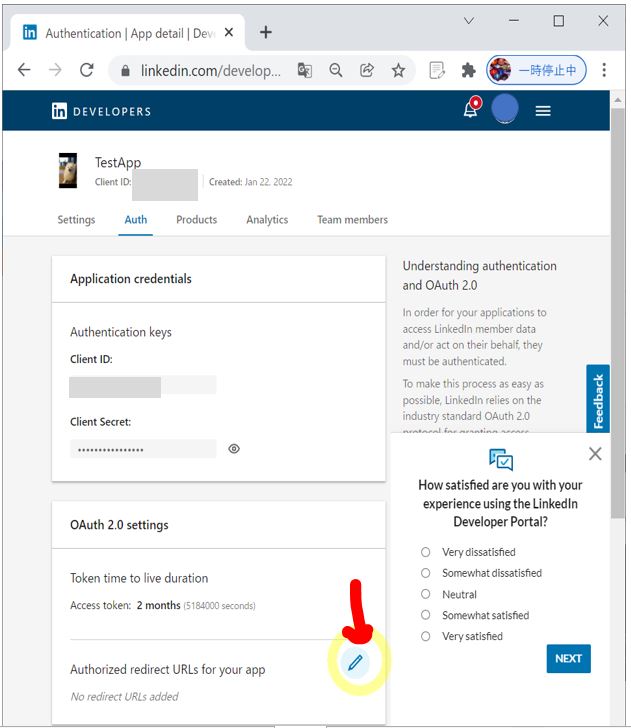
↓
↓
・④「http://localhost:8080」を入力して「Update」押下
リダイレクト先は何でもよく、今回はローカルのWebサーバ(があると仮定して。無くてもOK)の8080ポートを宛先にします。
(図141④)
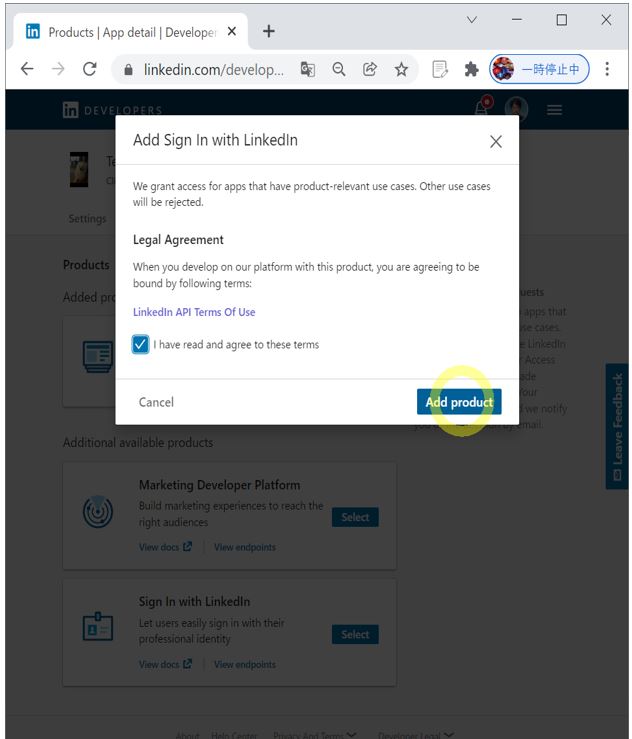
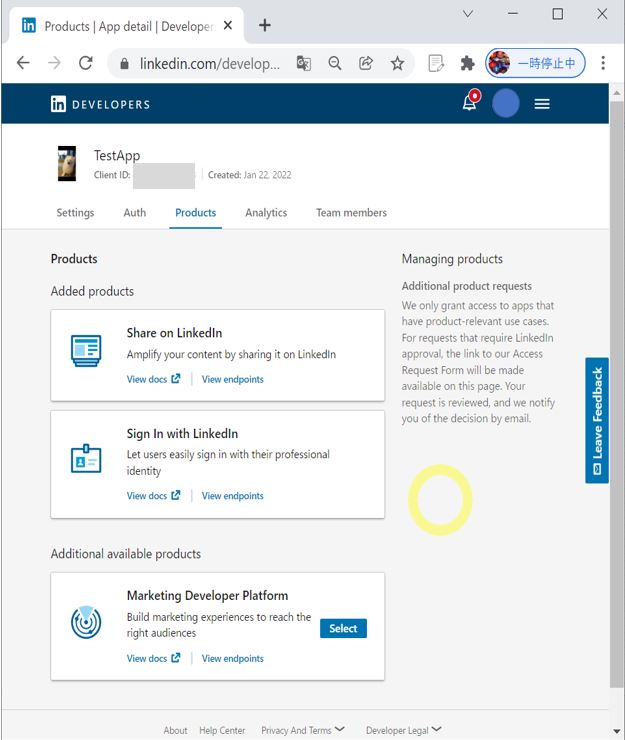
(1-5) STEP5:Appの「Products」タブの確認/設定
(概要)
ここではAppに対してプロダクト(許可する操作)を設定します。
(手順)
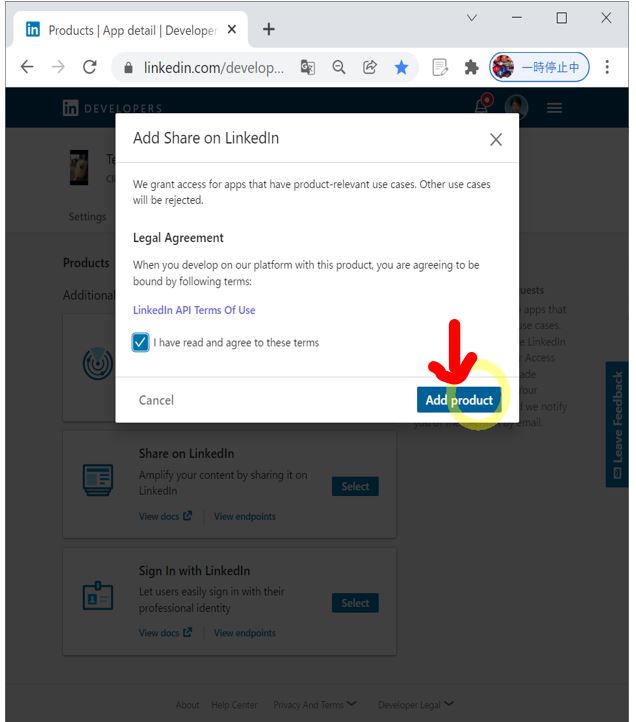
・①「Products」タブを押下し「Share on LinkedIn」を押下
(図151①)

↓
・②「Add Product」を押下
(図151②)
↓
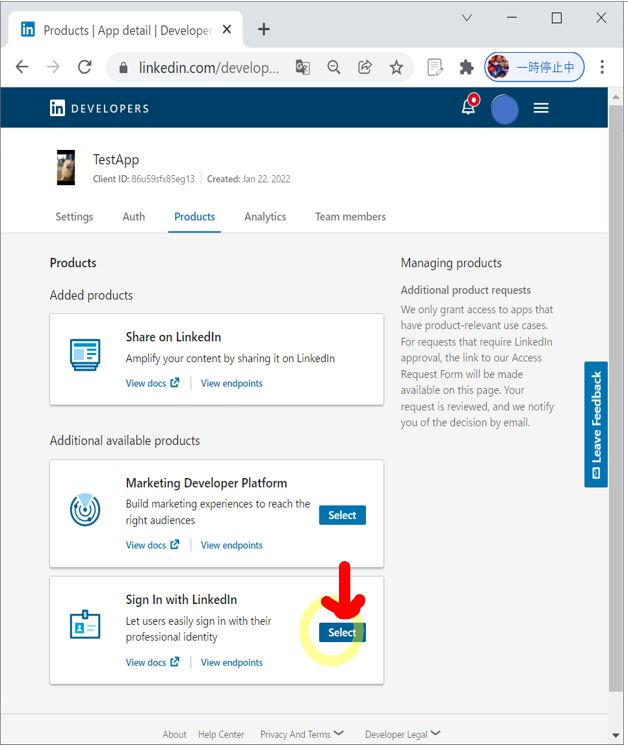
・③同様に「Sign In with LinkedIn」も追加
(図151③)
↓
(図151④)
↓
(図151⑤)
(1-6) STEP6:認証コードの取得(Python)
認証エンドポイントに対して、必要情報を添えてhttpのGETリクエストを送る事でトークンを取得します。
●STEP6-1:コード(code)の取得
・①コード(code)を取得するための下記Pythonプログラムをローカル実行
⇒「https://www.linkedin.com/oauth/v2/authorization」に対してhttpsのGETリクエストを送っています。
(図161①)
(サンプルプログラム)
# 必要なパッケージ: python -m pip install requests
import requests, secrets
url = requests.Request(
    'GET',
    'https://www.linkedin.com/oauth/v2/authorization',
    params = {
        'response_type': 'code', # Always should equal to fixed string "code"

        # ご自身のAppのClientID
        'client_id': 'XXXXXX',

        # ログインしたユーザーが認証後にリダイレクトされるURIを指定
        # (備考)
        # ・この値は「OAuth 2.0 Authorized Redirect URLs」の値のいずれかと一致する必要あり
        # ・ご自身で所有するローカルやリモートのサーバ等を指定します。
        'redirect_uri': 'http://localhost:8000',

        # 一意なランダム文字列を指定。
        # サーバ側で現在の認証リクエストを識別するために使用します。
        # もし値を何にするか困った場合、例えば「secrets.token_hex(8).upper()」のようなモジュールで生成するものありです。
        # このstateをサーバで保持する事で、認証済のセッションを識別します。
        #'state': secrets.token_hex(8).upper(),
        'state' : 'XXXXXX',

        # リクエストする権限を指定。
        # 下記は一例のため、必要に応じて変更。
        # ↓付与可能な権限の一覧はこちら
        #     https://docs.microsoft.com/en-us/linkedin/shared/references/migrations/default-scopes-migration#scope-to-consent-message-mapping
        #'scope': '%20'.join(['r_liteprofile', 'r_emailaddress', 'w_member_social']),
        'scope': 'r_liteprofile'
    },
).prepare().url

# ここまで来たら、サーバ⇒クライアントにURLを送ってOK
# 今回はローカル実行のため、サーバ⇒クライアントにURLを送る
import webbrowser
webbrowser.open(url)
↓
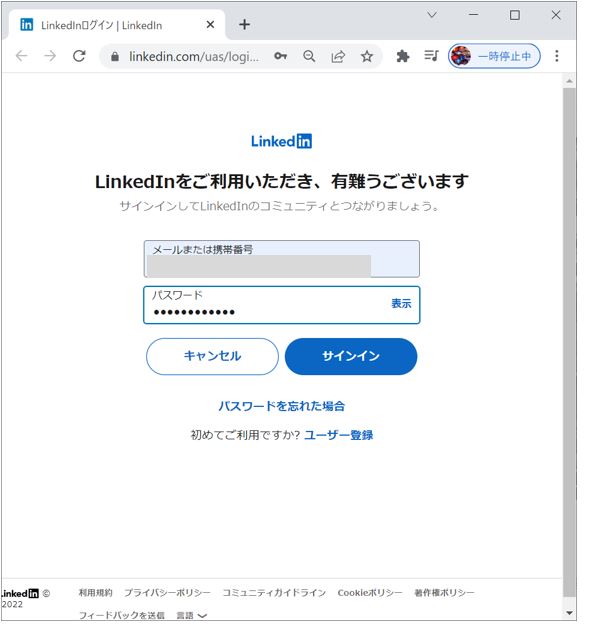
・②ログイン
(図161②)
↓
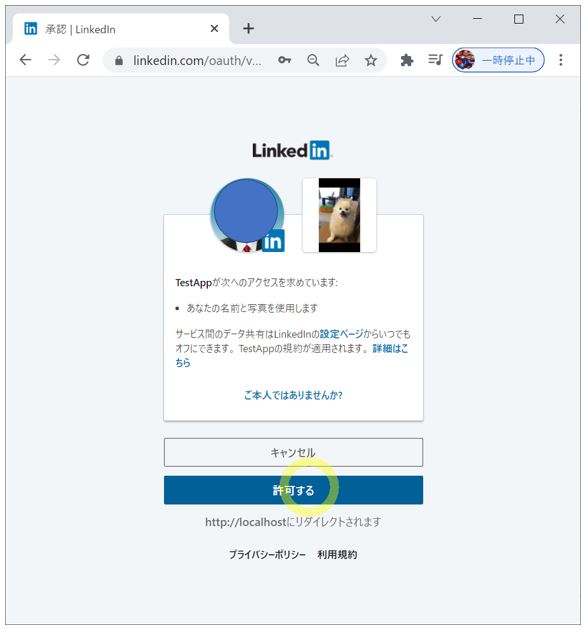
・③「許可する」を押下
※作成したAppがご自身のアカウントの写真や名前を使用してよいか?の許可
(図161③)
↓
・④リダイレクトされたURLの「code」パラメータの値を控える(次の手順で使用)
(図161④)
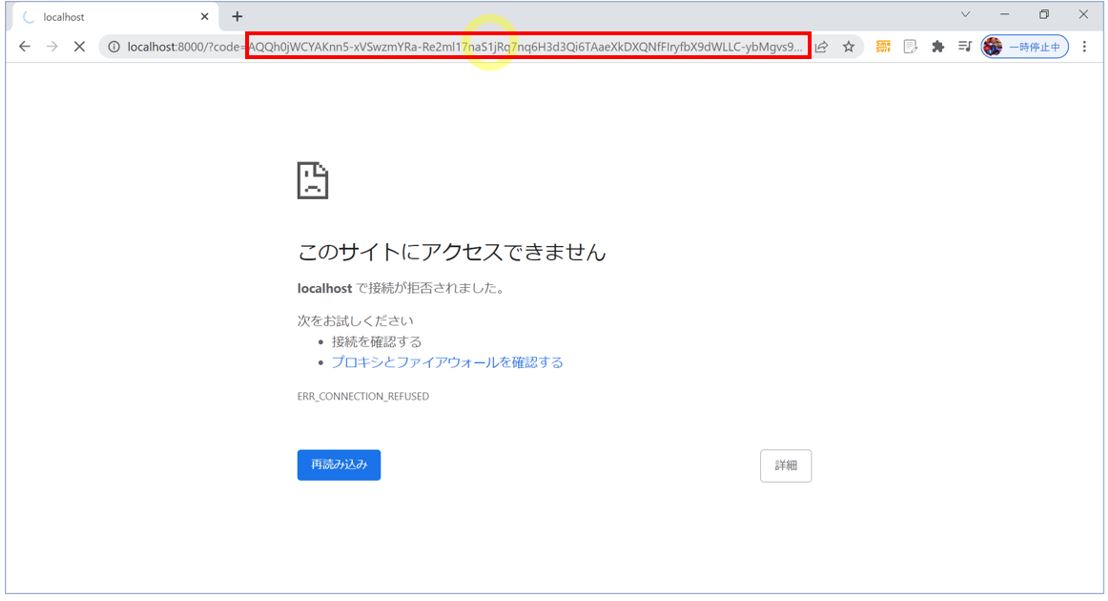
(例)
http://localhost:8000/?code=XXXXXXXXXXXX&state=DCEeFWf45A53sdfKef424
http://localhost:8000/?code=XXXXXXXXXXXX&state=DCEeFWf45A53sdfKef424
●STEP6-2:「access_token」の取得
・①「access_tokenを取得するための下記Pythonプログラムをローカル実行
(図162①)
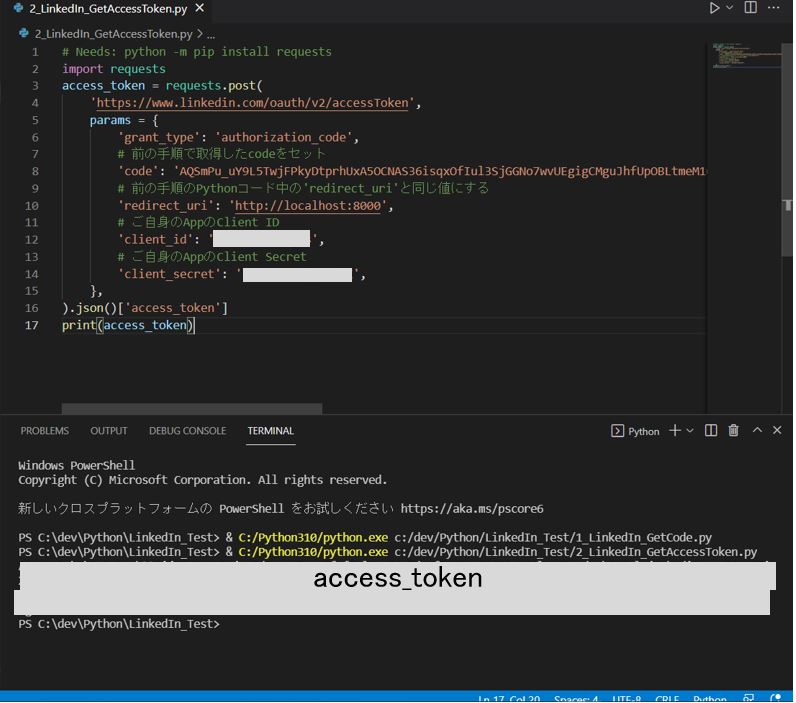
(サンプルプログラム)
(サンプルプログラム)
import requests
access_token = requests.post(
    'https://www.linkedin.com/oauth/v2/accessToken',
    params = {
        'grant_type': 'authorization_code',
        # 前の手順で取得したcodeをセット
        'code': 'XXXXX',
        # 前の手順のPythonコード中の'redirect_uri'と同じ値にする
        'redirect_uri': 'http://localhost:8000',
        # ご自身のAppのClient ID
        'client_id': 'XXXXX',
        # ご自身のAppのClient Secret
        'client_secret': 'XXXXXX',
    },
).json()['access_token']
print(access_token)
(1-7) STEP7:API疎通チェック(Python)
・①API下記Pythonプログラムをローカル実行 →結果がJSON形式で表示された!!
(図171)
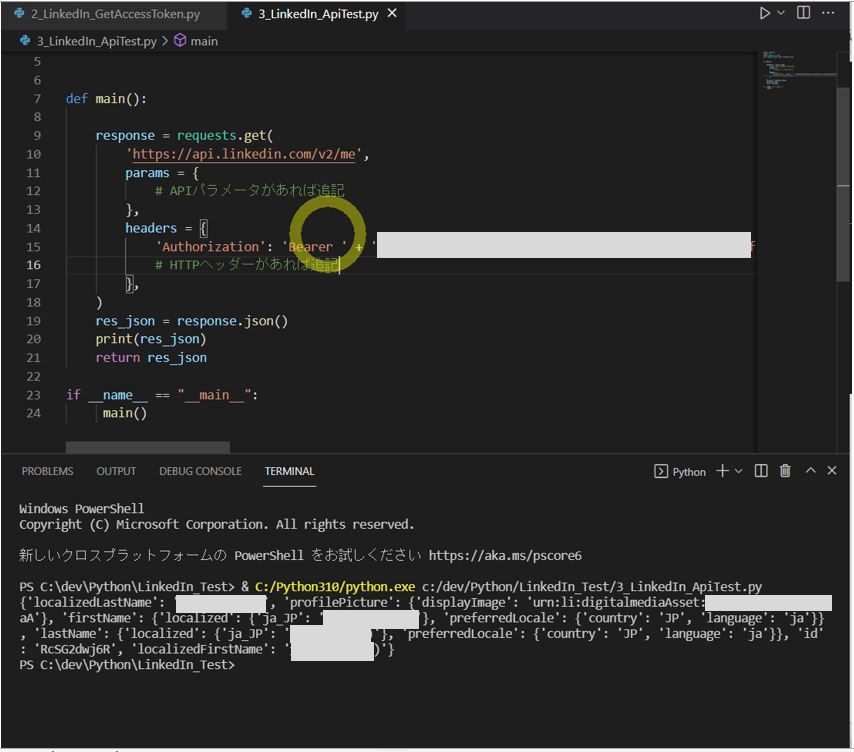
(サンプルプログラム)
import requests
import os
import oauth2 as oauth
from requests.auth import HTTPBasicAuth

def main():

    response = requests.get(
        'https://api.linkedin.com/v2/me',
        params = {
            # APIパラメータがあれば追記
        },
        headers = {
            'Authorization': 'Bearer ' + 'XXXXX',
            # HTTPヘッダーがあれば追記
        },
    )
    res_json = response.json()
    print(res_json)
    return res_json

if __name__ == "__main__":
     main()
(結果例)
{'localizedLastName': 'xxxx', 'profilePicture': {'displayImage': 'urn:li:digitalmediaAsset:C5603AQG8r0KSOzwwaA'}, 'firstName': {'localized': {'ja_JP': ' xxxx '}, 'preferredLocale': {'country': 'JP', 'language': 'ja'}}, 'lastName': {'localized': {'ja_JP': 'xxxx'}, 'preferredLocale': {'country': 'JP', 'language': 'ja'}}, 'id': 'XXXXXX', 'localizedFirstName': 'xxxx'}