<目次>
(1) Azure FunctionsのPythonローカル開発をVS Codeで行うためのセットアップ手順
(1-1) STEP1:Node.js(含むnmp)のインストール
(1-2) STEP2:Azure Functions Core Toolsの取得
(1-3) STEP3:Visual Studio Code用のAzure Functions拡張機能をインストール
(1-4) STEP4:Azureとの疎通(サインイン)
(1-5) STEP5:Azure Functionsプロジェクト&関数を作成
(1-6) STEP6:Visual Studio Codeでローカル実行(F5)
(1-7) STEP7:Azureへデプロイ
(1) Azure FunctionsのPythonローカル開発をVS Codeで行うためのセットアップ手順
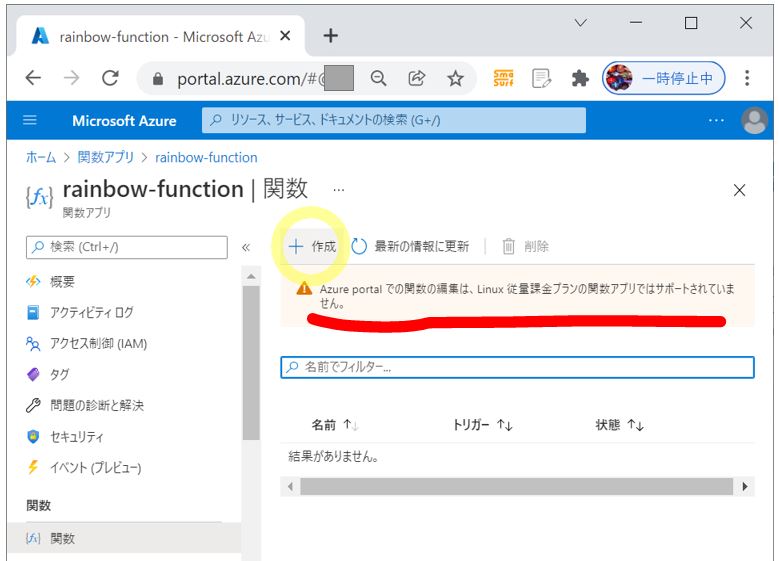
Azure FunctionsでPythonの開発を行おうとすると、2022年1月現在ではOSがLinuxのみ選択可能になっています。
そしてLinuxの場合はGUI上での関数プログラムの編集がサポートされていないため(図100)、VS Code等でローカル開発を行い、Azure上にデプロイする必要があります。
(図100)
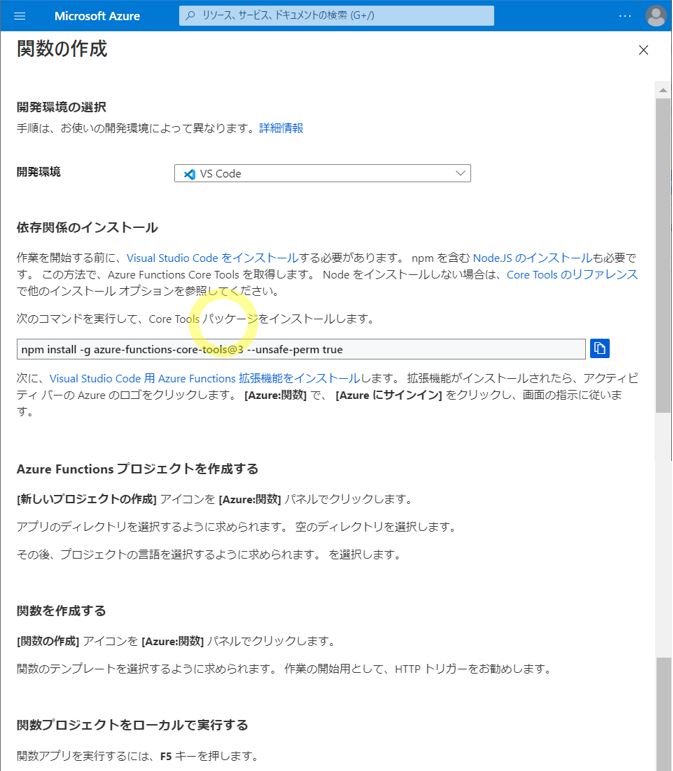
関数を作ろうとして、以下のような画面(図101)に遭遇した方もいらっしゃると思いますが、本記事ではこの設定手順をご紹介します(画面キャプチャ付き)。
(図101)
(1-1) STEP1:Node.js(含むnmp)のインストール
本来はnvmによるバージョン管理が望ましいが、今回は直接ダウンロードします。
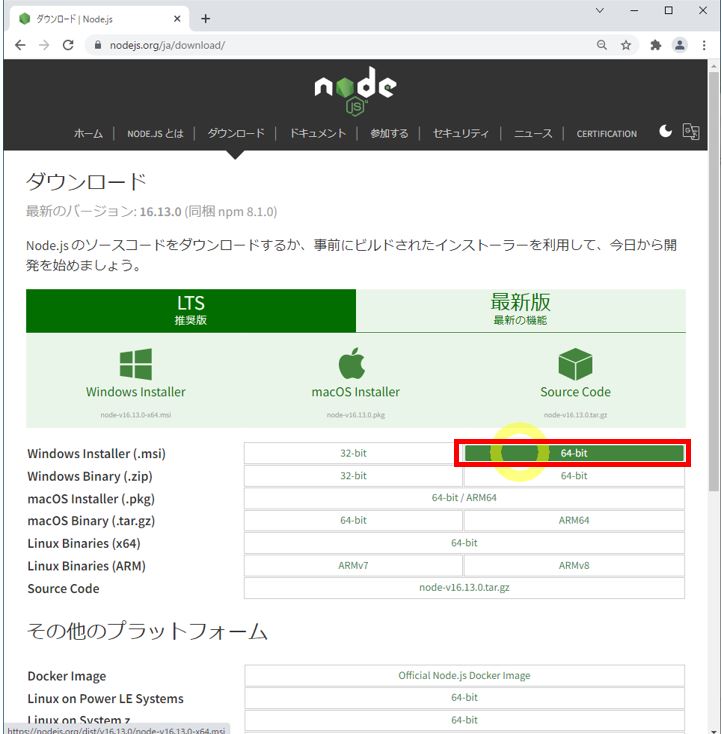
・①Node.jsのサイトからインストーラをダウンロード
(図111①)Windows 64bit OSの例
↓
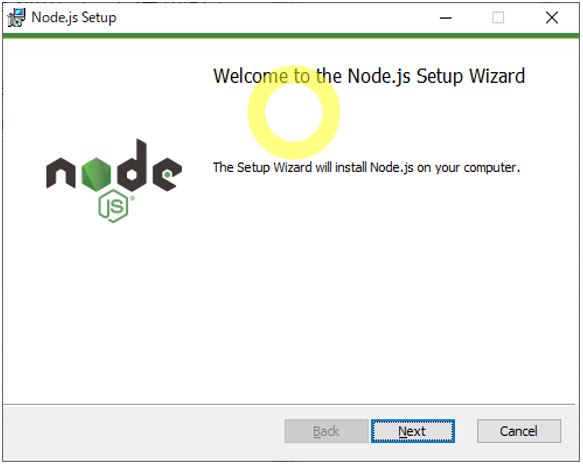
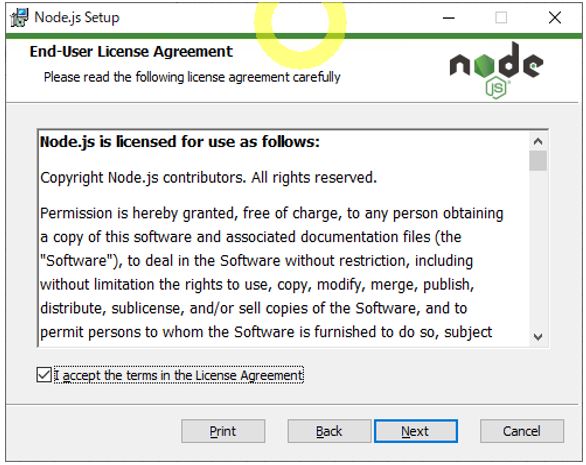
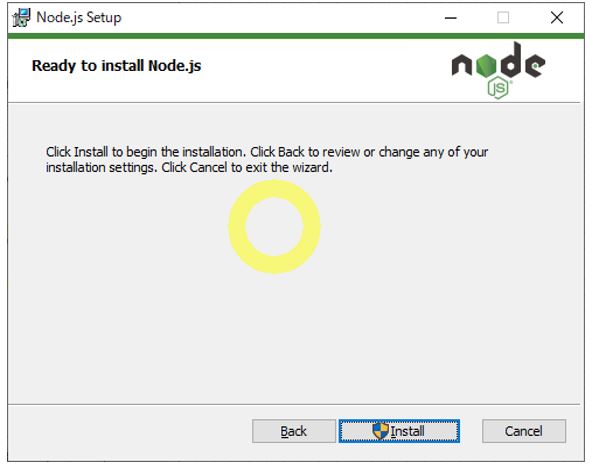
・②インストーラの指示に沿ってインストールします。
(図112①)
↓
(図112②)
↓
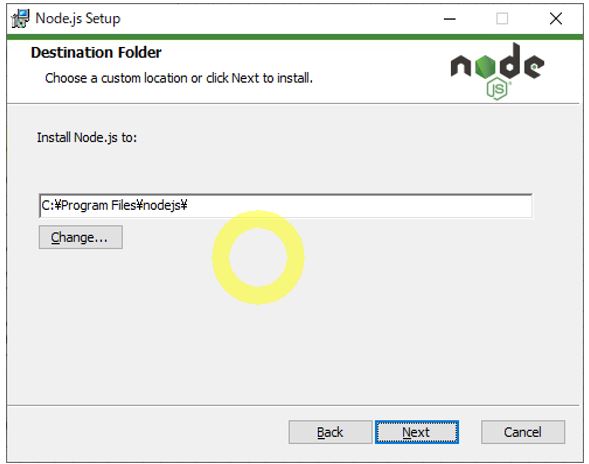
・Destination Folder:インストール先のフォルダ
(図112③)
↓
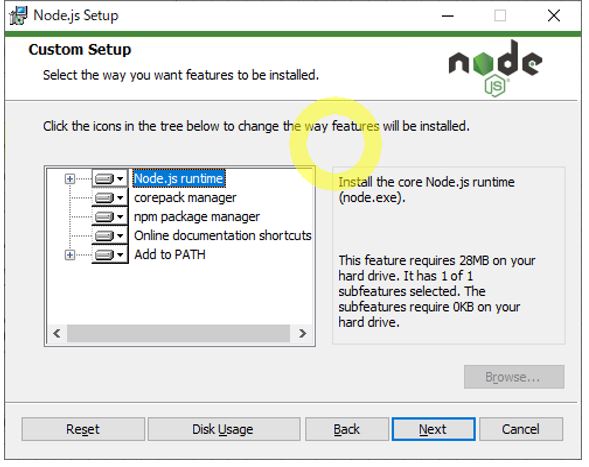
・Custom Setup:インストールする機能のカスタマイズ
(図112④)
↓
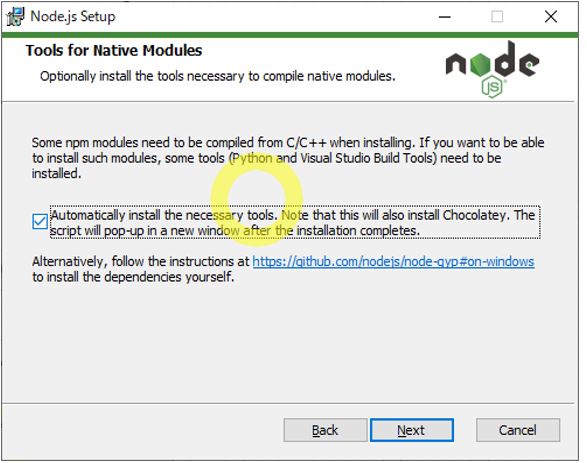
・Tools for Native Modules:npm(Node Package Manager)はパッケージ管理(≒インストールや依存性解決)のツールで、一部はC/C++からのコンパイルが必要なため、必要なツールを合わせて自動インストールしてよいか?
(図112⑤)
↓
(図112⑥)
↓
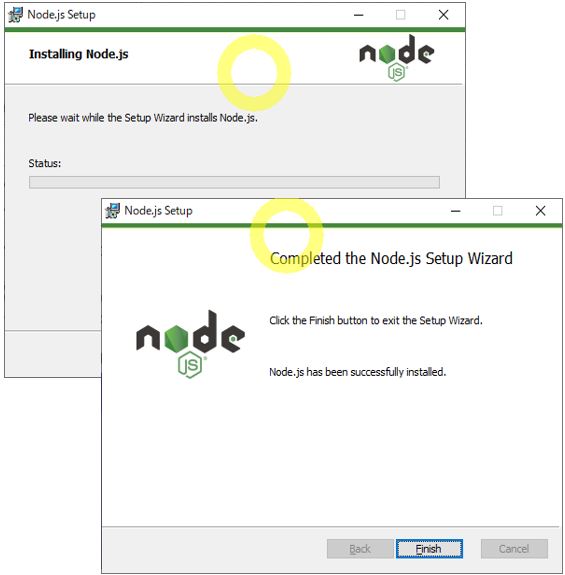
・インストール完了
(図112⑦)
↓
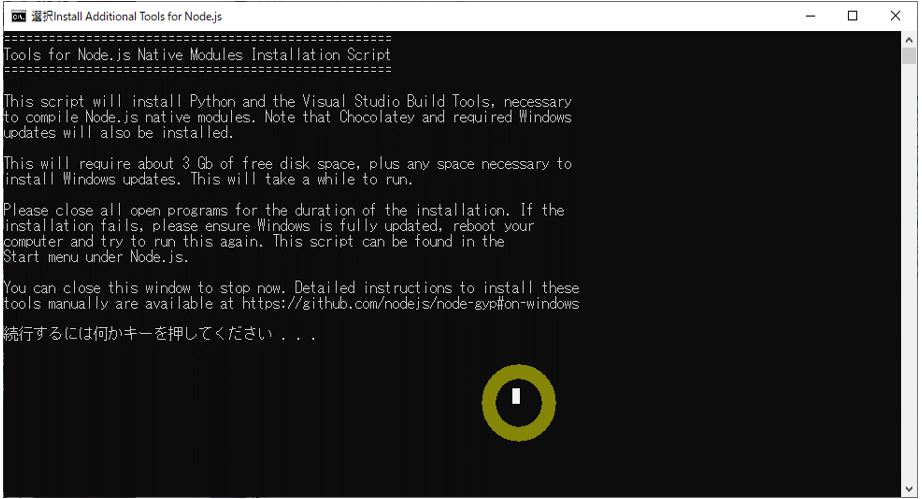
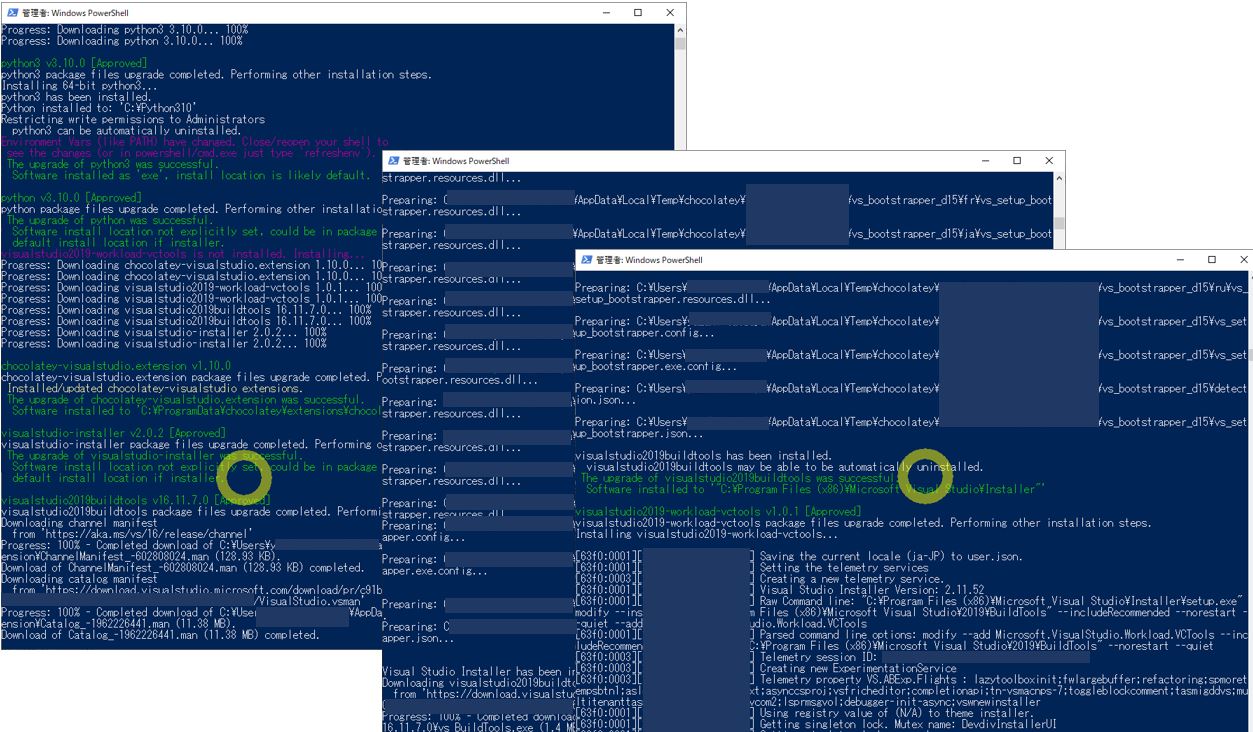
・③Python及びVisual Studio Build Toolsのインストール(スクリプトによる自動インストール)
インストーラを閉じると、自動的にNode.jsのネイティブモジュールをコンパイルするために必要な「Python」及び「Visual Studio Build Tools」をインストールする為のウィンドウが開きます。
(図113①)適当なキーを押下するとインストールが進行します
↓
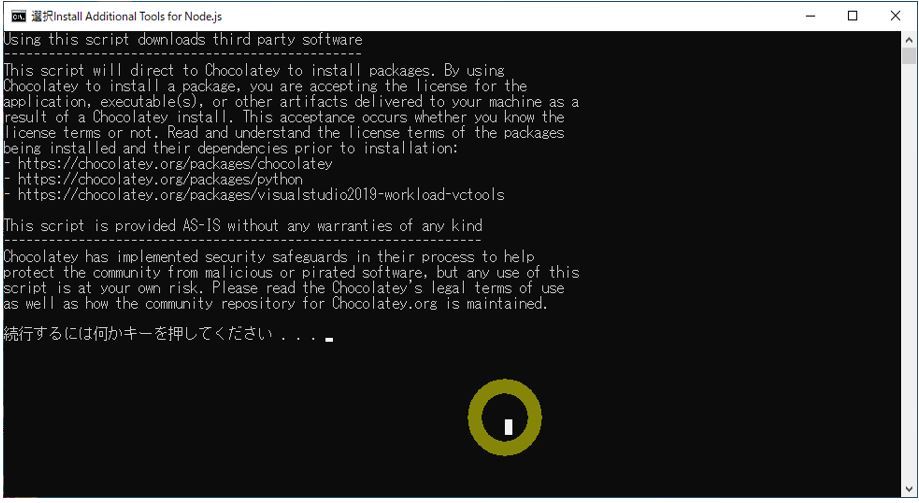
(図113②)適当なキーを押下するとインストールが進行します
↓
(図113③)Power Shellのスクリプトが起動し、各種インストールが実行されます。
↓
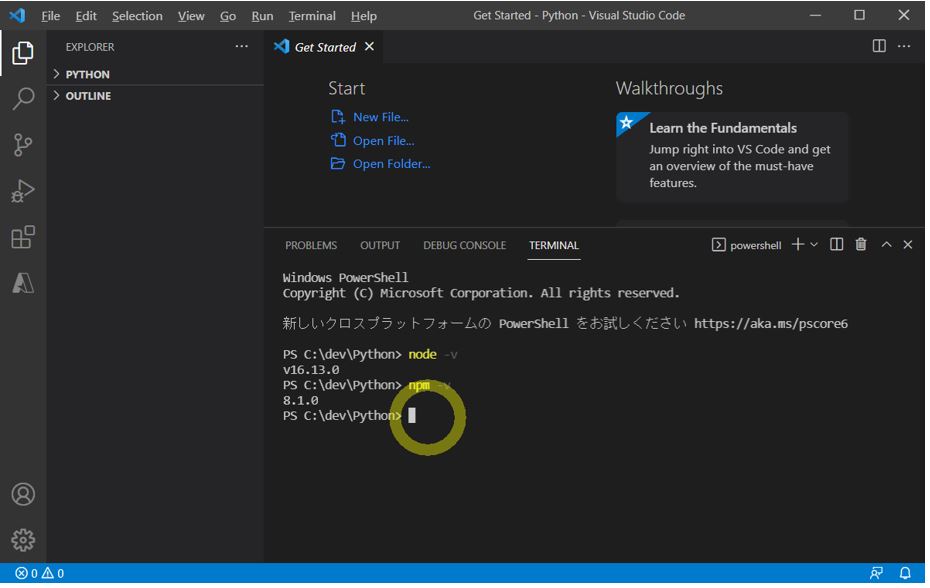
(図113④)インストールが終了したら、下記コマンドで正常にインストールされたか?をチェックします
> node -v
> npm -v
(1-2) STEP2:Azure Functions Core Toolsの取得
「Azure Functions Core Tools 」はAzure Functionsのローカル実行環境を作るために必要です。コマンドライン経由で実行が可能になります。Windowsの場合、Node.js経由でインストールします。
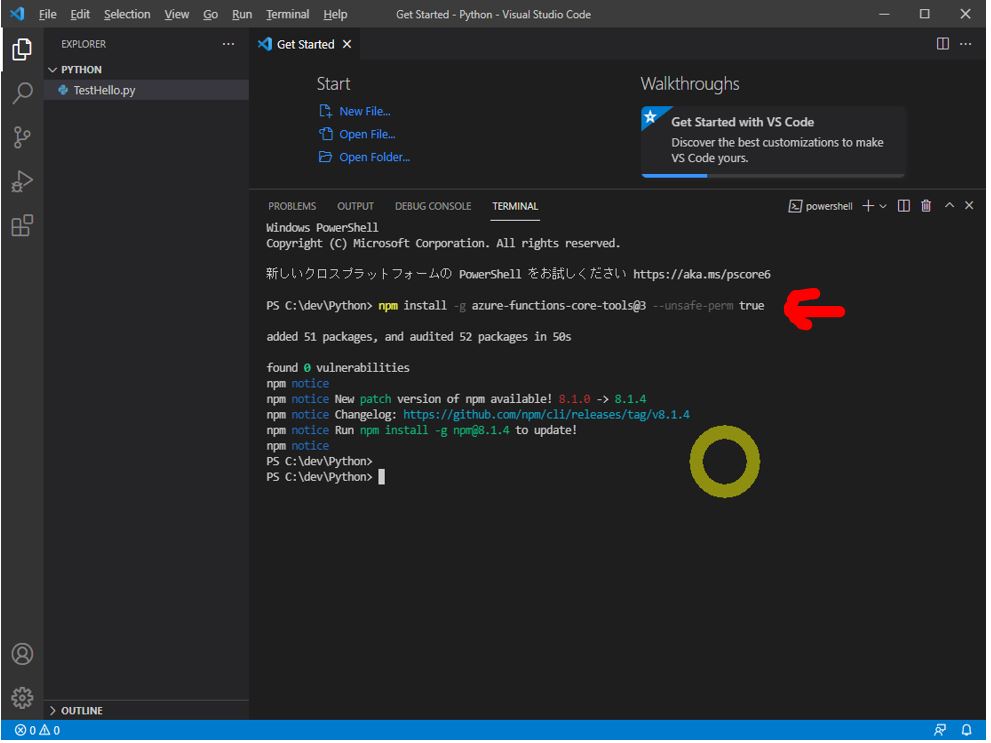
・①次のコマンドで「Azure Functions Core Tools」をインストールします。
(コマンド)
> npm install -g azure-functions-core-tools@3 --unsafe-perm true
(実行結果例)
added 51 packages, and audited 52 packages in 50s

found 0 vulnerabilities
npm notice
npm notice New patch version of npm available! 8.1.0 -> 8.1.4
npm notice Changelog: https://github.com/npm/cli/releases/tag/v8.1.4
npm notice Run npm install -g npm@8.1.4 to update!
npm notice
(図121①)
↓
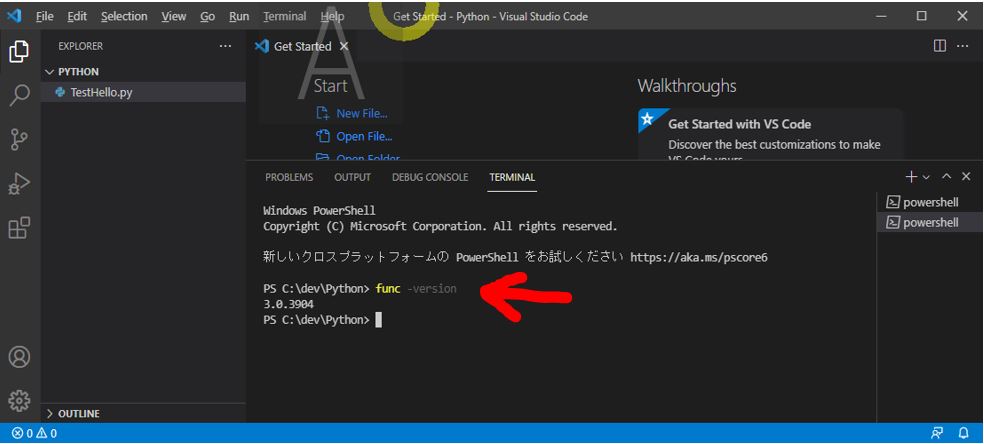
・②「func -version」コマンドで正常にインストール出来た事を確認します。
(図121②)
(1-3) STEP3:Visual Studio Code用のAzure Functions拡張機能をインストール
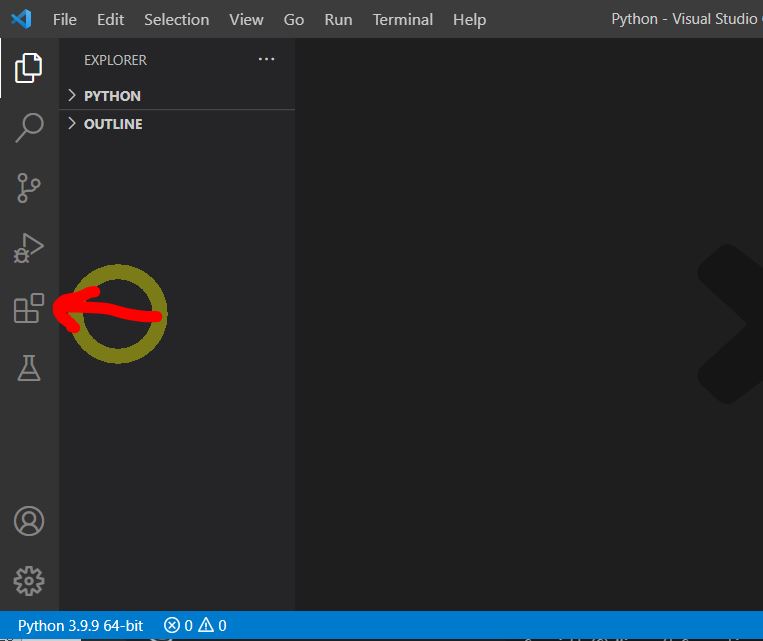
・①VS Codeの左メニューから「□4個のマーク(拡張機能)」を選択します。
(図131①)
↓
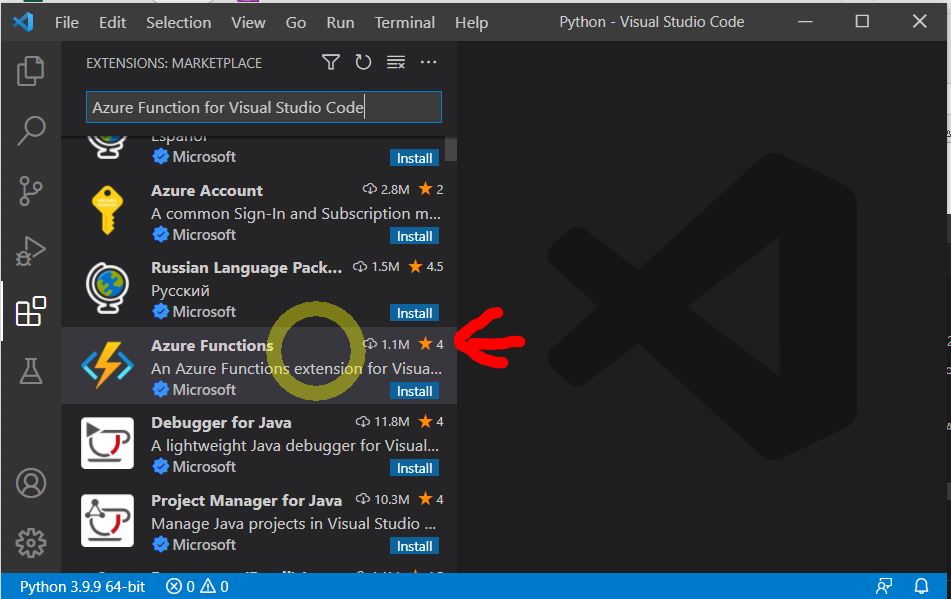
・②検索窓に「Azure Function for Visual Studio Code」を入力し、「Azure Functions」と表示されている行を選択します。
(図131②)
↓
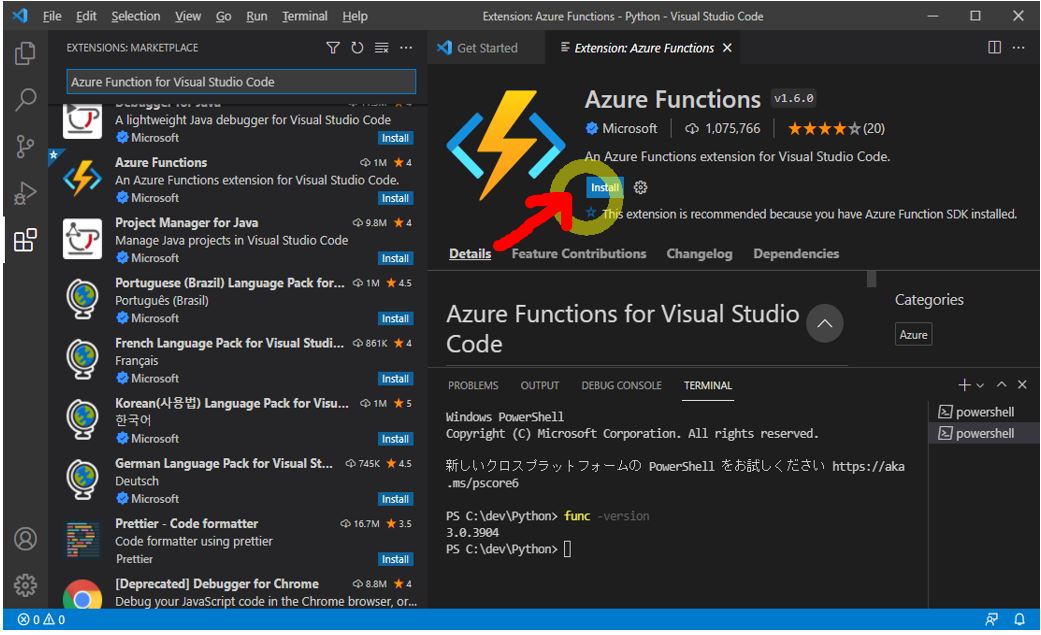
・③「Install」を押下します。
(図131③)
↓
・④正常に導入されると「INSTALLED」の欄に表示されます。
(図131④)

(1-4) STEP4:Azureとの疎通(サインイン)
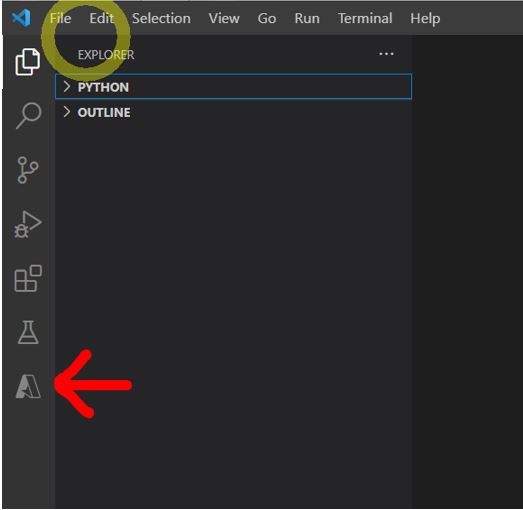
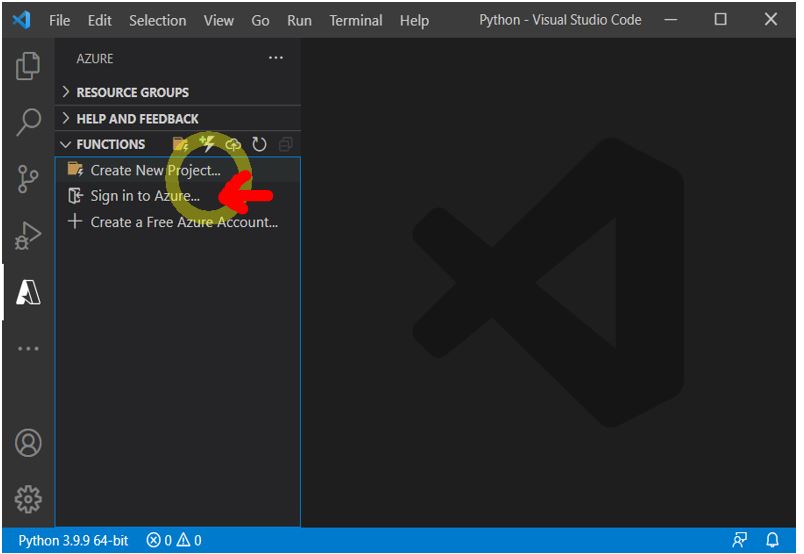
・①左メニューから、先程インストールしたAzure Functions拡張機能のボタンを押下します。
(図141①)
↓
・②メニューのいずれか(例:「INTEGRATION ACCOUNTS」)の欄から「Sign in to Azure」を押下します。
(図141②)
↓
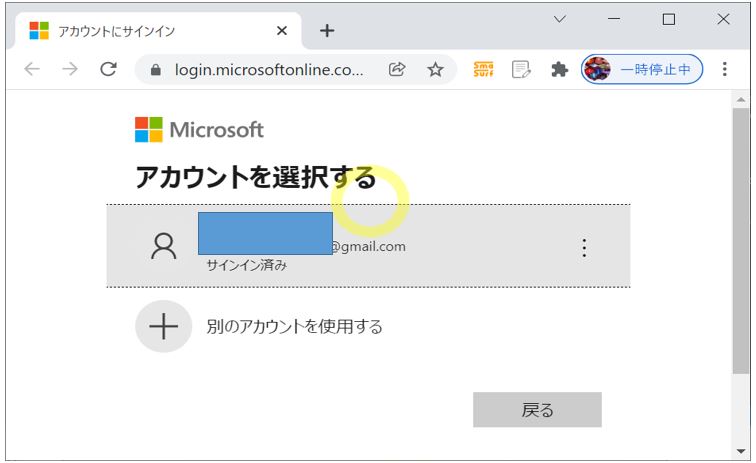
・③Microsoftの認証を実施。
(図141③)
↓
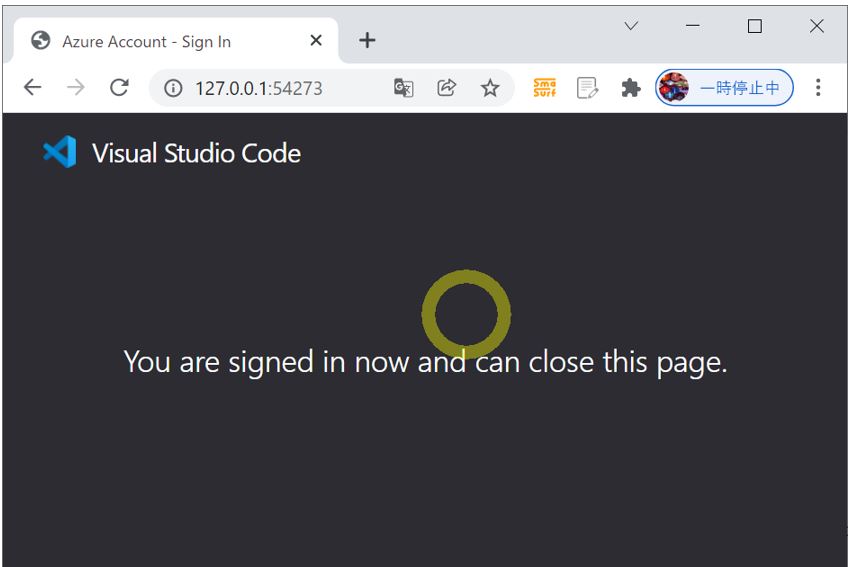
・認証が完了すると次のような画面が表示されます。
(図141④)
↓
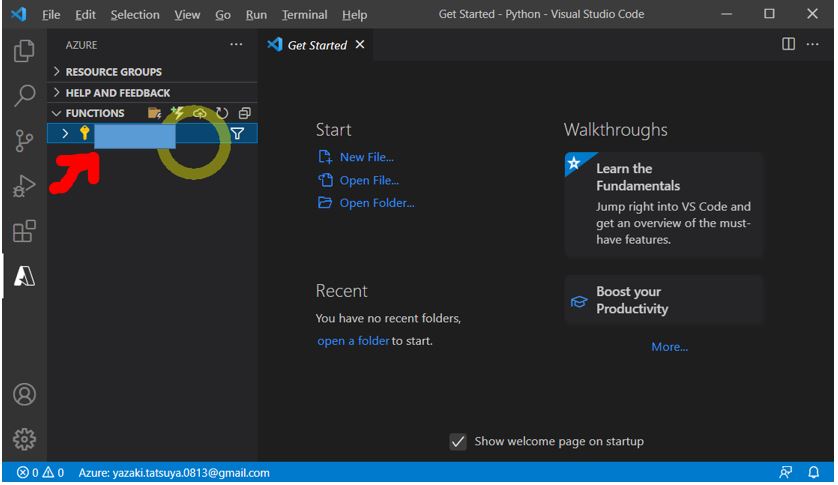
・VS Codeで各メニュー(例:「INTEGRATION ACCOUNTS」)の欄にサブスクリプションの一覧が表示されます。
(図141⑤)
(1-5) STEP5:Azure Functionsプロジェクト&関数を作成
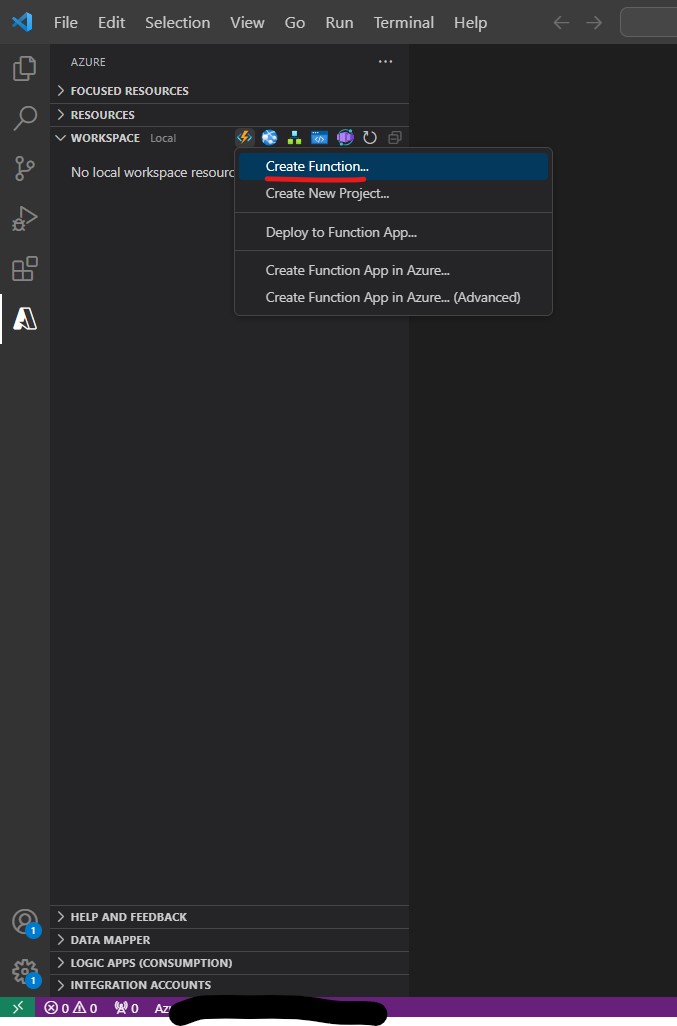
・①VS Codeの「WORKSPACE」欄で「+」のアイコン(Create Function)を押下
(図151①)
↓
・②Pythonの開発用フォルダを指定します(どこでもOK)。
↓
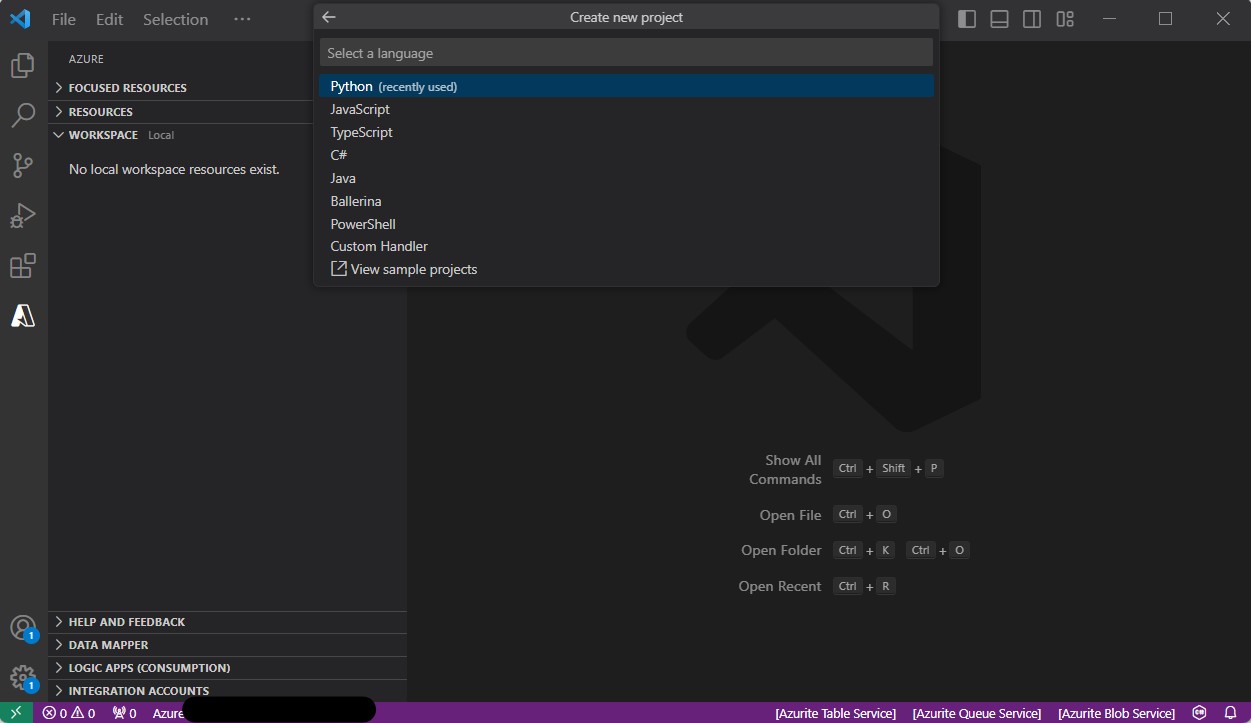
・③言語はPythonを選択
(図151③)
↓
・④Pythonのインタープリタを選択
(図151④)
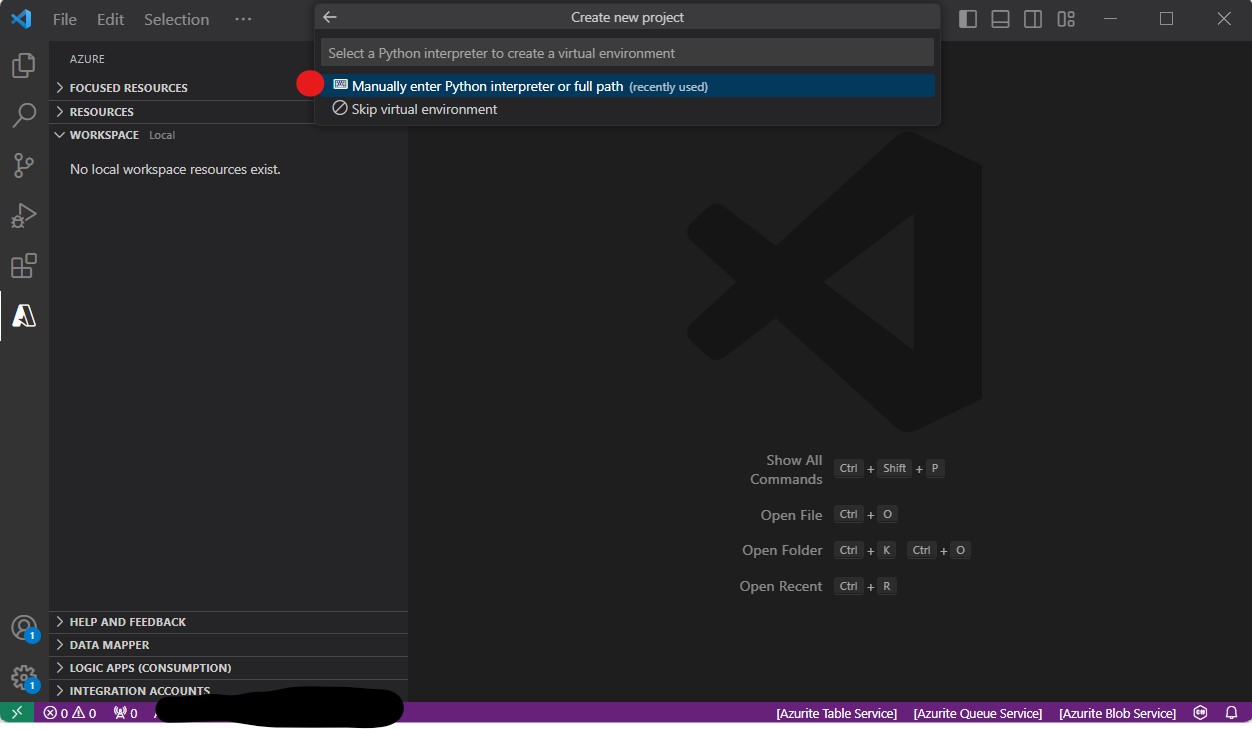
(図151④2)

(図151④2)
↓
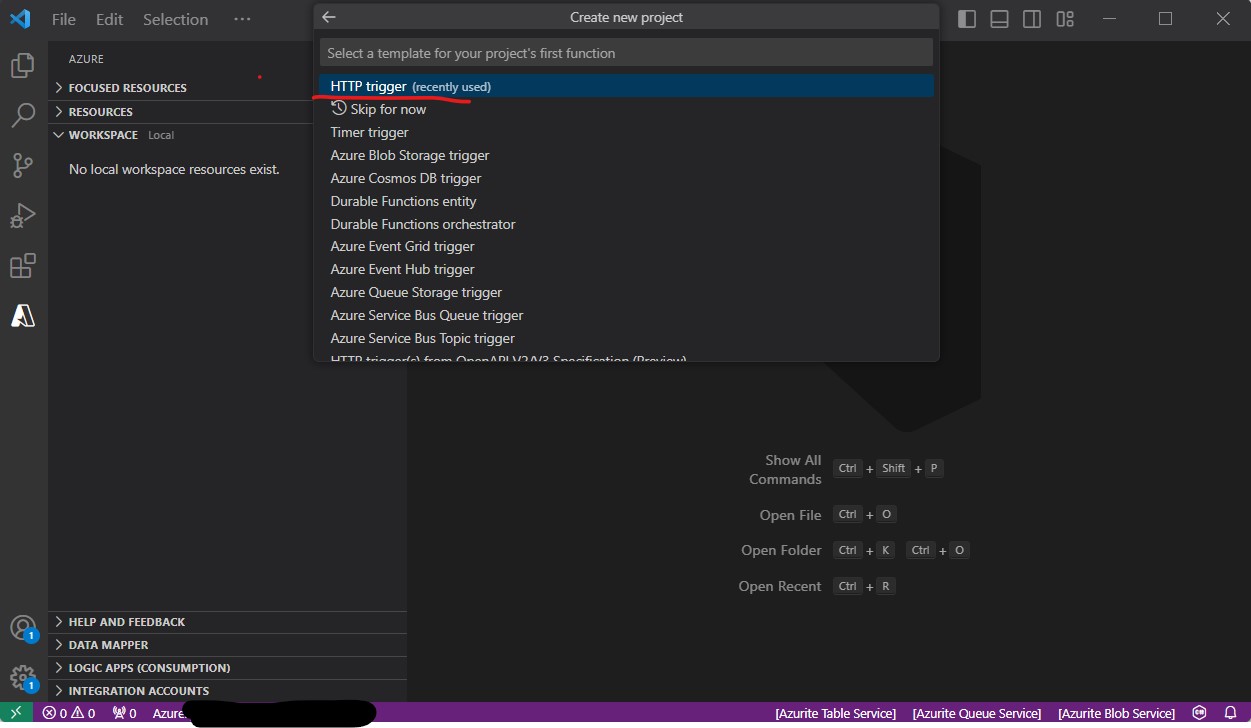
・⑤Azure Functionsの関数を起動する際の「トリガー」を選択します。
今回はHello Worldも兼ねて簡単あAPIを作りたいため「Http tigger」を選択します。
(図151⑤)
↓
・⑥関数の名前を入力します。
(図151⑥)

↓
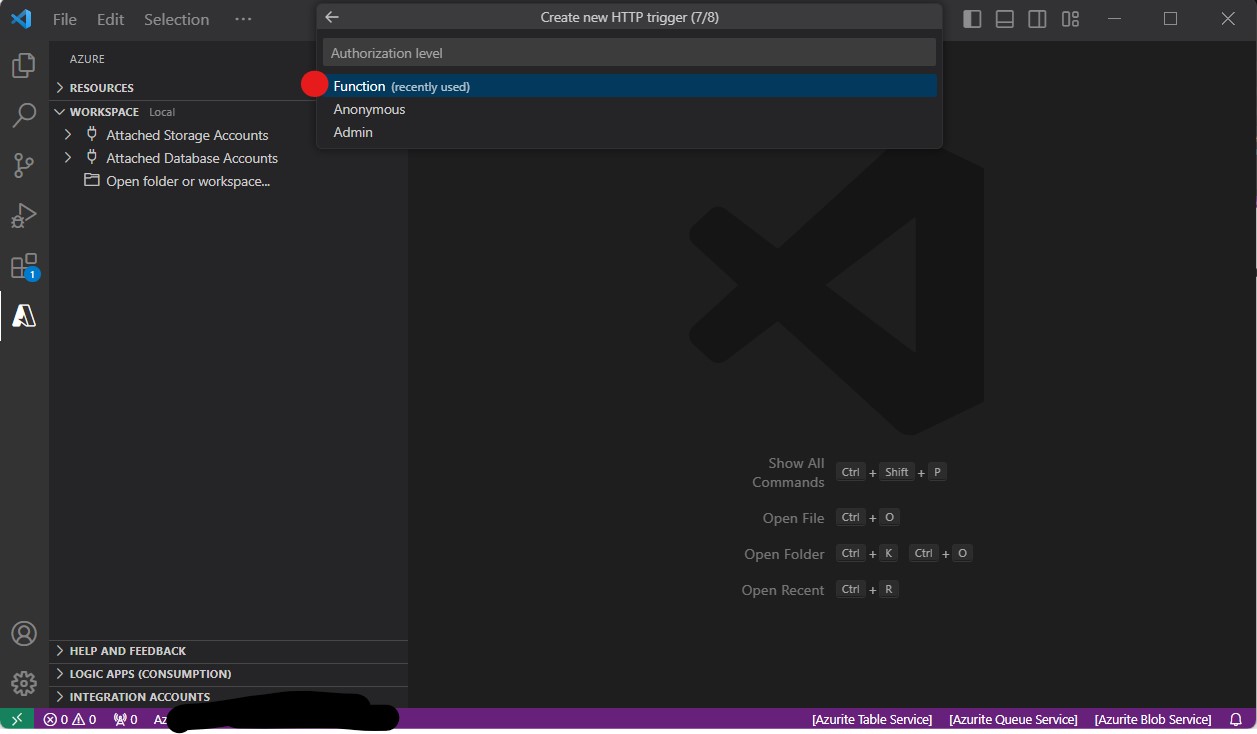
・⑦Authorization Level(認証レベル)の選択。
(表)
| 承認レベル | 説明 |
| Anonymous | 認証不要。 有効なHTTPリクエストは全て通す。 |
| Function | keyベースの認証。 下記のいずれのkeyでも認証可能。 ①Host key (Azure Fucntionリソースのレベル) ②Function key (リソース配下の各関数レベル) |
| Admin | keyベースの認証。 Host keyでのみ認証可能。 |
(図152①)
↓
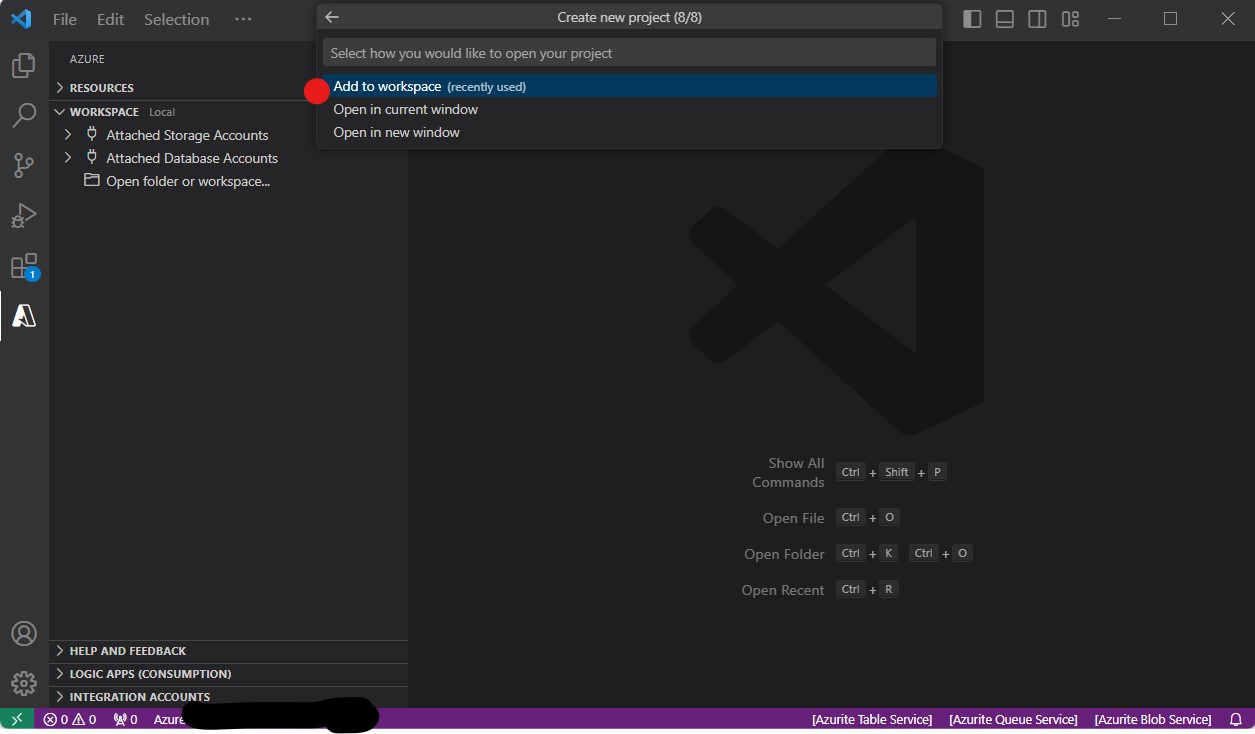
・⑧開き方の選択
(図152③)
・⑧開き方の選択
(図152③)
↓
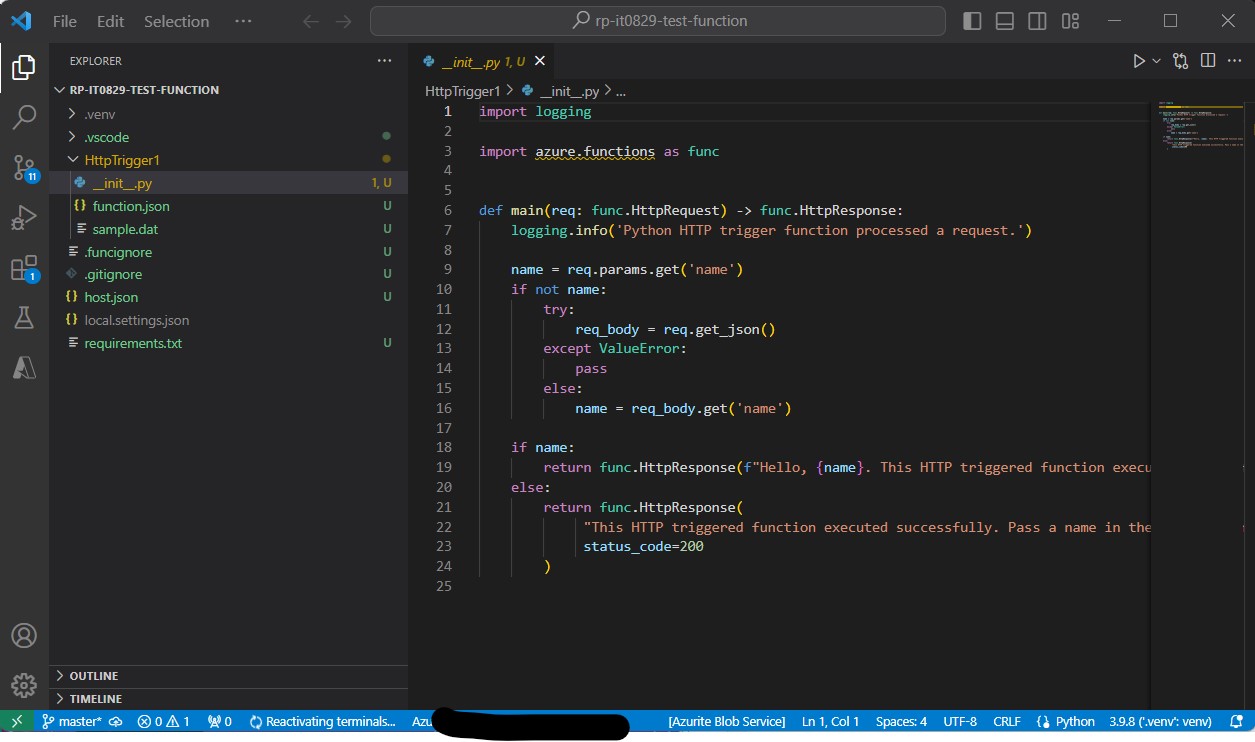
・⑨ローカルプロジェクトの作成完了
自動的にローカルのAzure Function用Pythonプロジェクトを作成します。
(図152②)
(1-6) STEP6:Visual Studio Codeでローカル実行(F5)
次に関数アプリをローカルでデバッグしてみます。
・①左メニューから「デバッグ」ボタンを押下
(図161①)
・②「RUN AND DEBUG」の右横のプルダウンが「Attach to Python Function」になっている事を確認し、△マークのボタンを押下します。
(図161②)
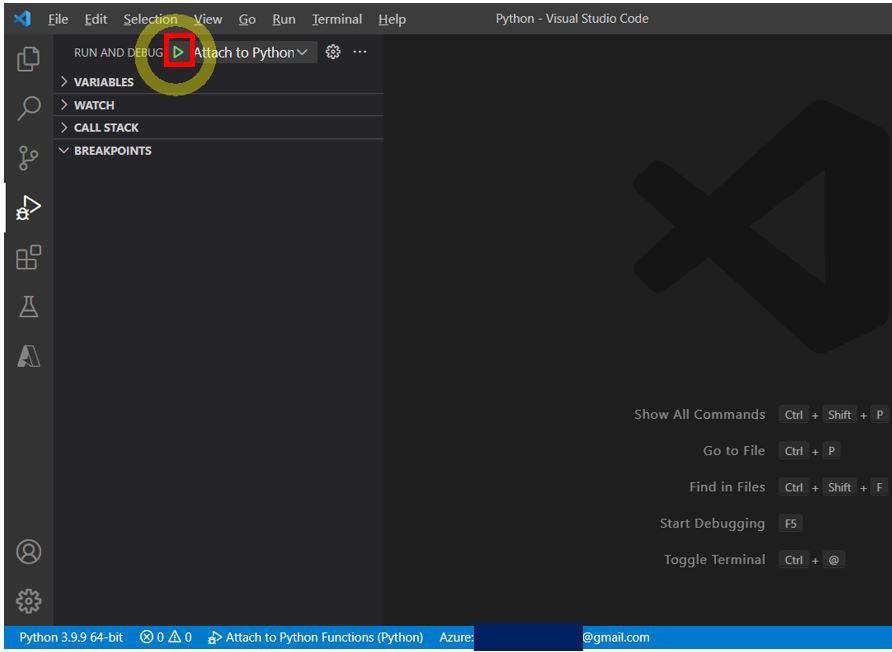
⇒これにより、ローカルで仮想環境(.venv)が起動して、指定のURLから関数を実行できるようになります。
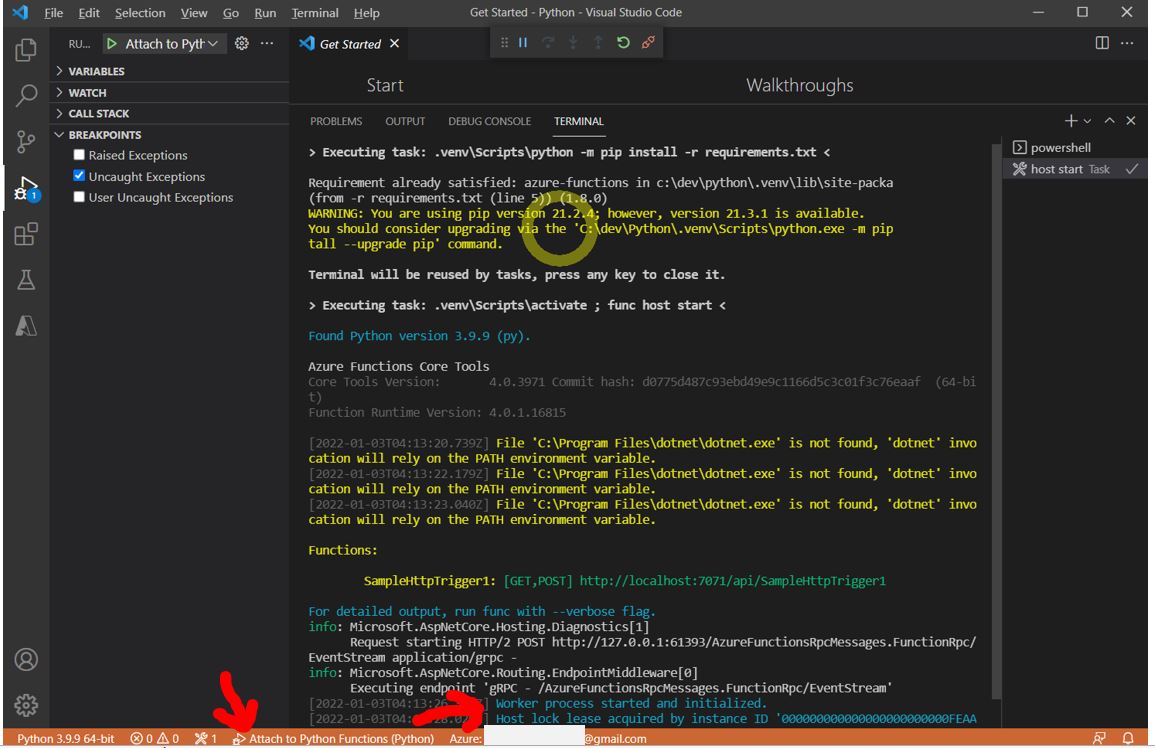
・③コンソールに「Worker process started and initialized.」等のメッセージが表示され、下の帯も「オレンジ色」に変化して「Attached to Python Functions」と表示された事を確認します。
(図161③)
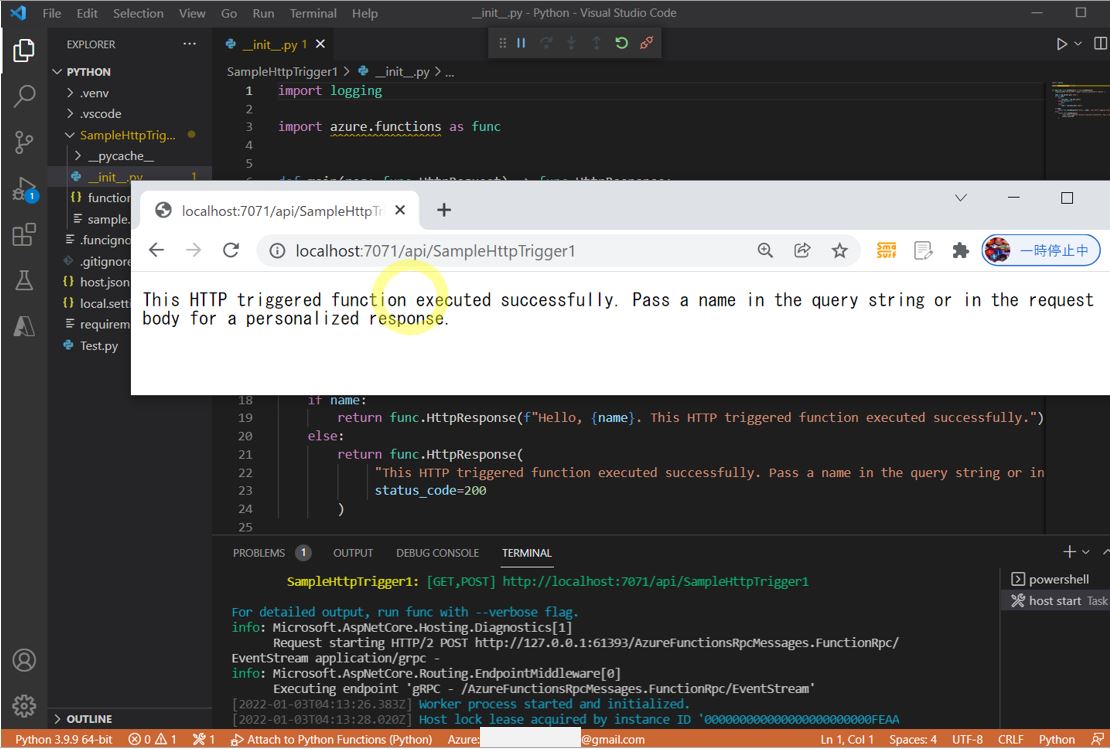
・④疎通確認
コンソールに表示されているURL(Azure Functionの関数のURL)をブラウザに入力して、疎通確認します。
「http://localhost:7071/api/SampleHttpTrigger1」
正常に処理されれば、下記の”This HTTP~”のメッセージがブラウザに表示されるはずです。
return func.HttpResponse(
	 "This HTTP triggered function executed successfully. Pass a name in the query string or in the request body for a personalized response.",
	 status_code=200
)
(図161④)
ちなみに、このデバッグは通常Visual Studio等のデバッグで行う、ブレークポイントを張ってのデバッグも可能です。
(1-7) STEP7:Azureへデプロイ
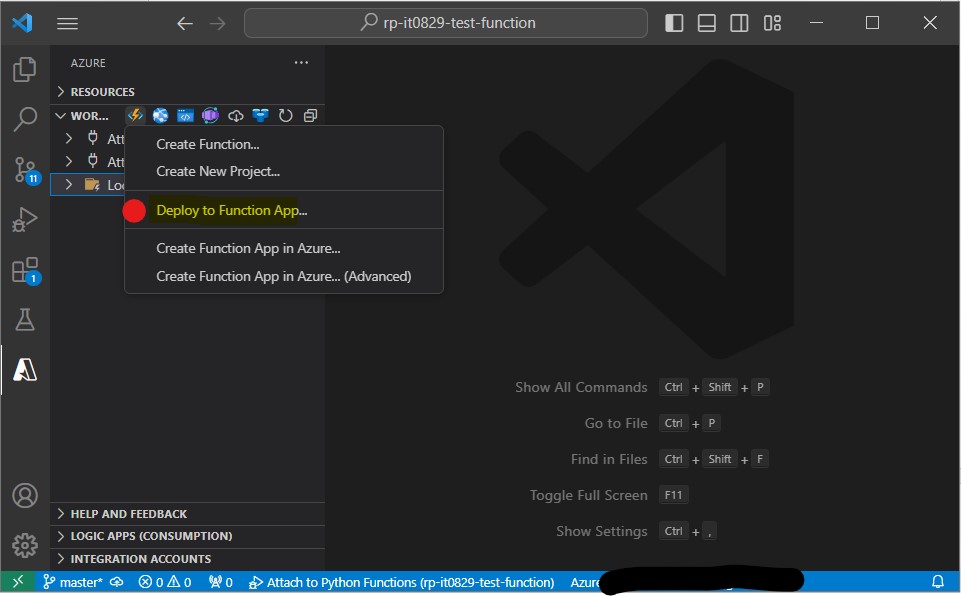
・①VS Codeの「WORKSPACE」欄で「Create Function App in Azure)を押下します。
(図171①)
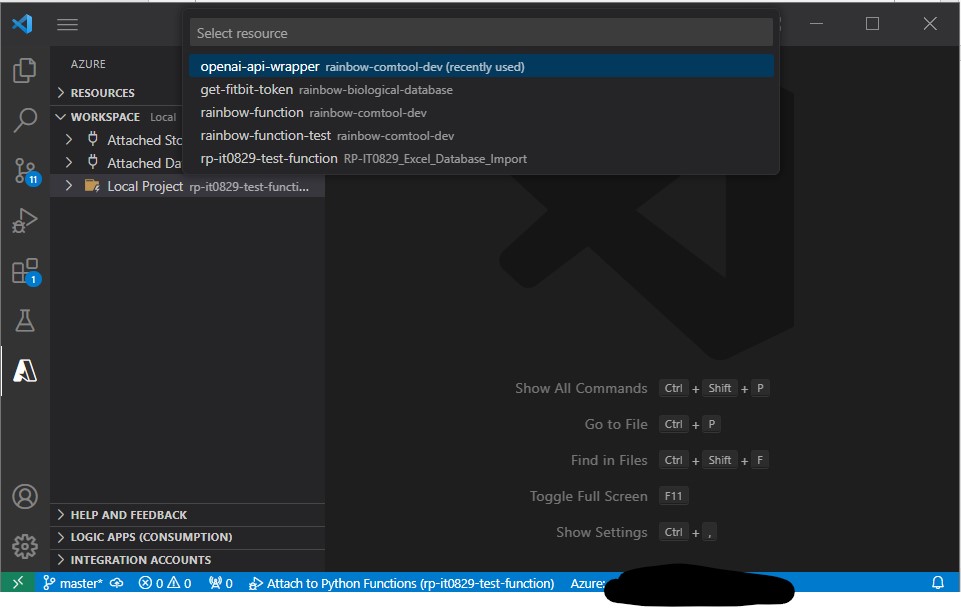
・②デプロイ先のAzure Functionsアプリを選択します。
(図171②)
↓
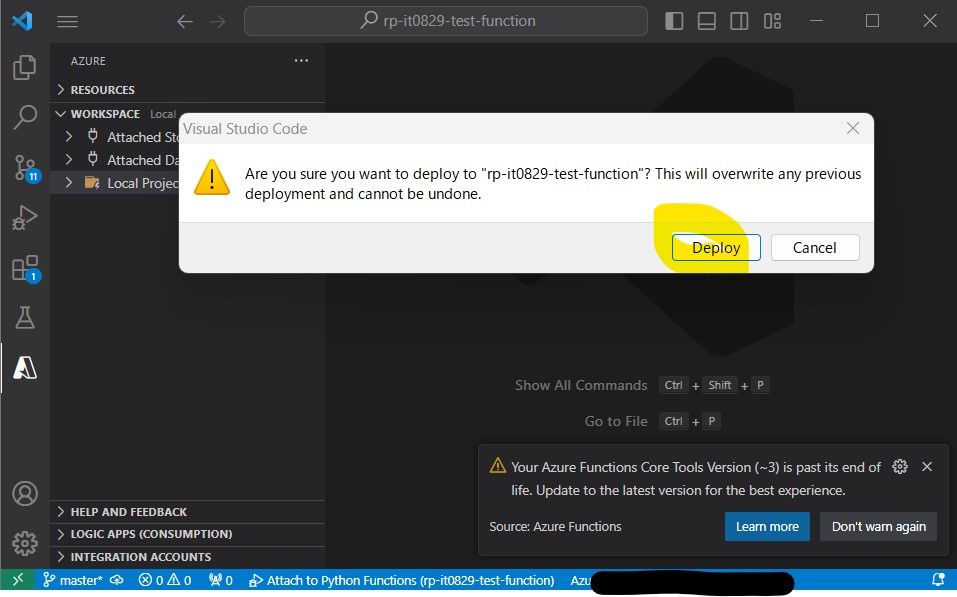
・③「Deploy」を押下
(図171④)
↓
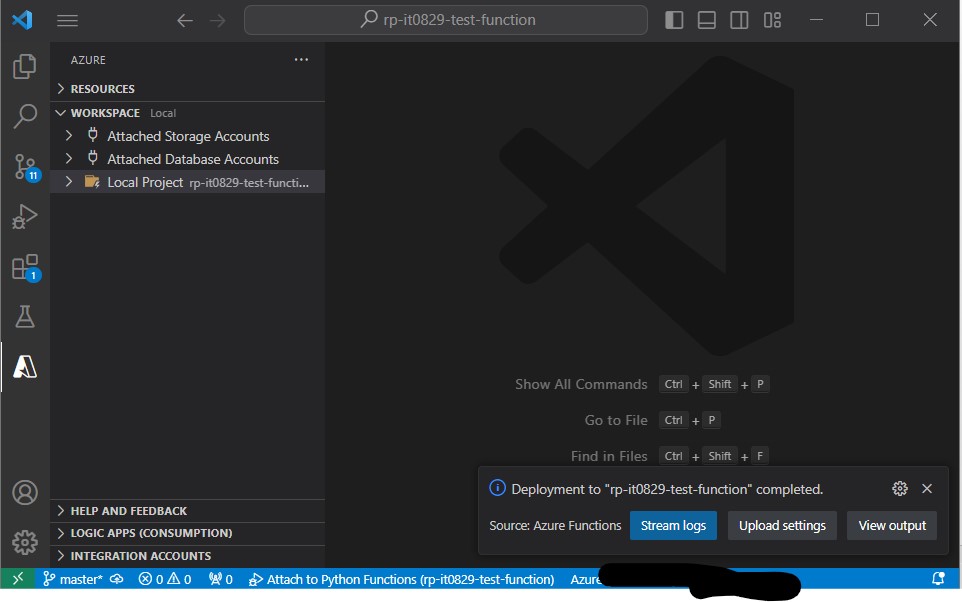
・④少し待ち「Deployment to XXXX completed」のポップアップを確認します。
(図171⑤)
↓
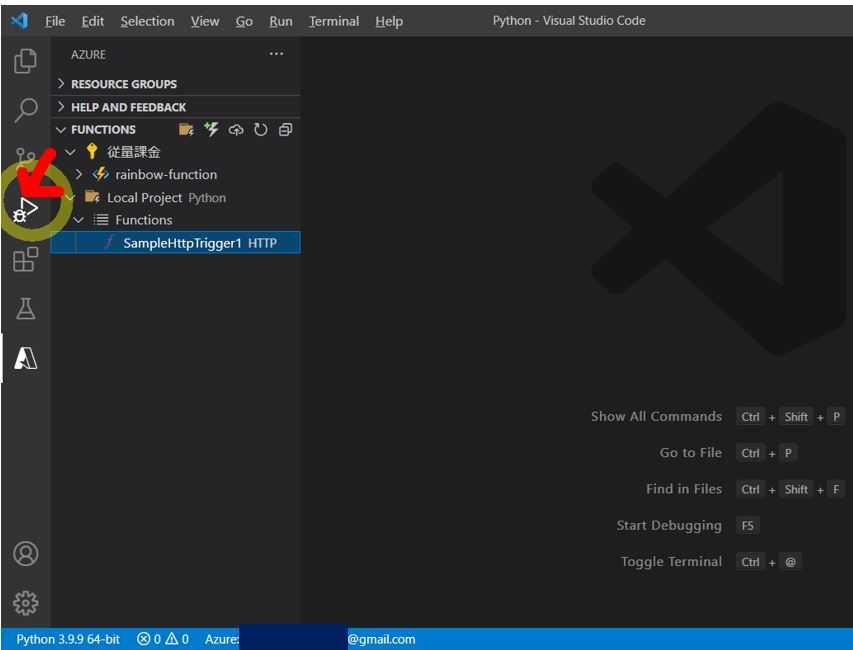
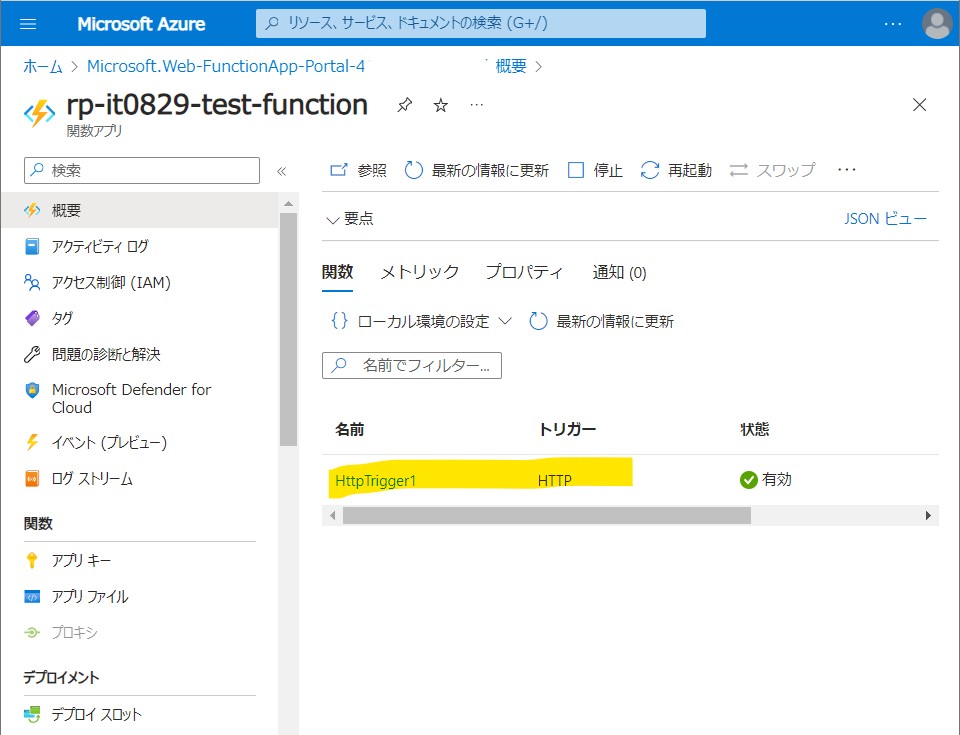
・⑤疎通確認
Azure Functions側を見ると、先ほどまで無かった関数(ローカルで作った「SampleHttpTrigger1」)がデプロイされている事が確認できます。
(図172①)
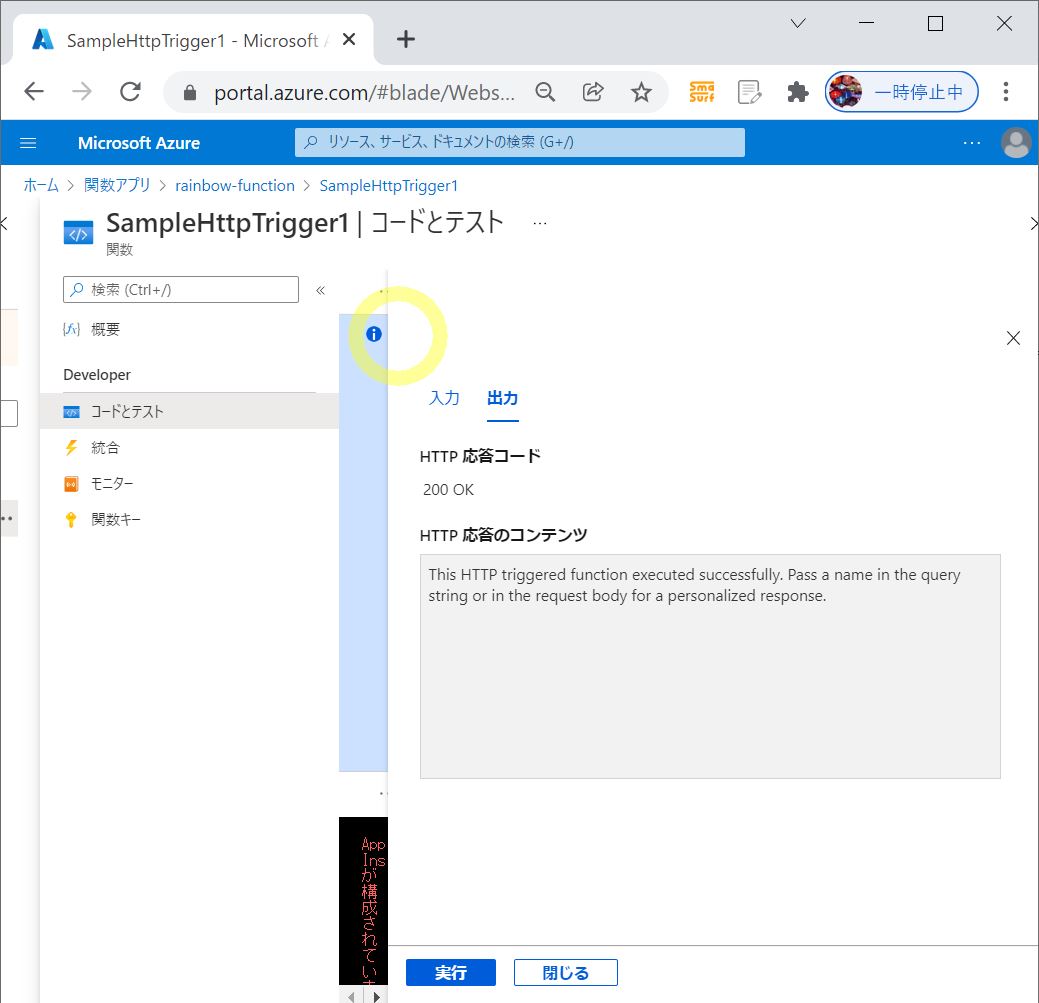
・⑥単体テスト
ここでは詳しく触れませんが、Azure Functionsの機能で単体テストもできます。
(図172②)